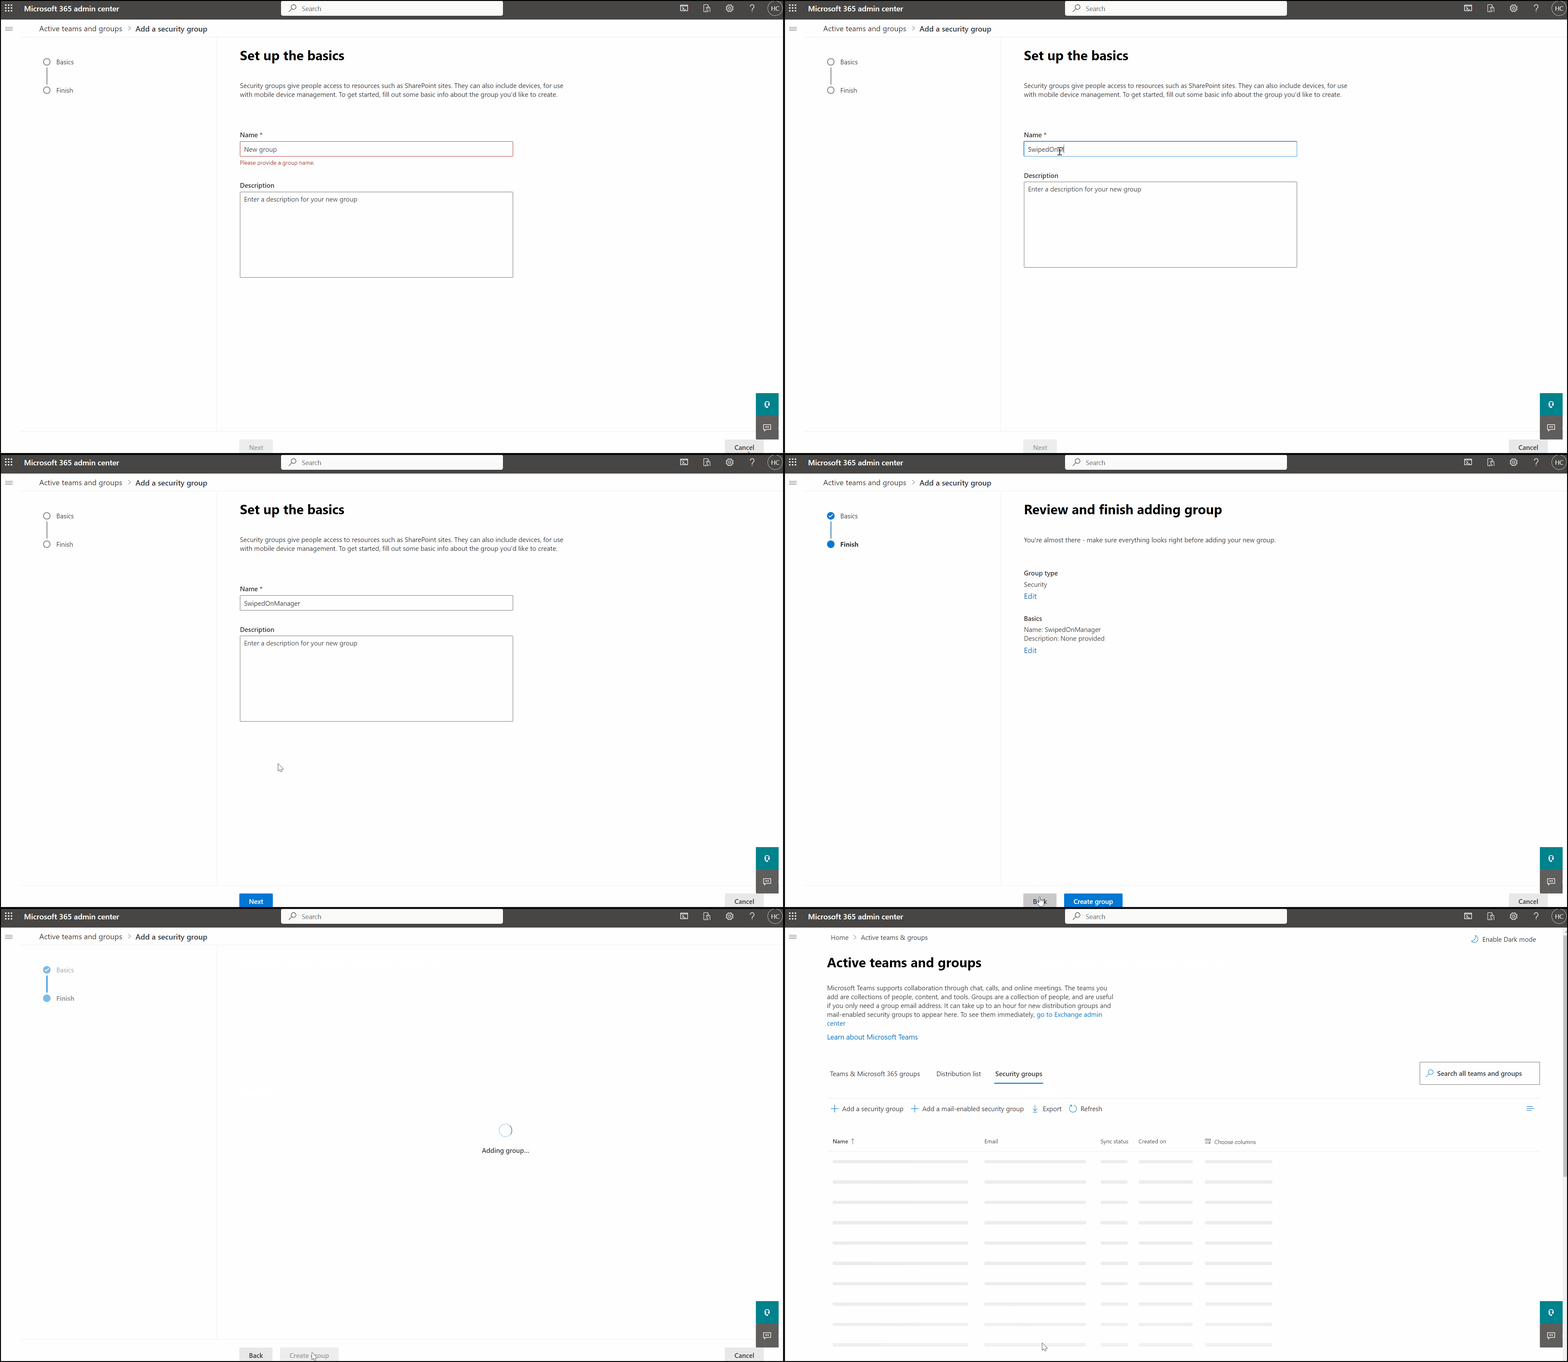
In order to give a user a manager role within SwipedOn Desks you first need to create a manager group to allow your SwipedOn Desk managers to log in.
⚠️ This article relates to SwipedOn Desks which is a separate platform to our SwipedOn Visitor Management Software. SwipedOn Spaces and Resource Booking have their own help centre articles
To begin, please log in to the Microsoft 365 admin centre by clicking here.
After logging in, head over to the 'Teams & Groups' section on the left-hand side navigation panel. From there, click on 'Active Teams & Groups,' followed by 'Security Groups,' and finally, select 'Add Security Group.'

To create the group, ensure you use the name 'SwipedOnManager' (which cannot be altered), and if you'd like, include a description. Afterwards, click 'Next,' followed by 'Create Group,' and lastly, 'Close.'

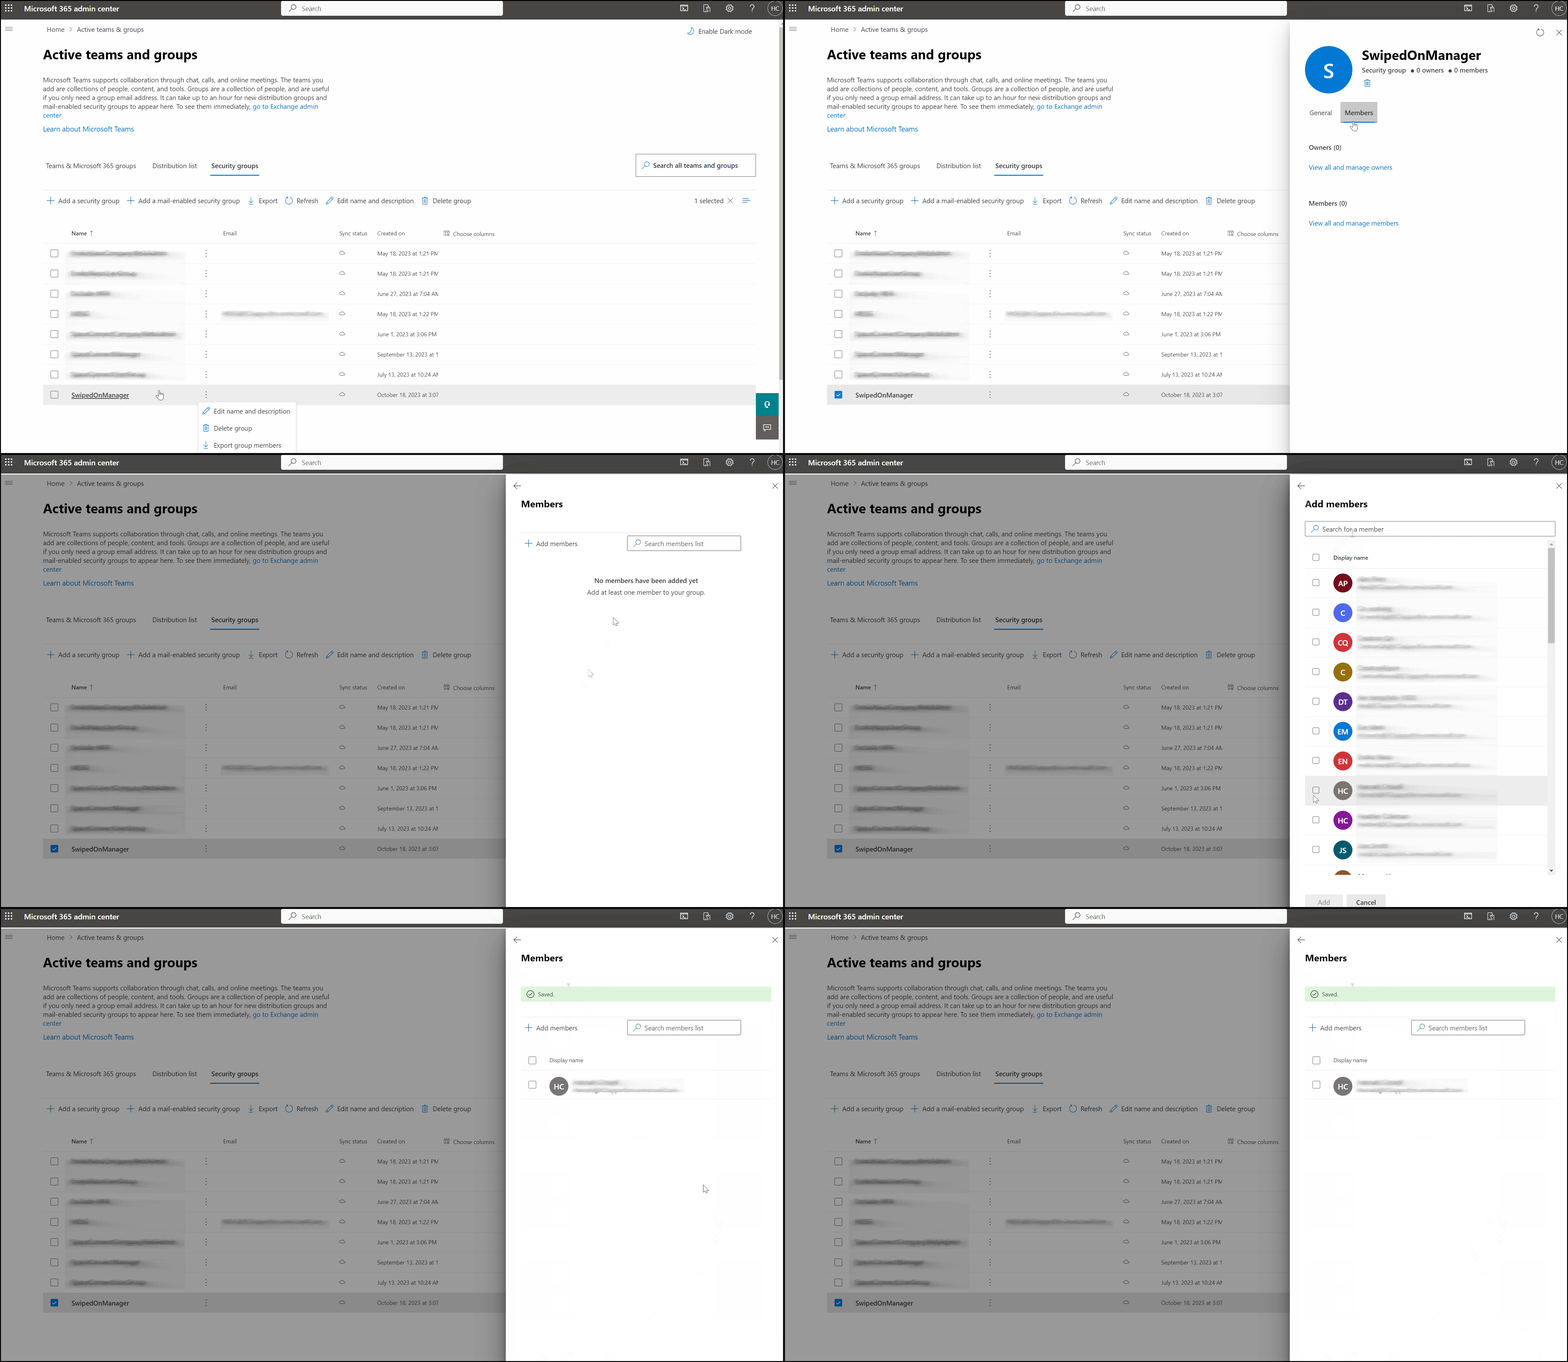
Now, let's bring in the individuals you'd like to assign this role to. Start by clicking on the group you've recently created to access its details on the right-hand side. Within the group details, select 'Members,' followed by 'View all and Manage members.' In this section, choose '+ Add Members,' then search for each member, click on their names, and hit 'Add.' Continue this process until you've included everyone you wish to designate with the Manager role.
 These individuals now have access to the manager features.
