⚠️ This article relates to SwipedOn Desks which is a separate platform to our SwipedOn Visitor Management Software. SwipedOn Spaces and Resource Booking have their own help centre articles
Create a Level within a location
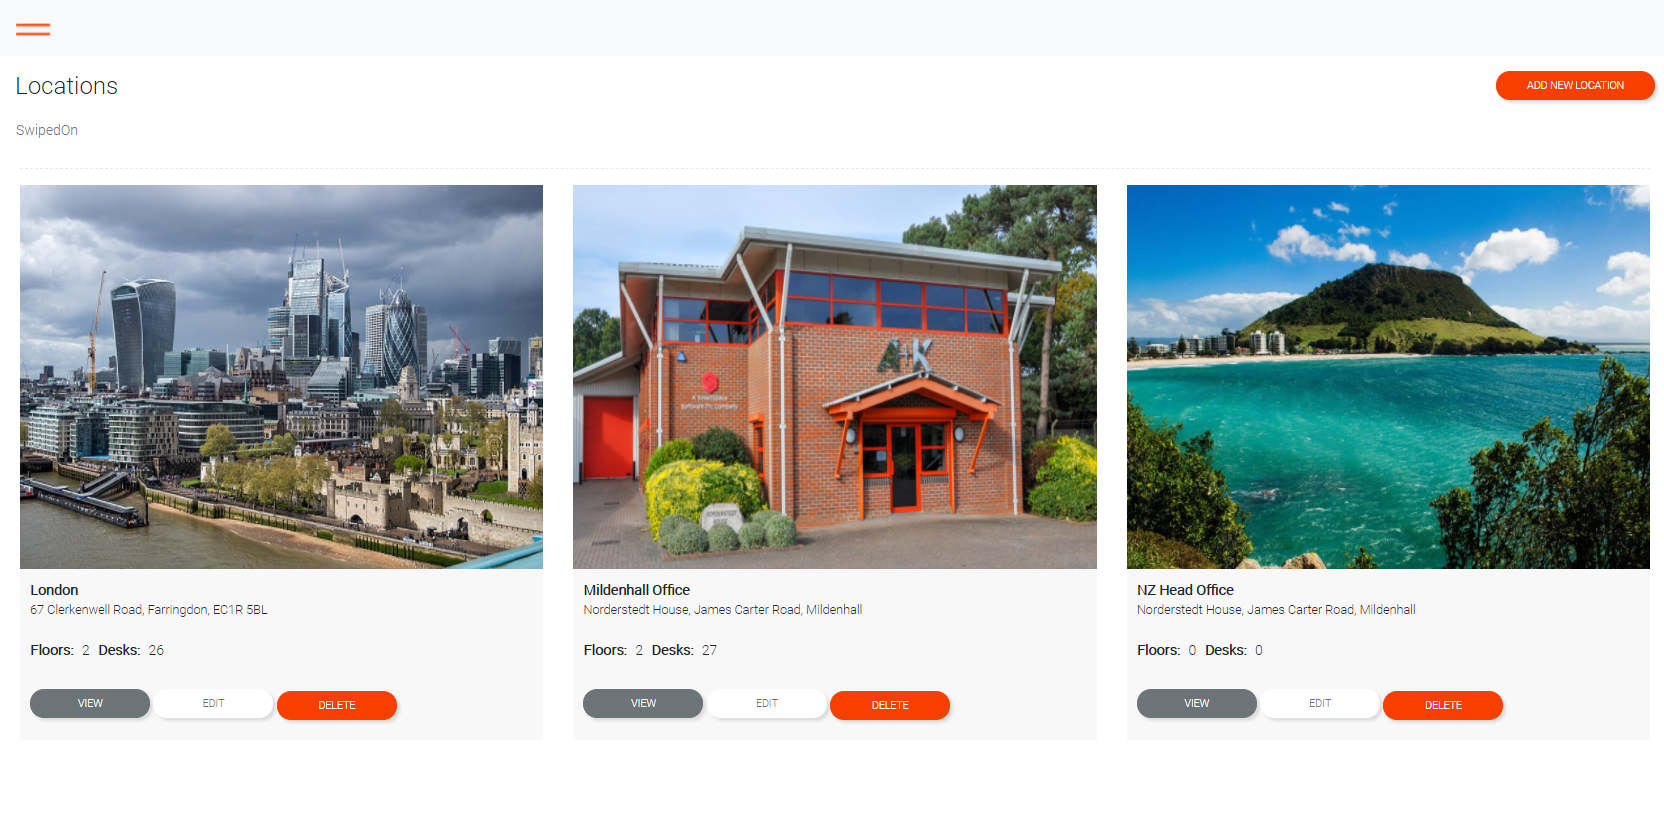
Once you have created a location, you will need to create each level within that location before you can add your desks.
Follow the steps below to create a new level within a location.
-
Click 'View' on your selected location that you'd like to add a level for.
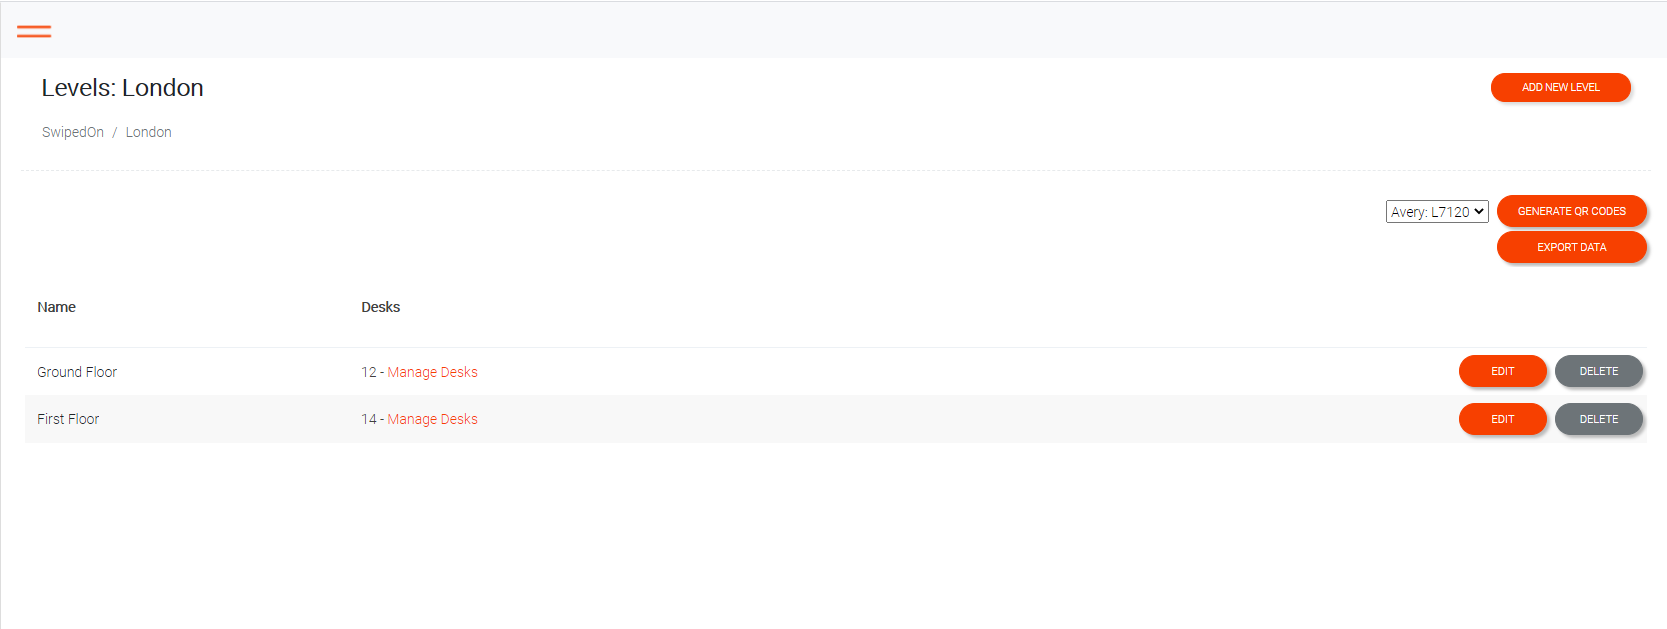
The screen will then show levels for the selected location. To add a new level click on 'Add New Level'.
-
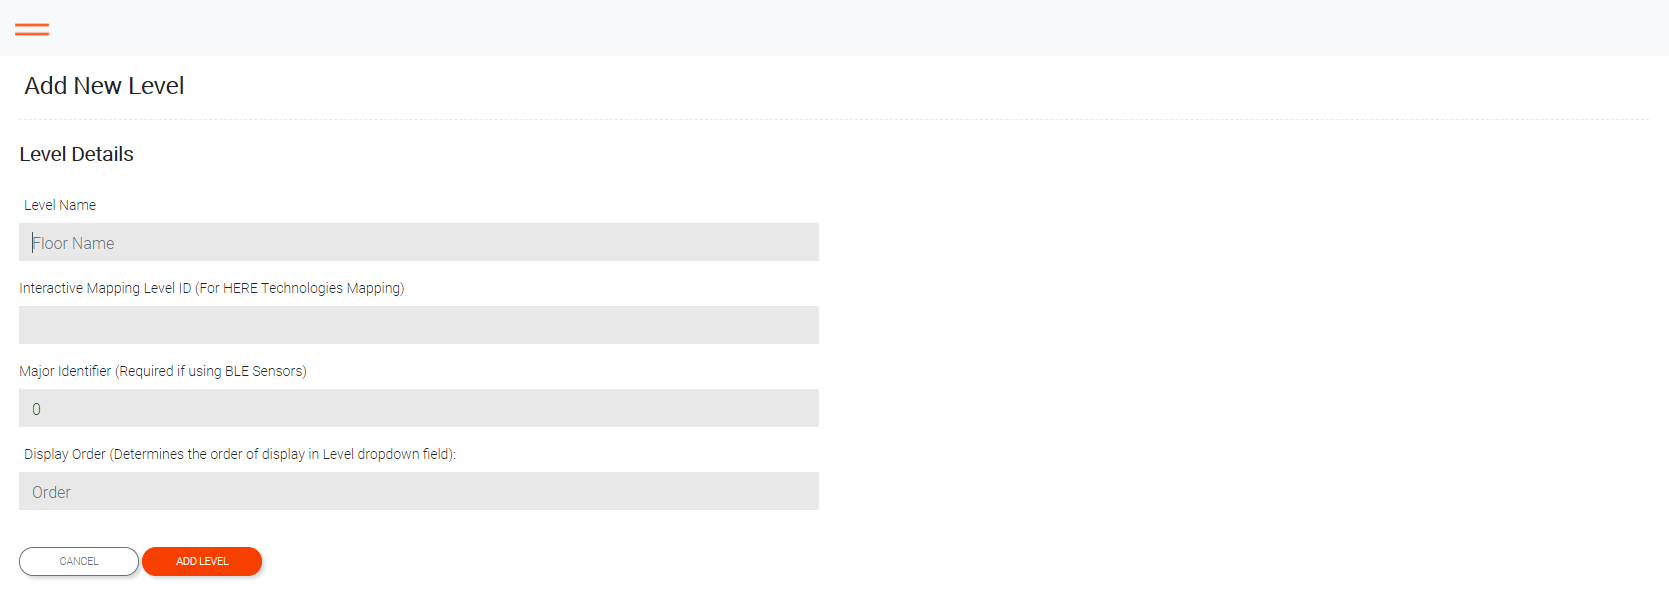
Now complete the details required for the new level - as per the information below.
-
Level Name
The name of the level. Such as "1st floor" or "Mezzanine".
-
Interactive Mapping Level ID (Optional)
If using interactive mapping, this field is used to link a level to a specific floorplan.
-
Major Identifier (Optional)
This is only required when using sensors to monitor presence. Each sensor has three IDs that are used to link them to a specific building, level and space. This field is used to link major identifier of the sensor to this level.
-
Display Order
Used to set the sequence for listing the levels such as when searching with the mobile application. For example:
Ground floor = "0"
First floor = "1"
Mezzanine = "2"
Second floor = "3"
-
-
When all details are entered, click on 'Add Level' to save the record and return to the location details. The level is now available for entering desks.