⚠️ This article relates to SwipedOn Desks which is a separate platform to our SwipedOn Visitor Management Software. SwipedOn Spaces and Resource Booking have their own help centre articles
Using the web portal to book a desk is simple! Most users can perform this within 20 seconds.
-
Firstly, sign into the SwipedOn Desks web portal either with Microsoft single sign on (see for more information) or using email and password.
-
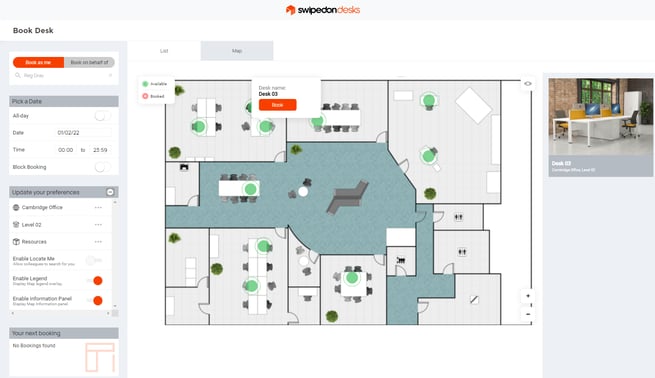
Now that you're signed in, the default landing page will be 'Book Desk'. The menu on the left hand side will allow you to choose your criteria for the desk book. The page will automatically refresh as new search values are selected.
-
Its important to note the following:
-
If your organisation only allows all day bookings, then times will not be displayed.
-
If you already have desks booked for several days, the application will assume that the booking is required for the next available date and will automatically select it (however this can be manually set, if needed).
-
Location preferences are taken from your profile.
-
-
If you're using interactive maps the default view will be that of the map. Desk availability is displayed for the selected date/time. When times are changed, the map updates.
-
Colour codes used for desks are as follows:
-
Available = Green
-
Unavailable = Red
When clicking on an available desk a dialog will appear with a 'Book' button. Click to make and confirm the booking.
-
-
If interactive maps are not enabled, or not available for the selected area, then desks will appear in a list view.
-
More details for the desk will appear on the right hand side of the page, if you select it.

-
When making a booking, you can choose to make a 'Block Booking' (ensure Block Booking is toggled on). You can block book days up to 30 days into the future. Each day will be given a separate booking so they can be cancelled individually.

-
When a booking is made (either through the map or list view) a confirmation dialog will be displayed.
-
Click close to return to the landing page. If map view is enabled, then the booked desk should now be shown as unavailable (red).