⚠️ This article relates to SwipedOn Desks which is a separate platform to our SwipedOn Visitor Management Software. SwipedOn Spaces and Resource Booking have their own help centre articles
To get started, simply log in to the Admin Portal by clicking here. Be sure to use the sign-in method that aligns with your company's credentials.
After successfully logging in, navigate to the 'Configuration' option located in the left-hand side navigation panel. From there, select 'Zones' to proceed.
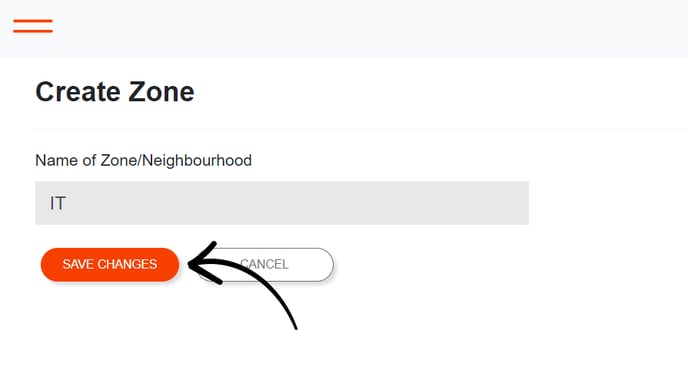
To create a new zone, click on the 'Create New Zone' button. Enter the desired name for your zone, and then click 'Save Changes' to confirm.

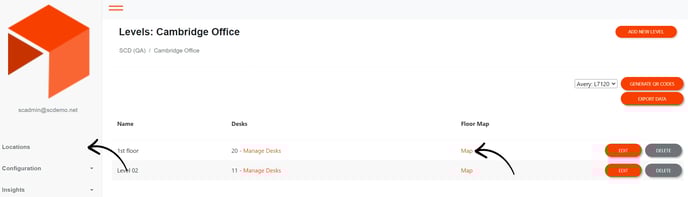
After you've successfully created the zones you wish to use, the next step is to place them on your Interactive Map. Return to the navigation panel on the left-hand side, then click on 'Locations.' Choose the desired location, and click on 'Map' for the relevant level. Let's bring those zones to life on your map.
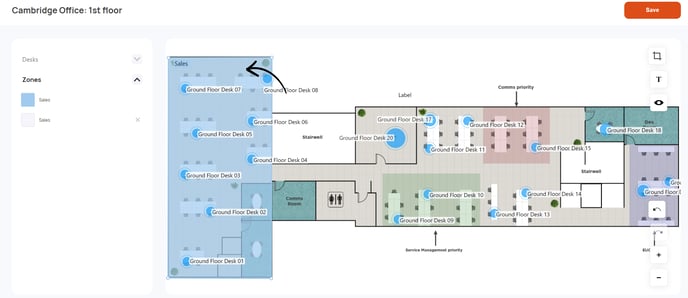
Simply open the 'Zones' drop-down menu on the left-hand side. Select the zone of your choice, then click, hold, and smoothly drag it to the spot that suits you best. Don't forget to use the handy circles to fine-tune the shape of your zone. Once you've perfected it, just tap 'Save' in the upper-right corner. A message will pop up to let you know that spaces have been automatically assigned to your created zone. Give it a quick read, and if everything looks good to you, simply click 'OK' to confirm your changes.