🏳️ Available on our Enterprise plan
To connect your Microsoft Azure account to SwipedOn, you will need three credentials from Azure:
-
Tenant ID
-
Client ID
-
Client Secret
Follow the below steps to find these details.
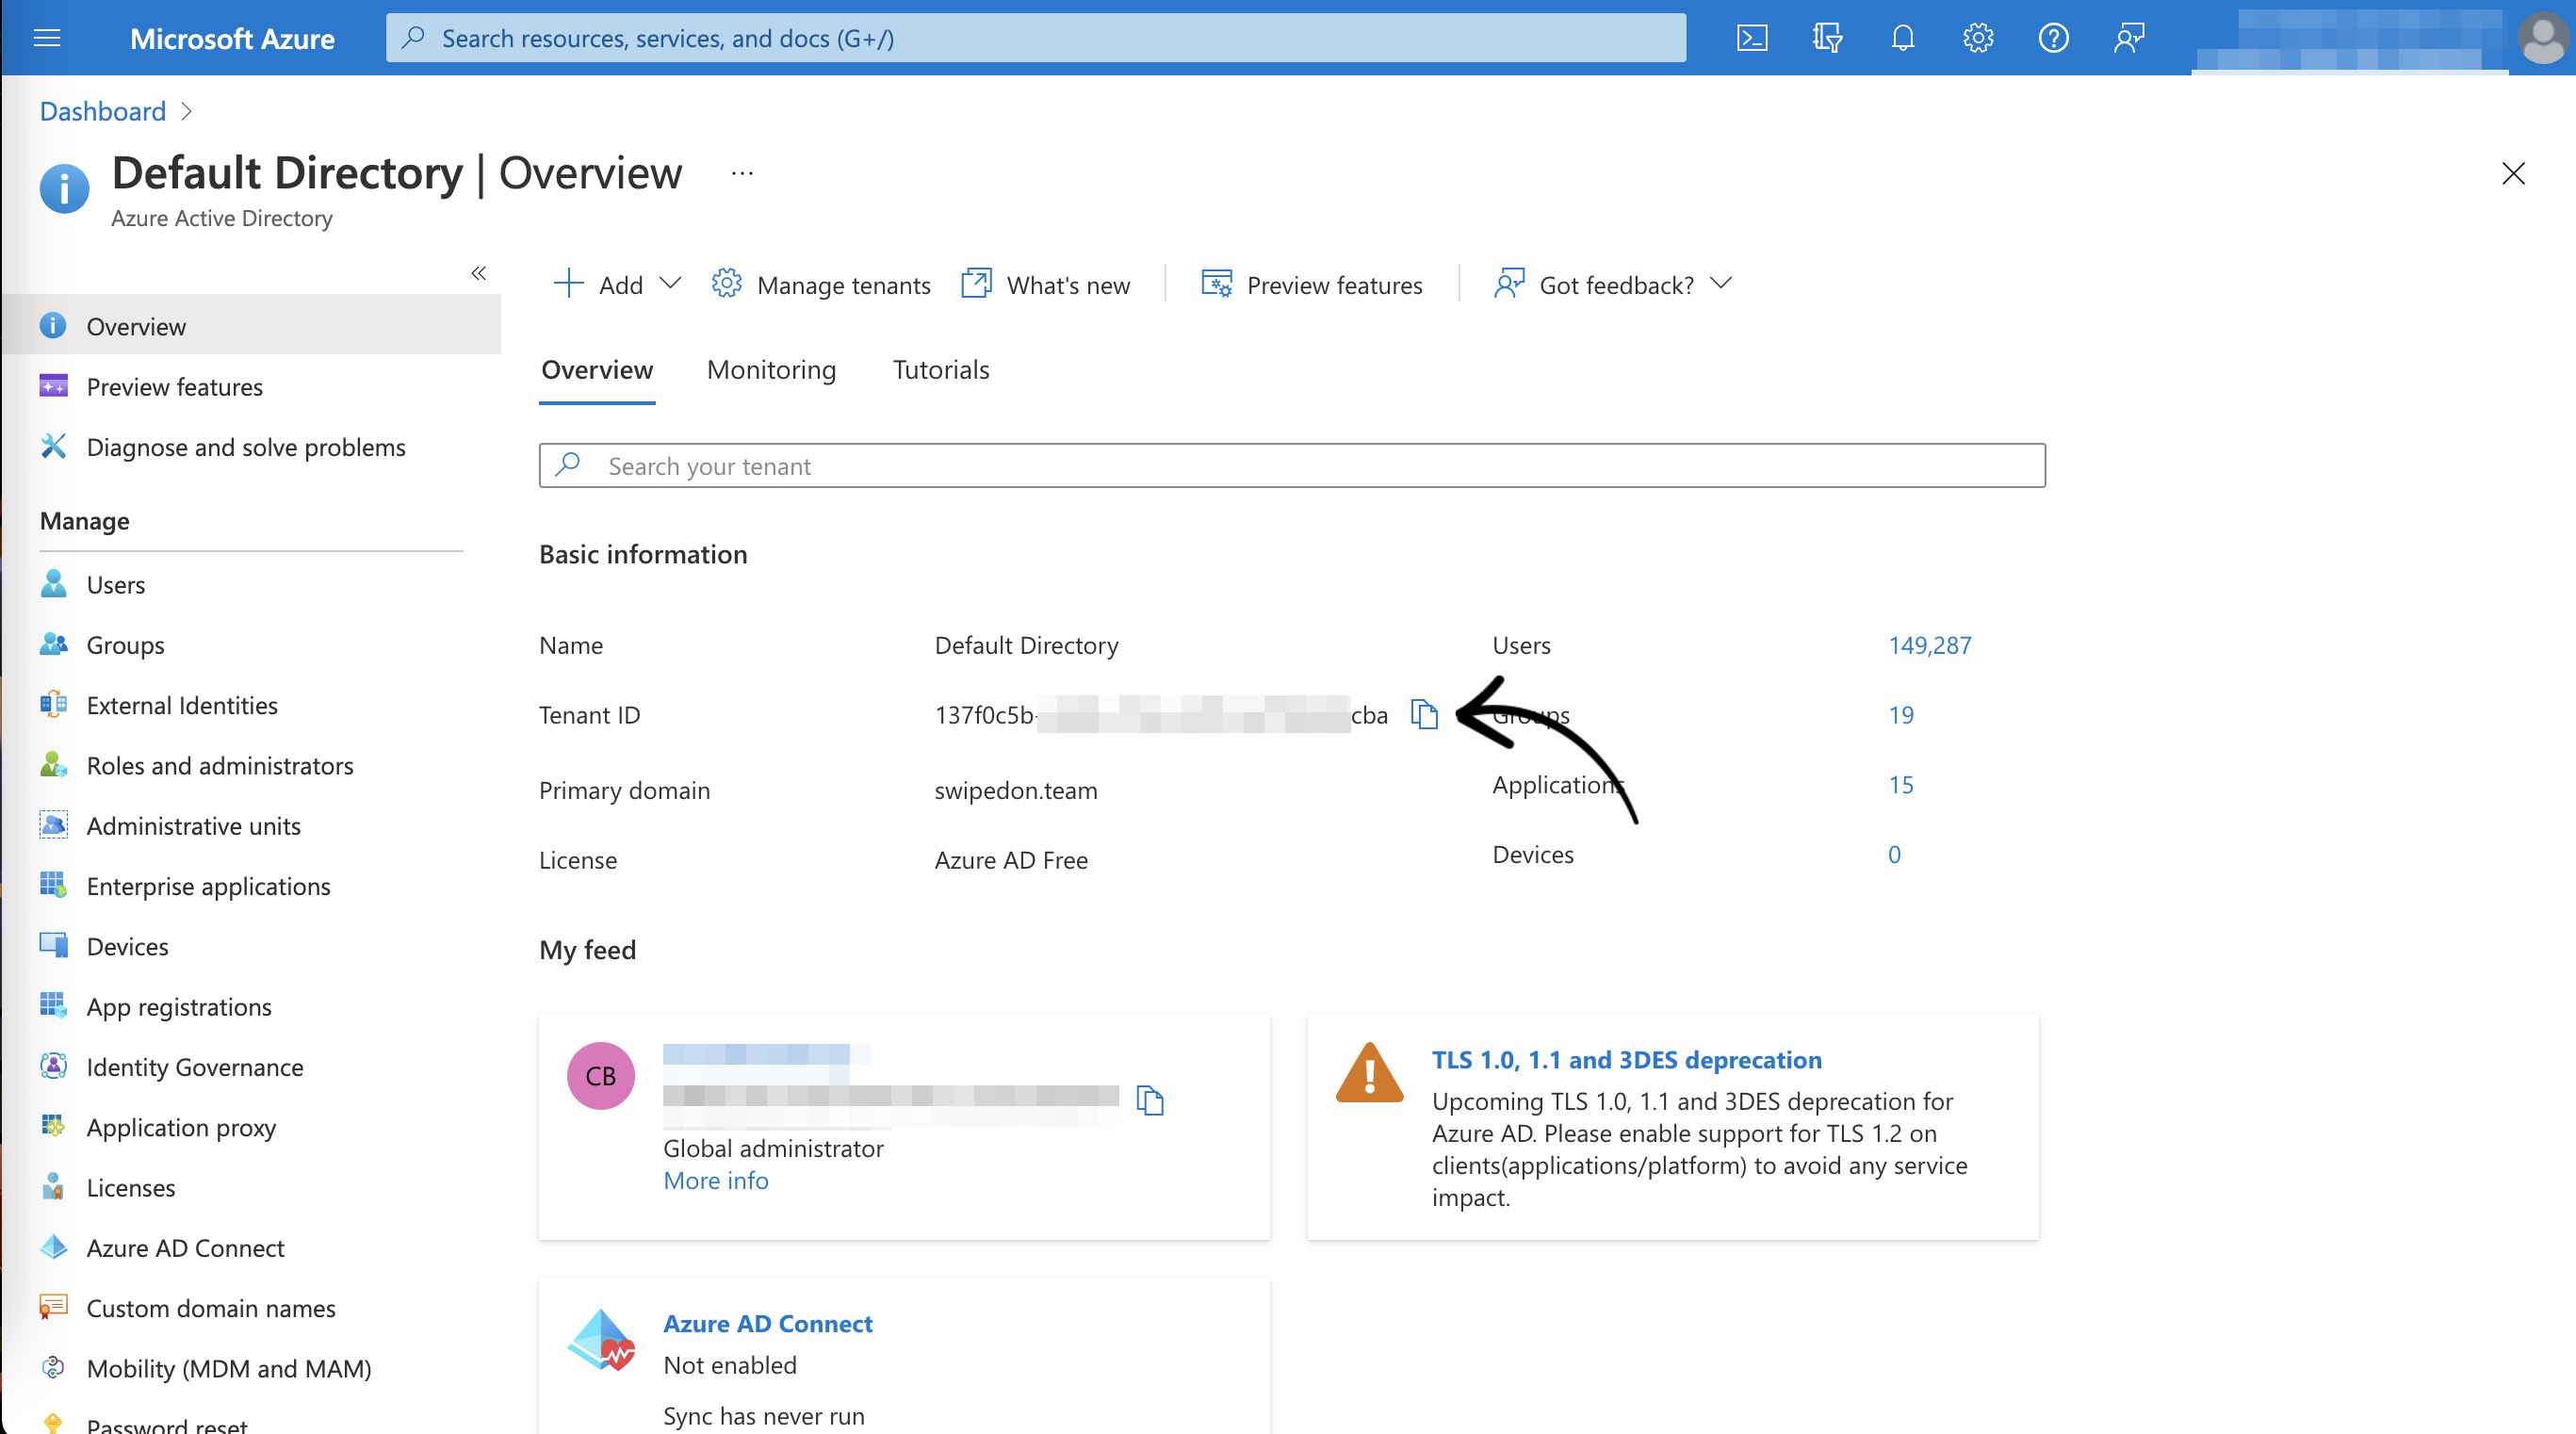
Find your Tenant ID
Log into Azure, and then click on Azure Active Directory from the Home page. Your Tenant ID is displayed on the Overview screen for Azure Active Directory.
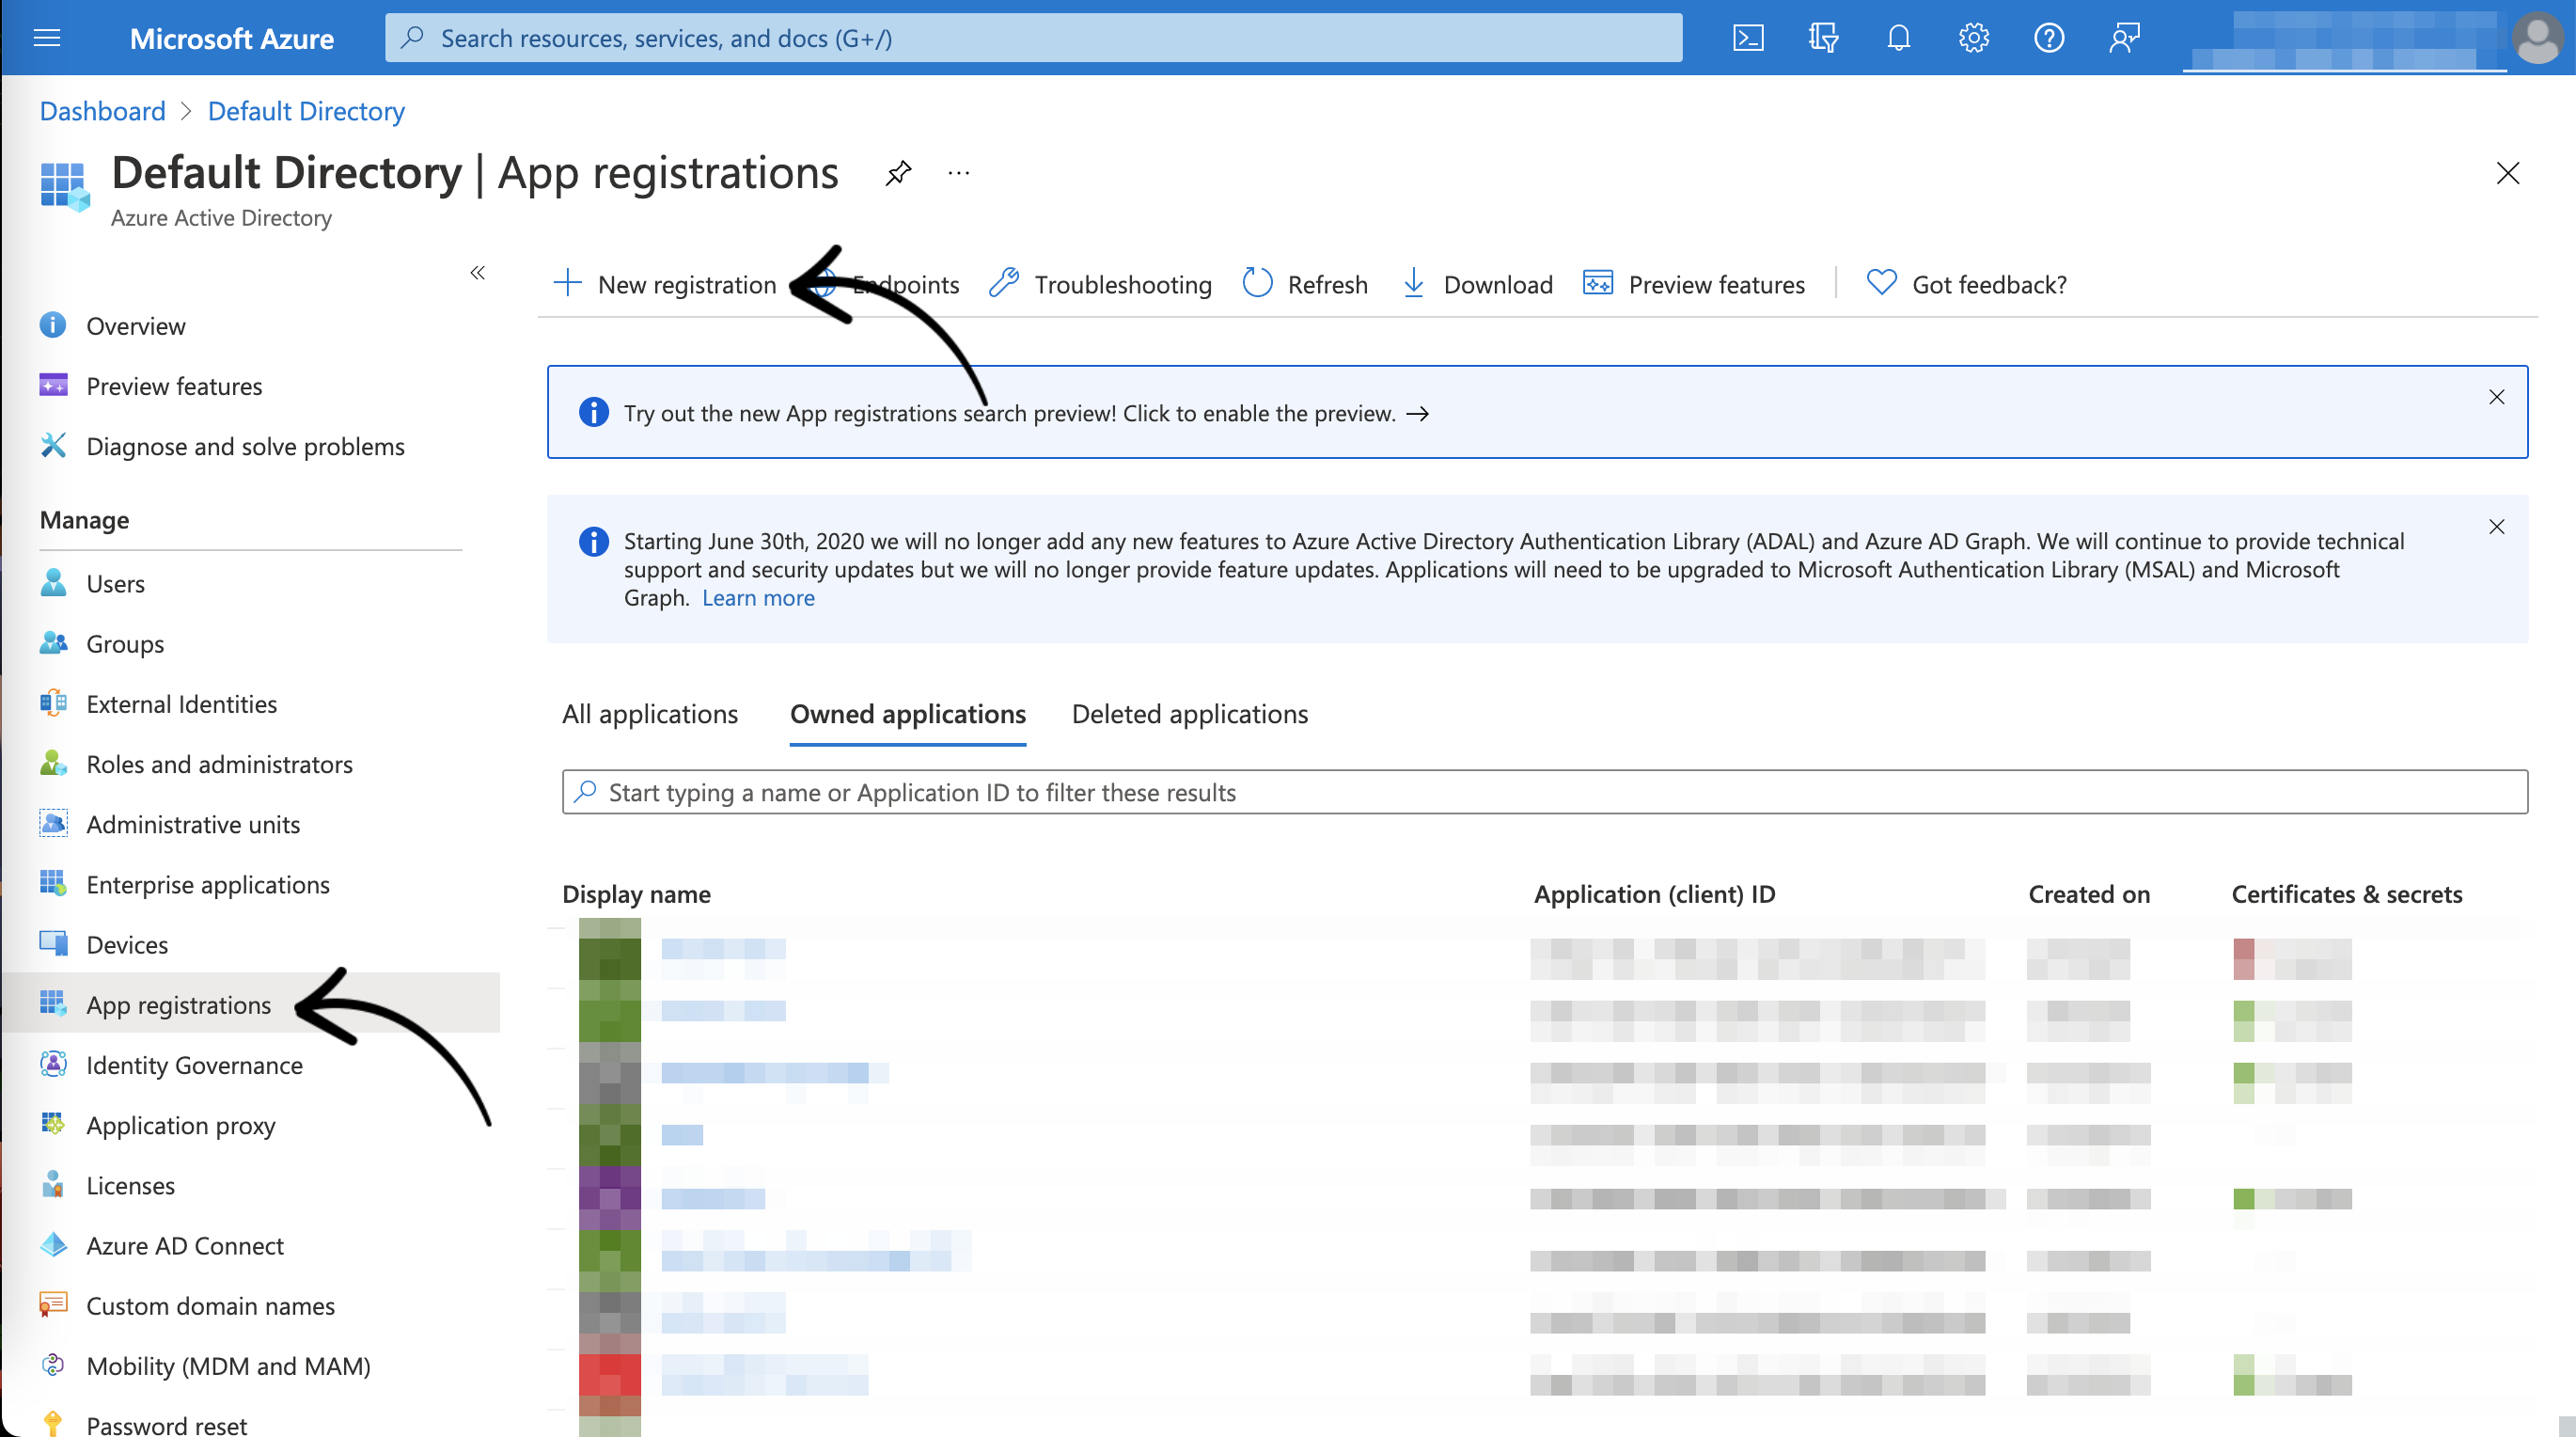
Create a new app registration
Next, click on App registrations in the sidebar and select New registration.
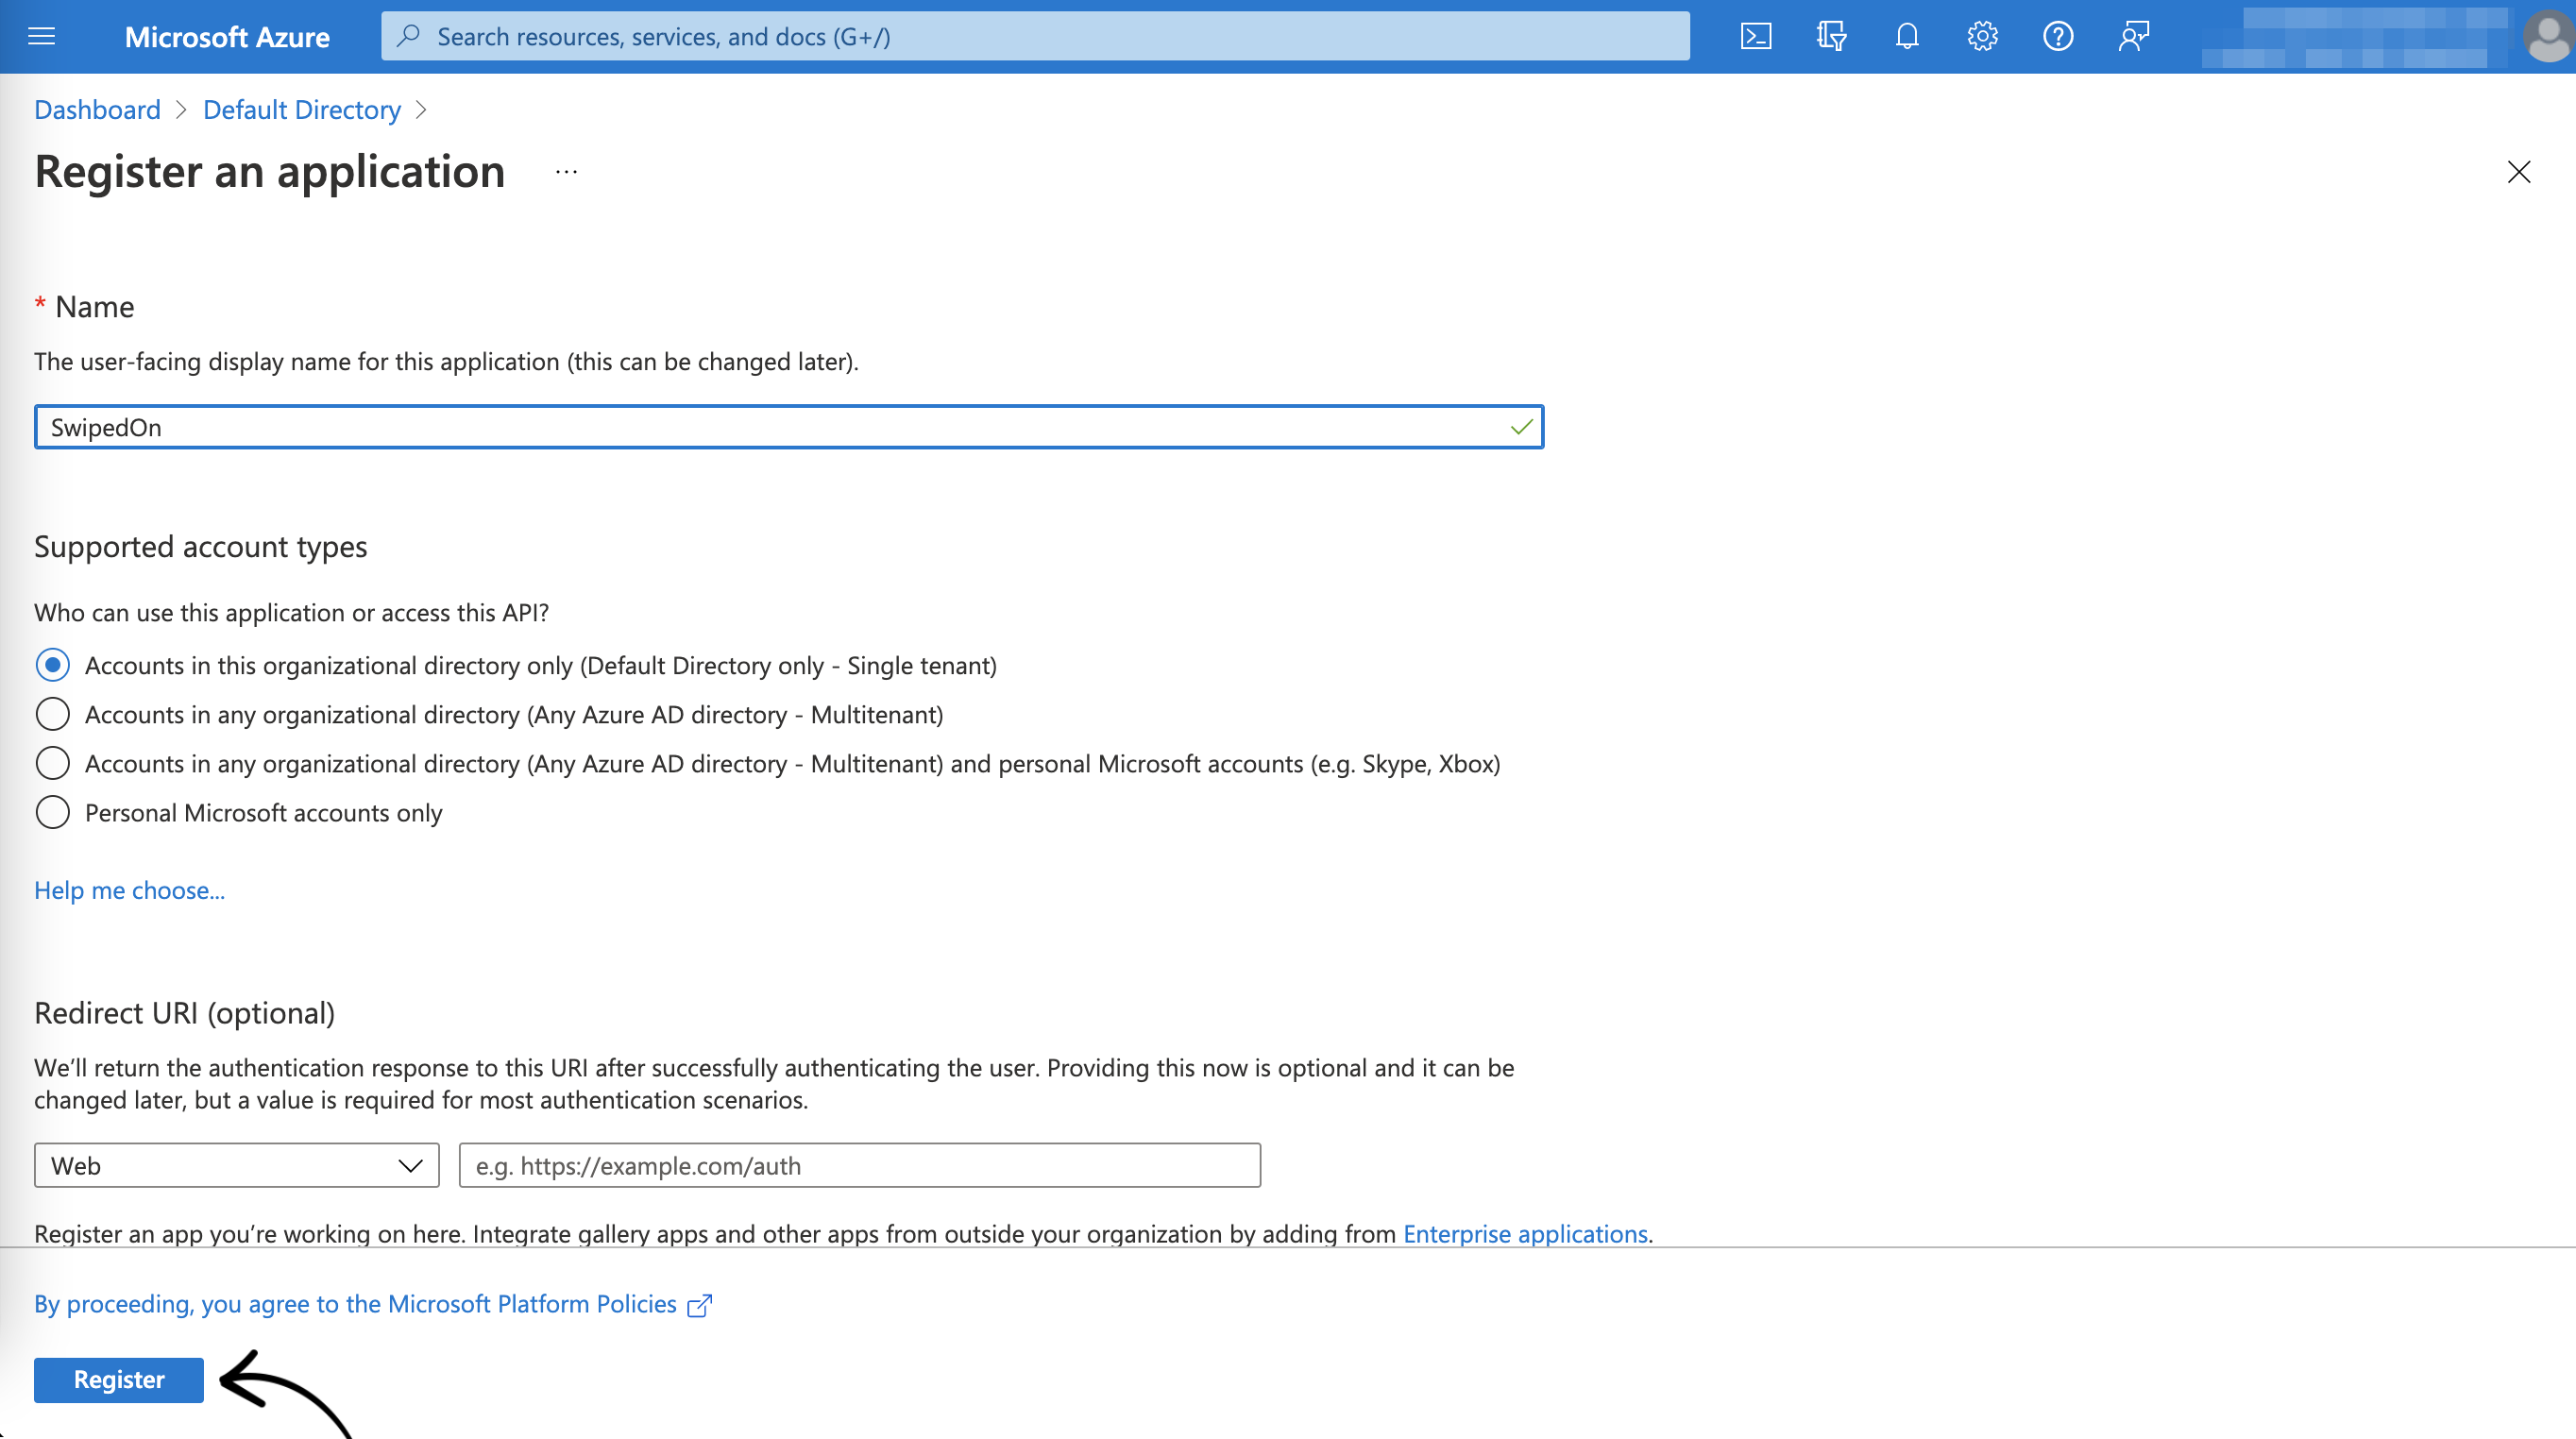
Enter a name for your new app registration - calling it "SwipedOn" is a good way to remember what this is for.
Ensure the Supported account types is set to "Accounts in this organizational directory only" and click Register.
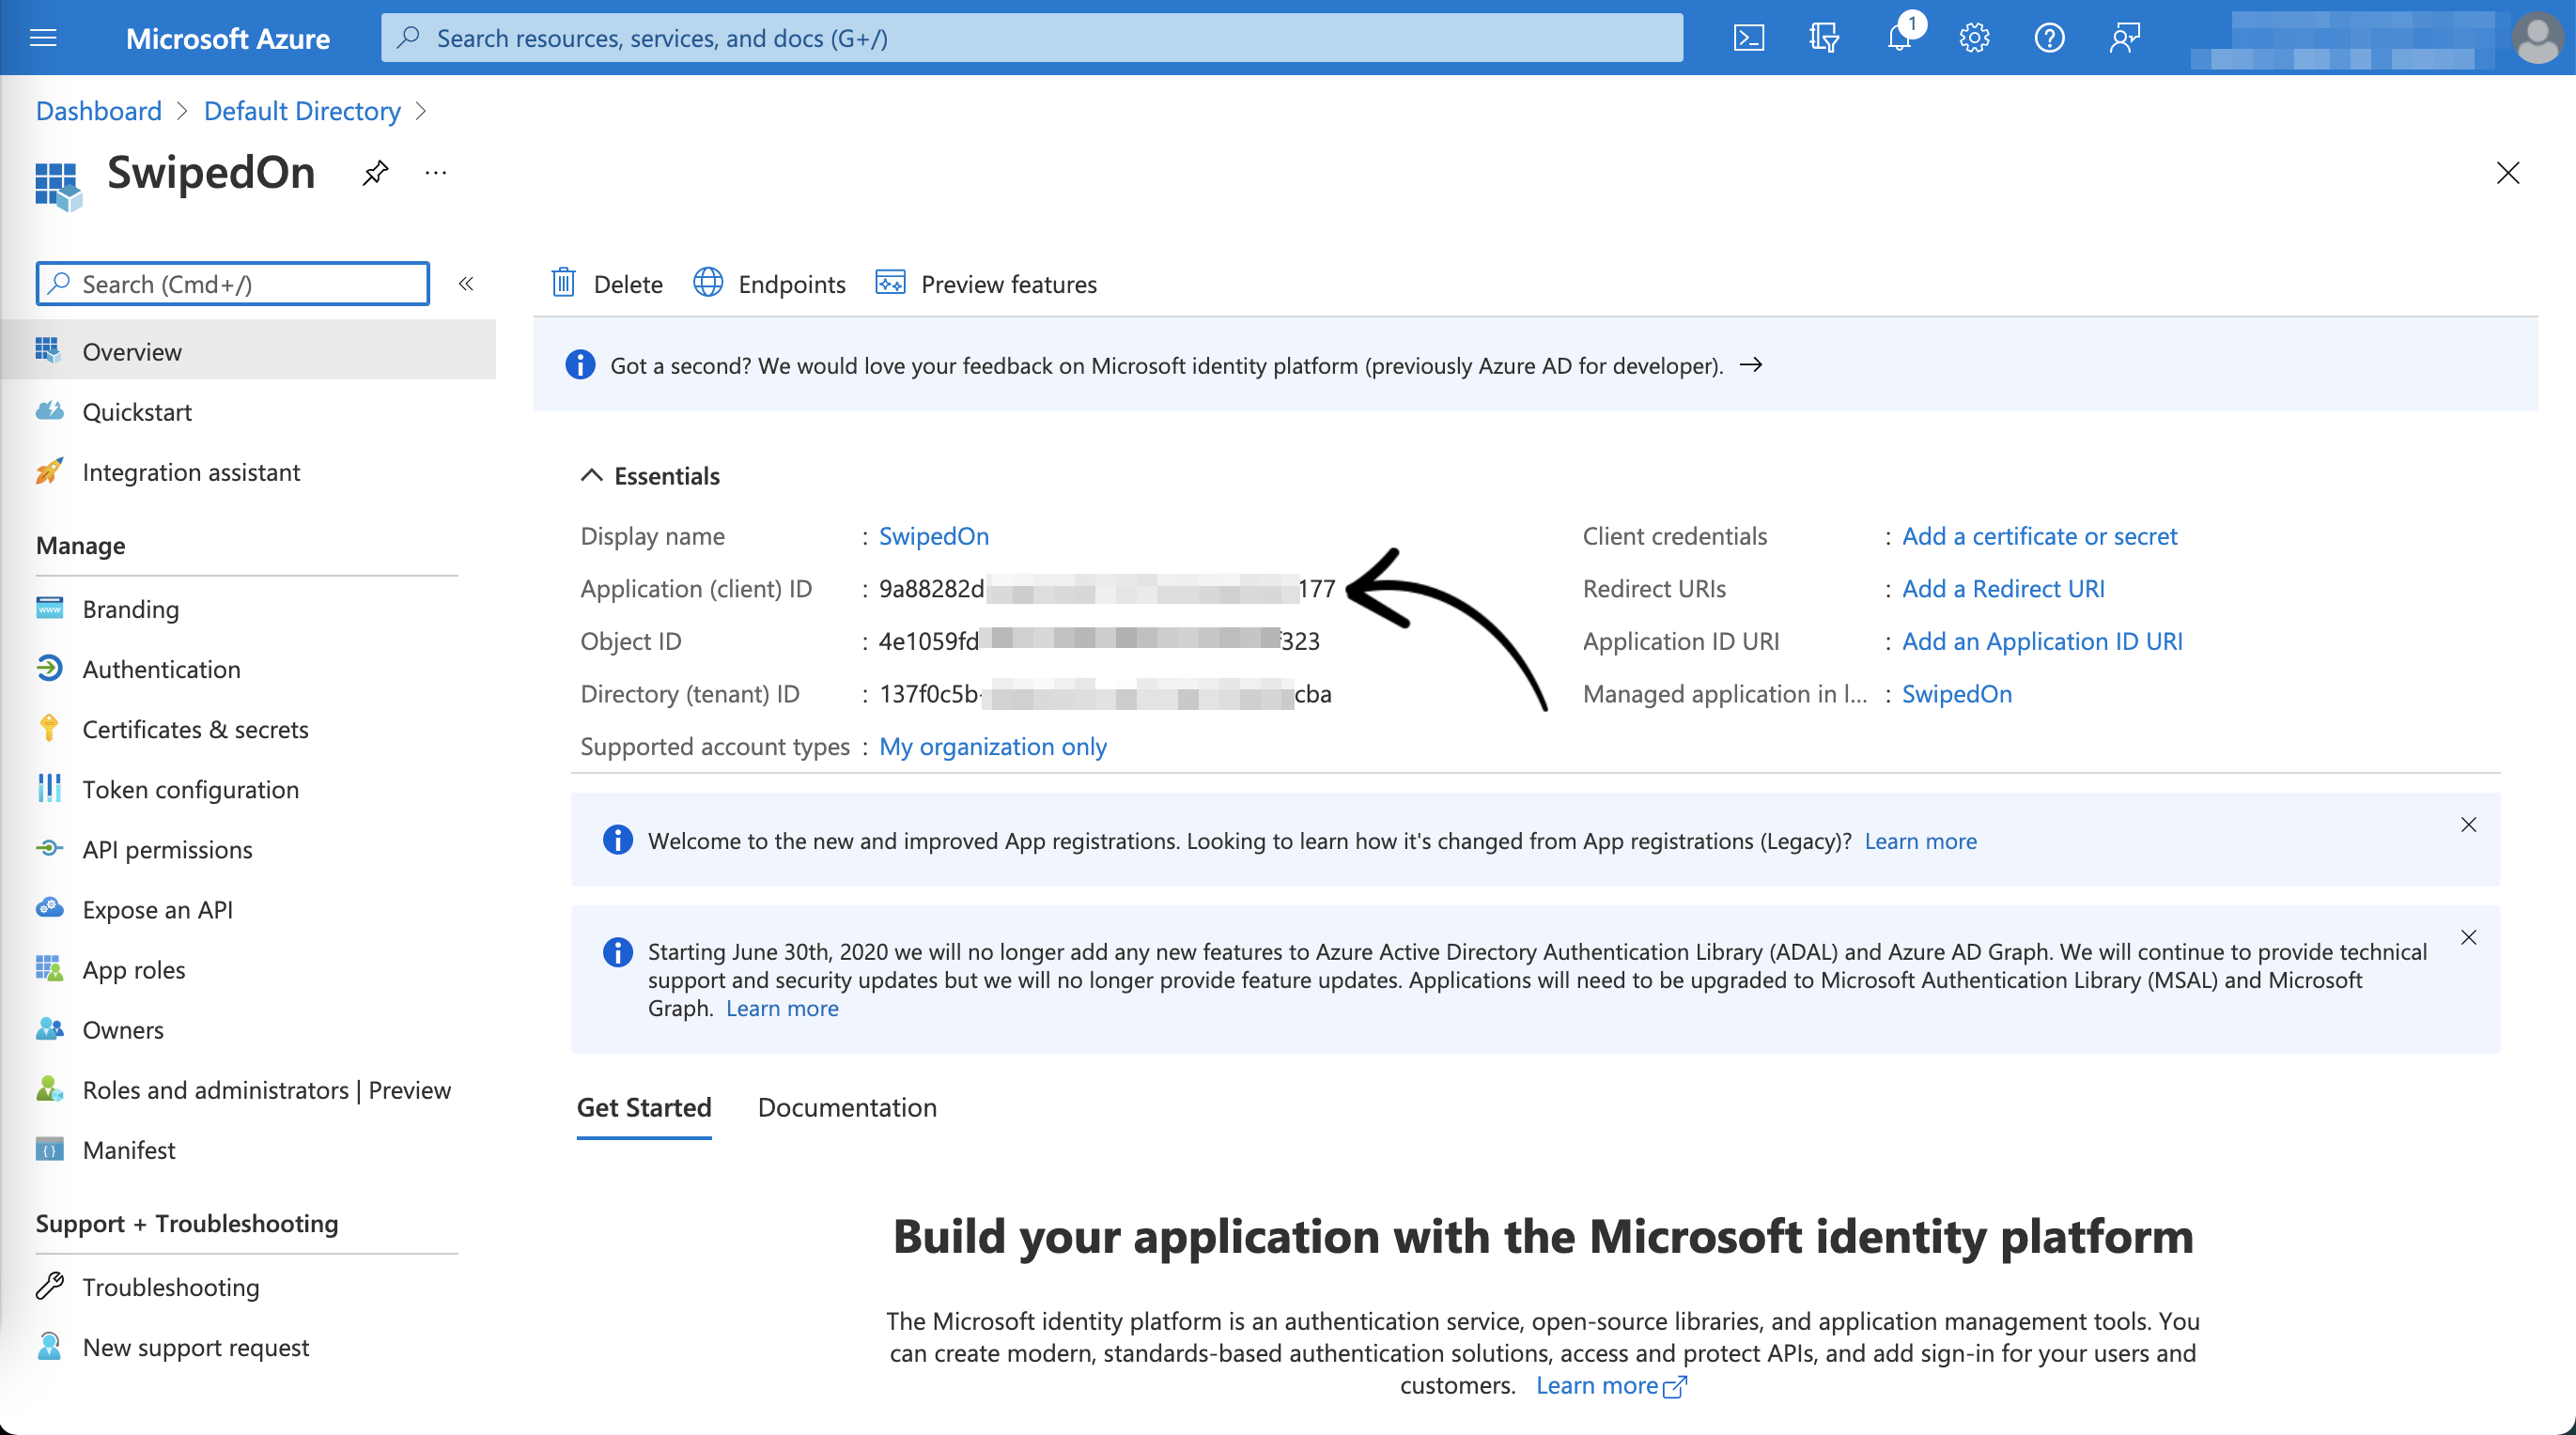
The new Client ID will be displayed on the Overview screen.
Create a new client secret
From within your new app registration, click Certificates & secrets on the sidebar and click the New client secret button.
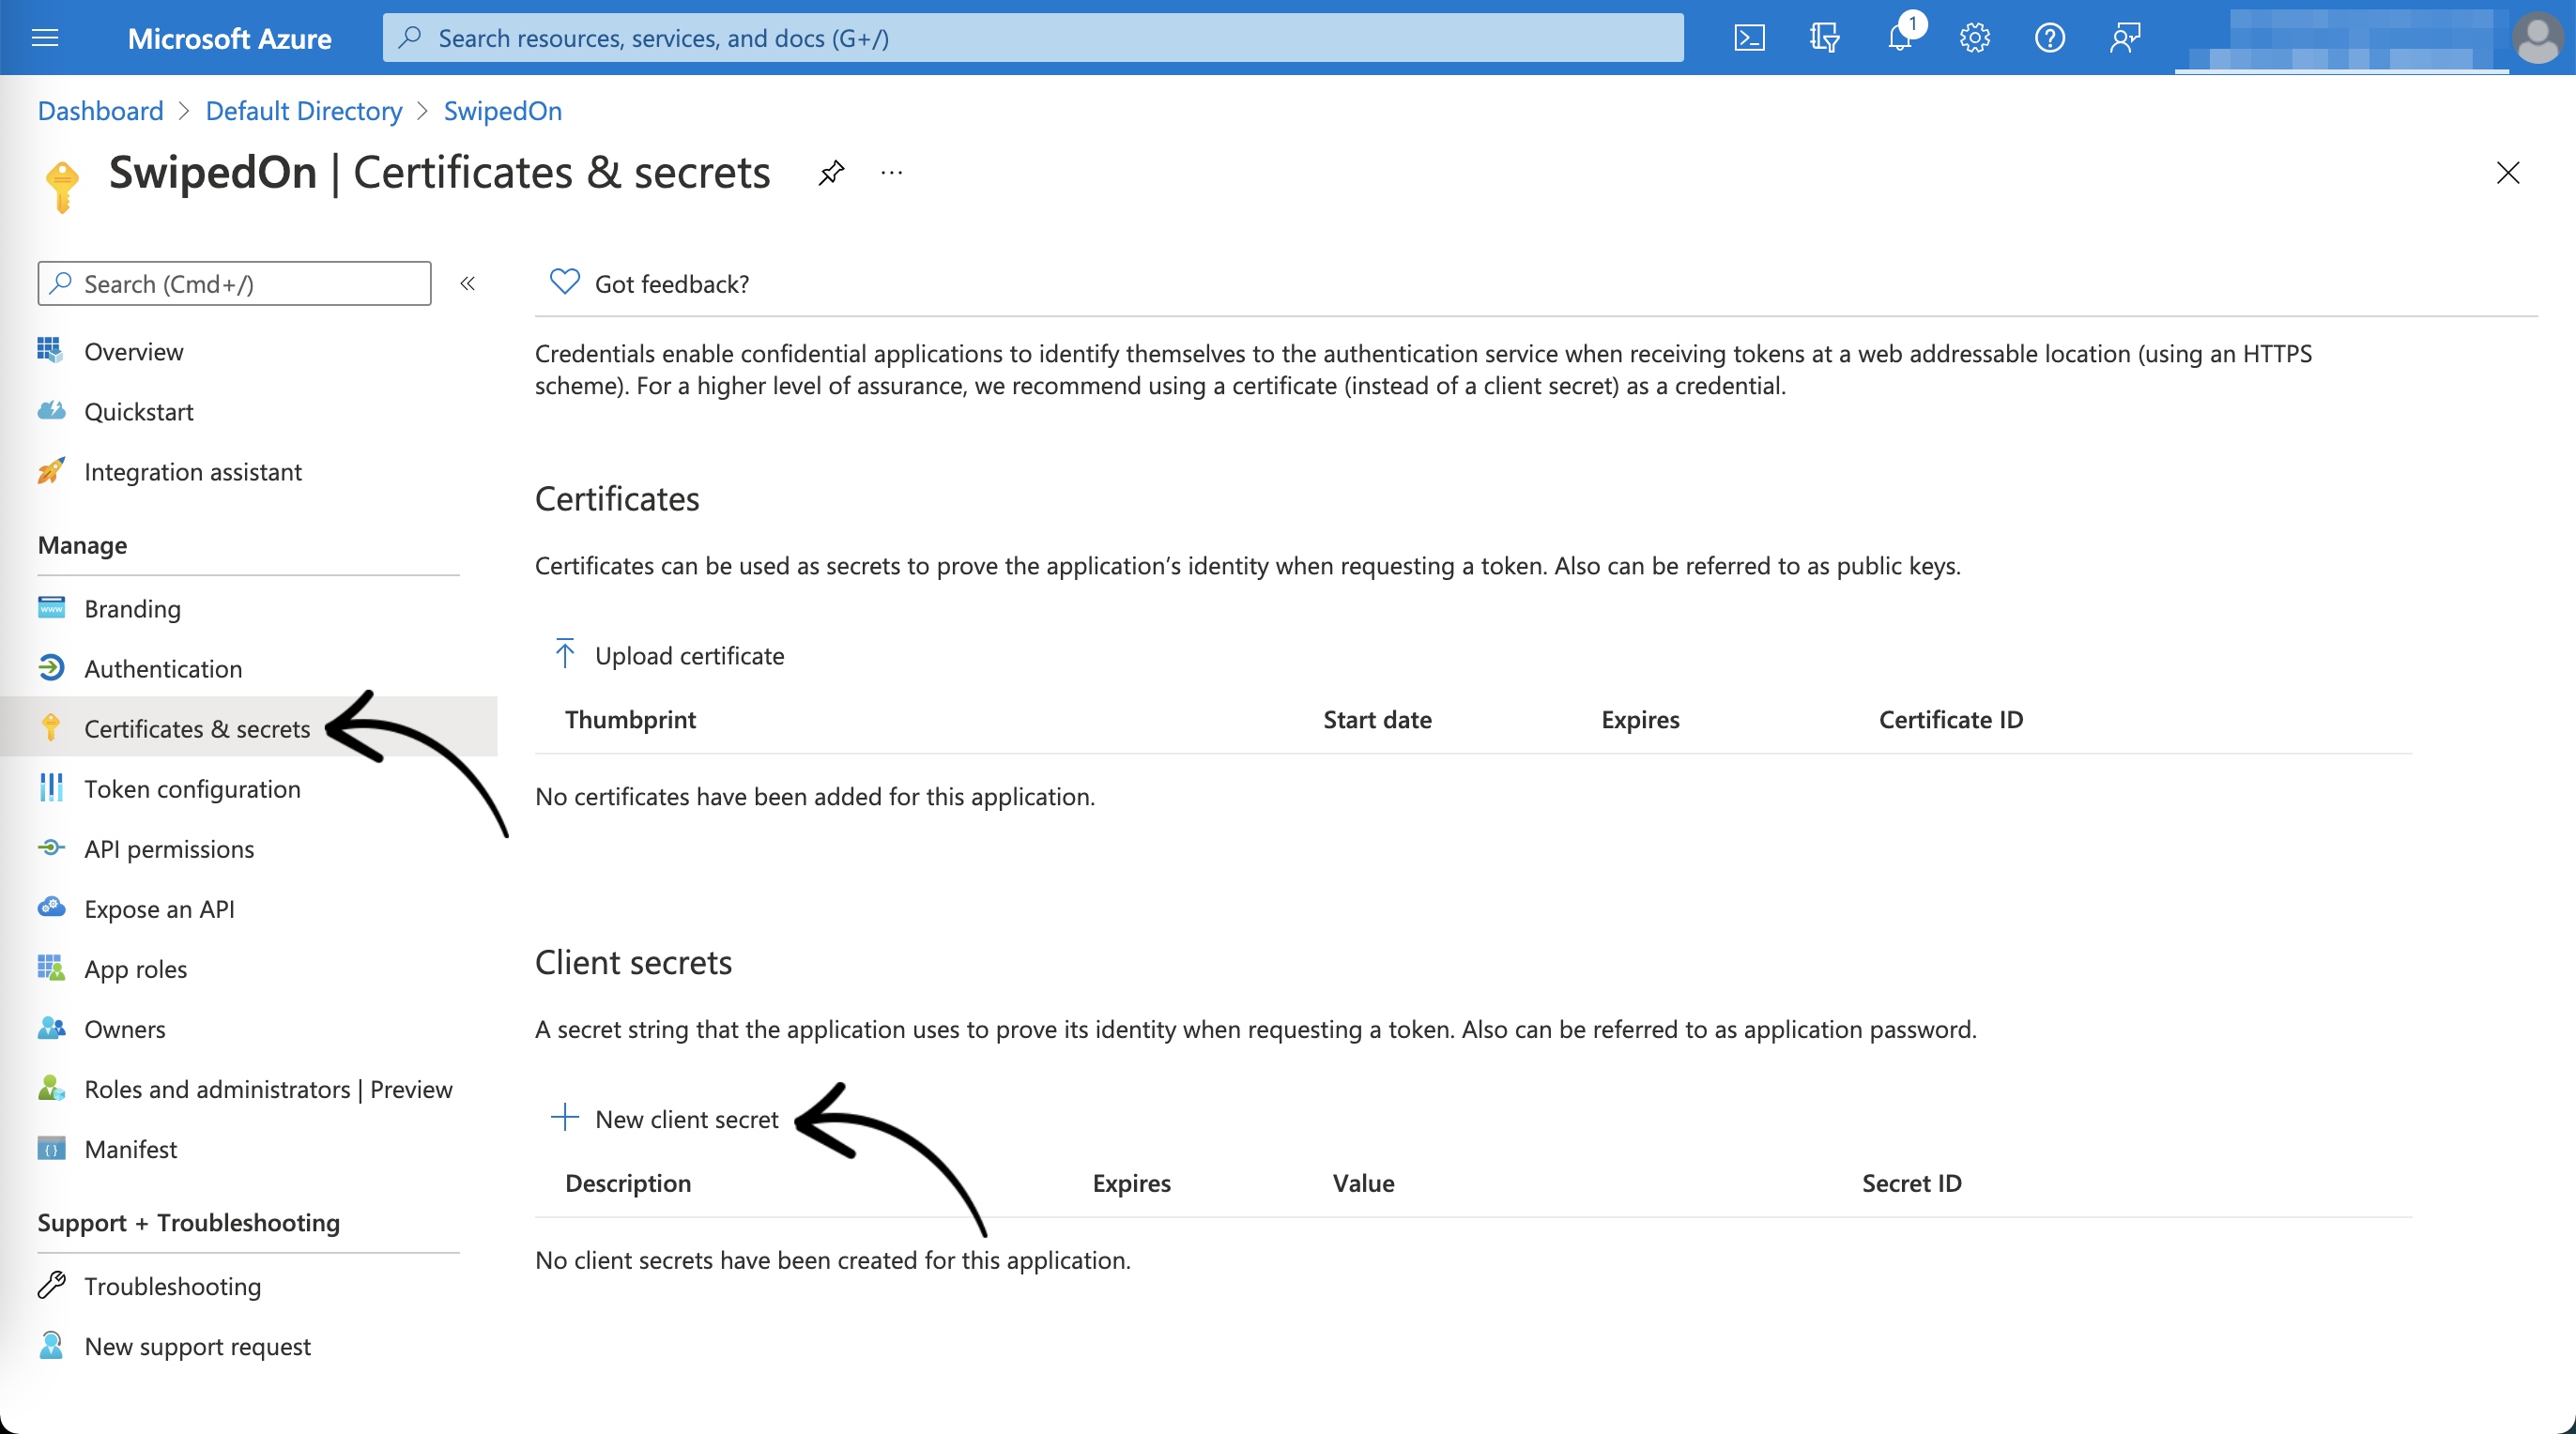
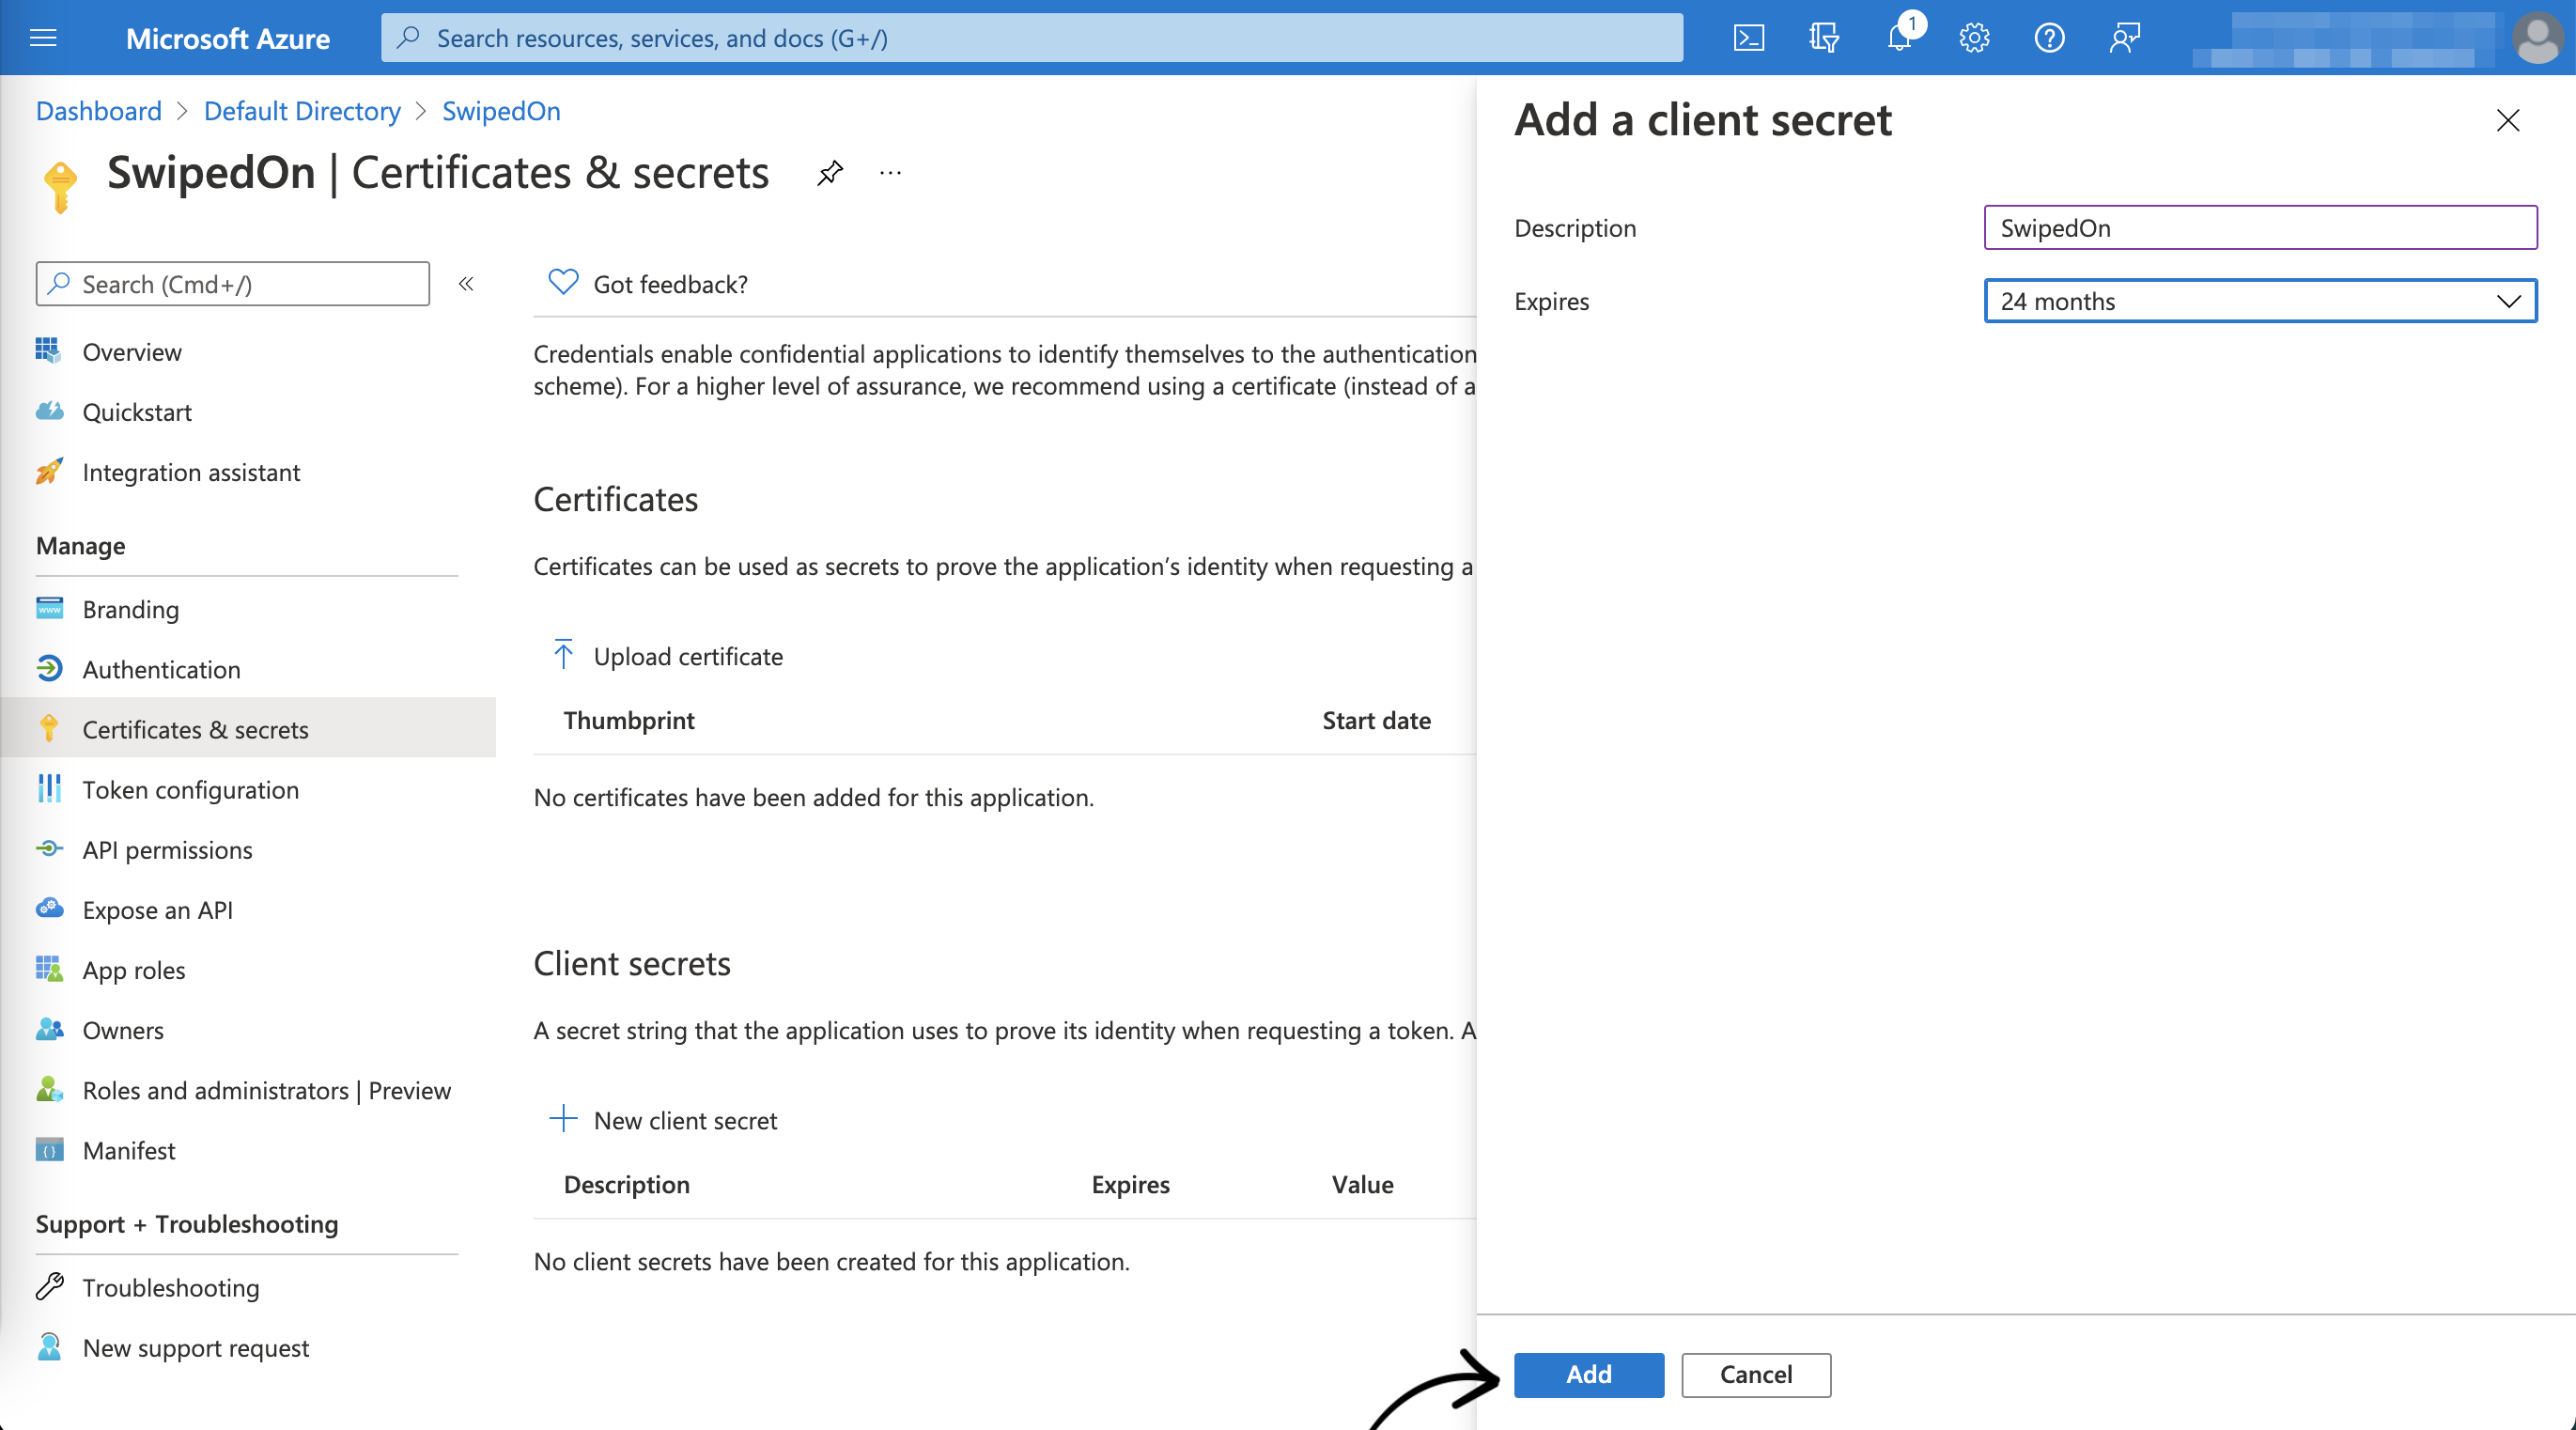
Enter a description and select an expiry, then click Add.
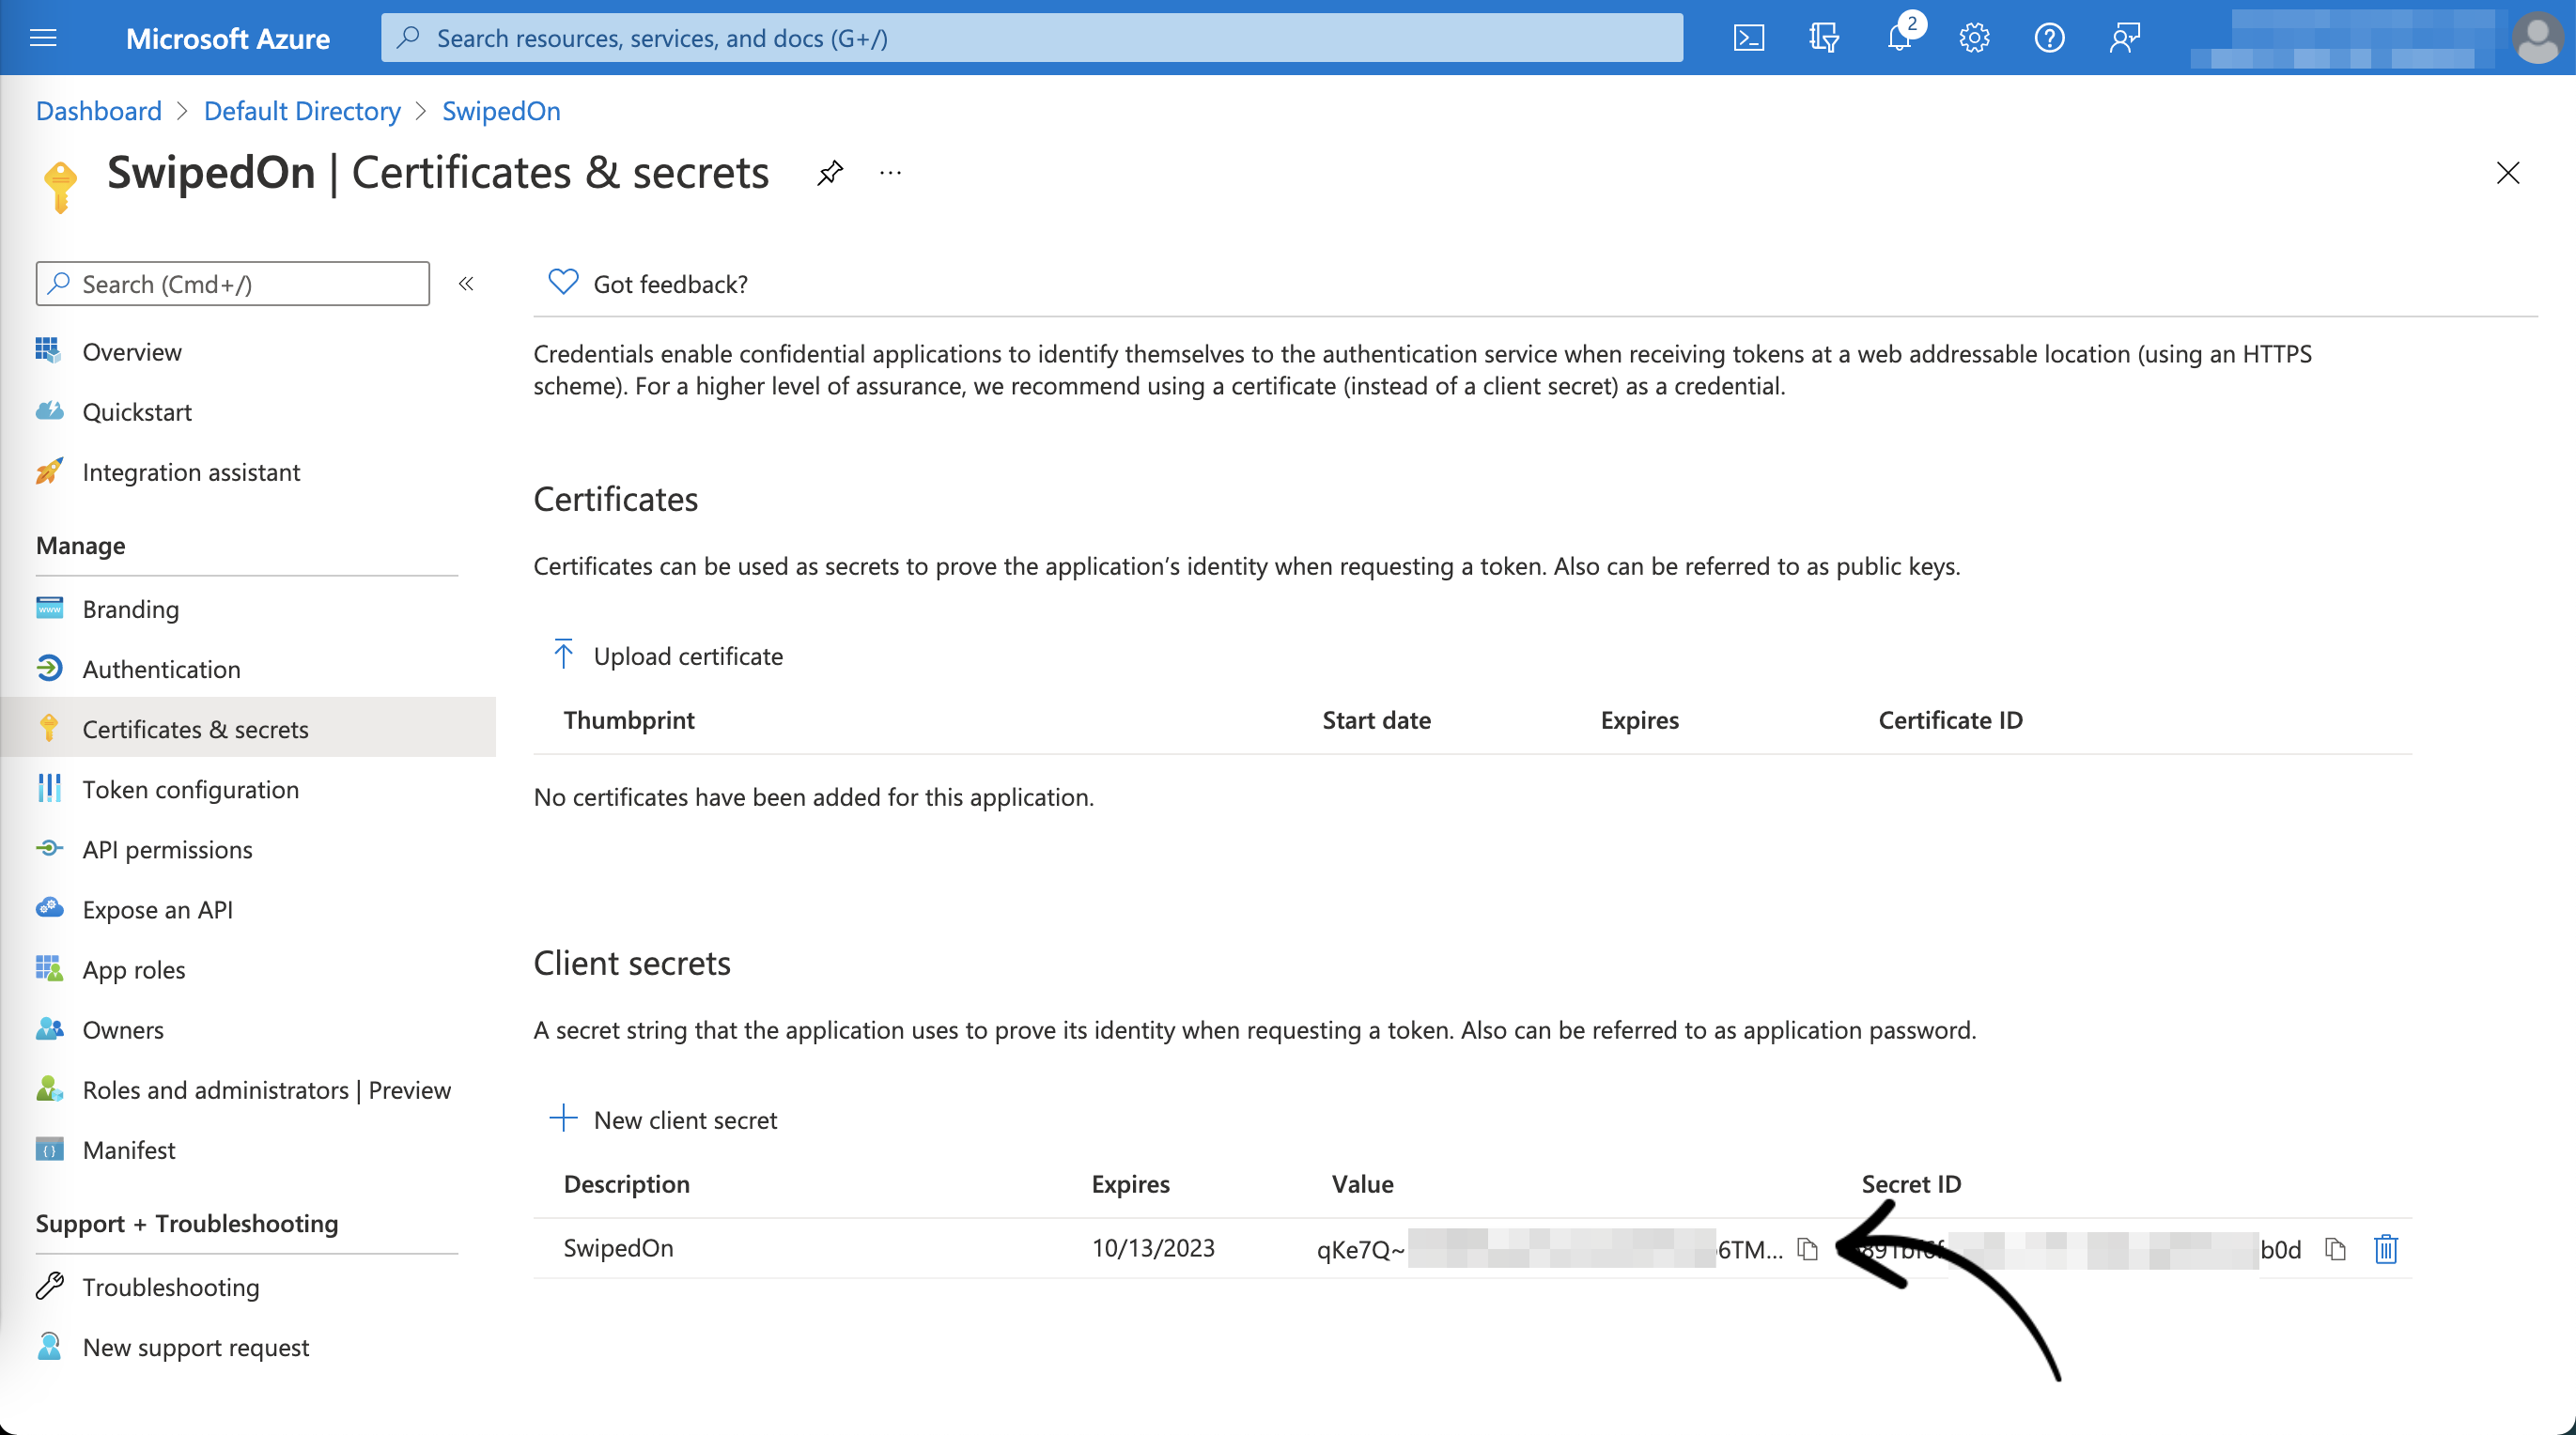
Your new Client Secret will be displayed. Make sure you copy the value immediately - it won't be available if you leave this page and come back later.
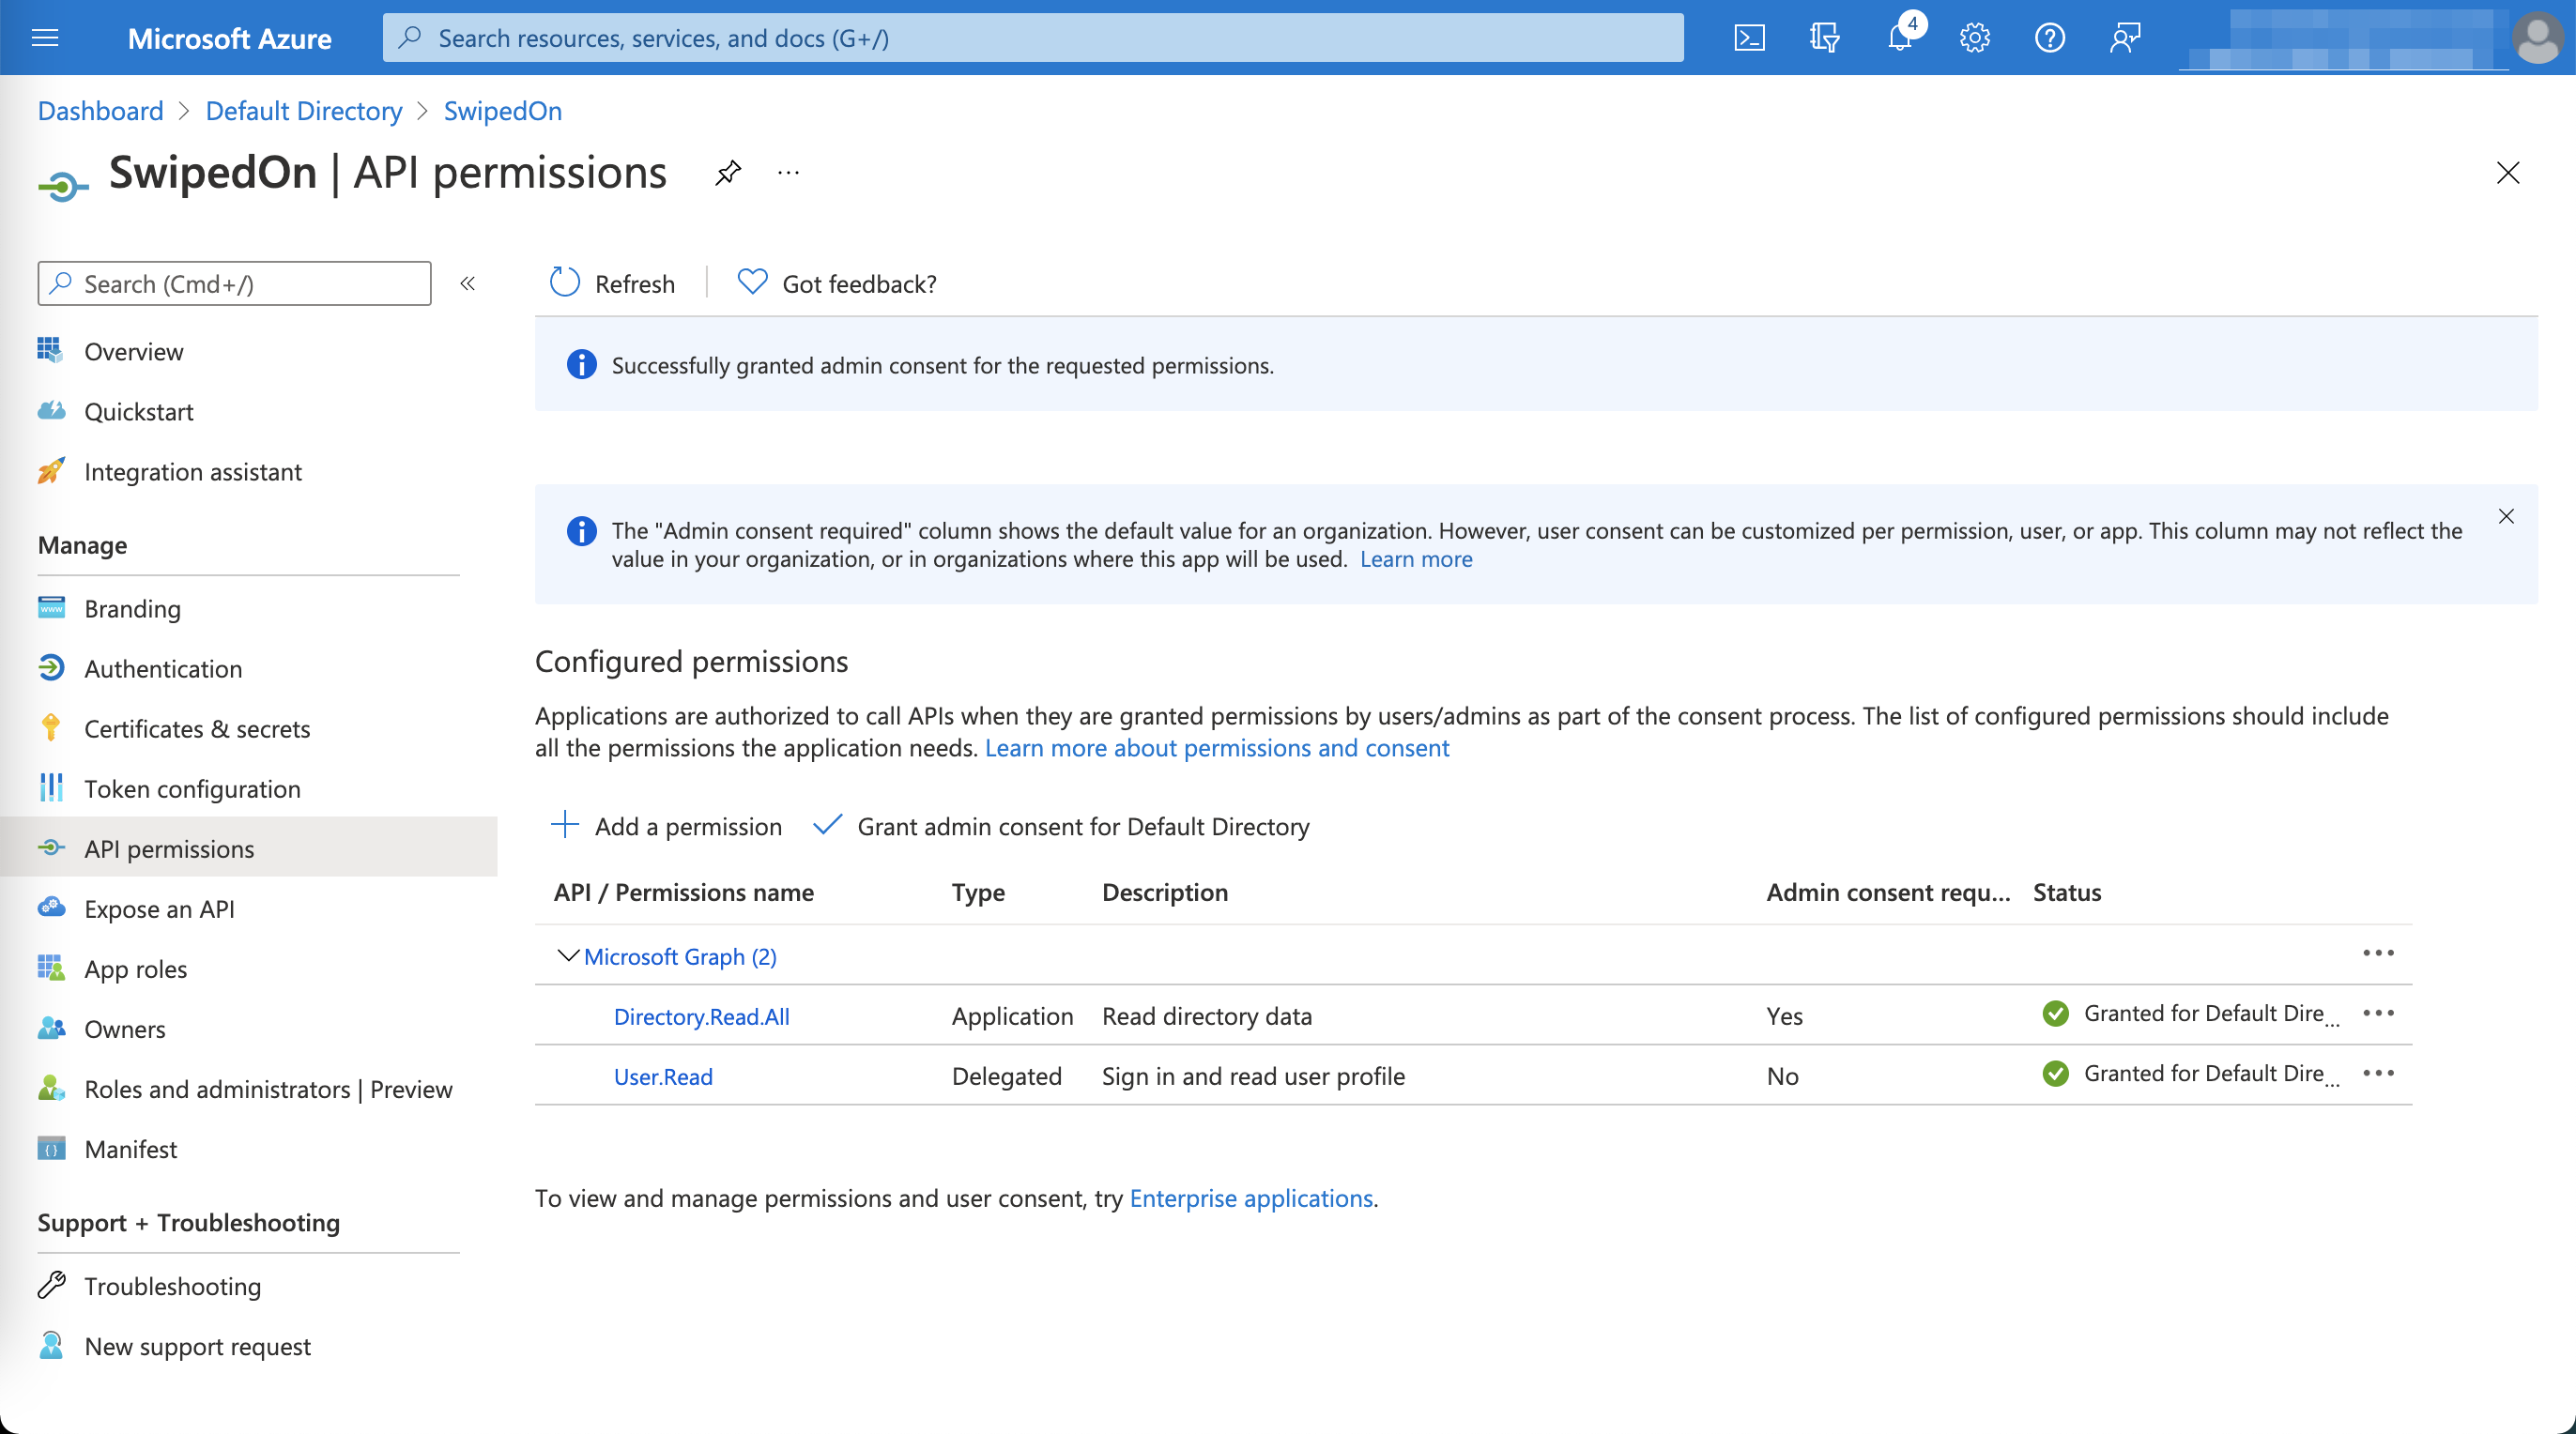
Set API permissions
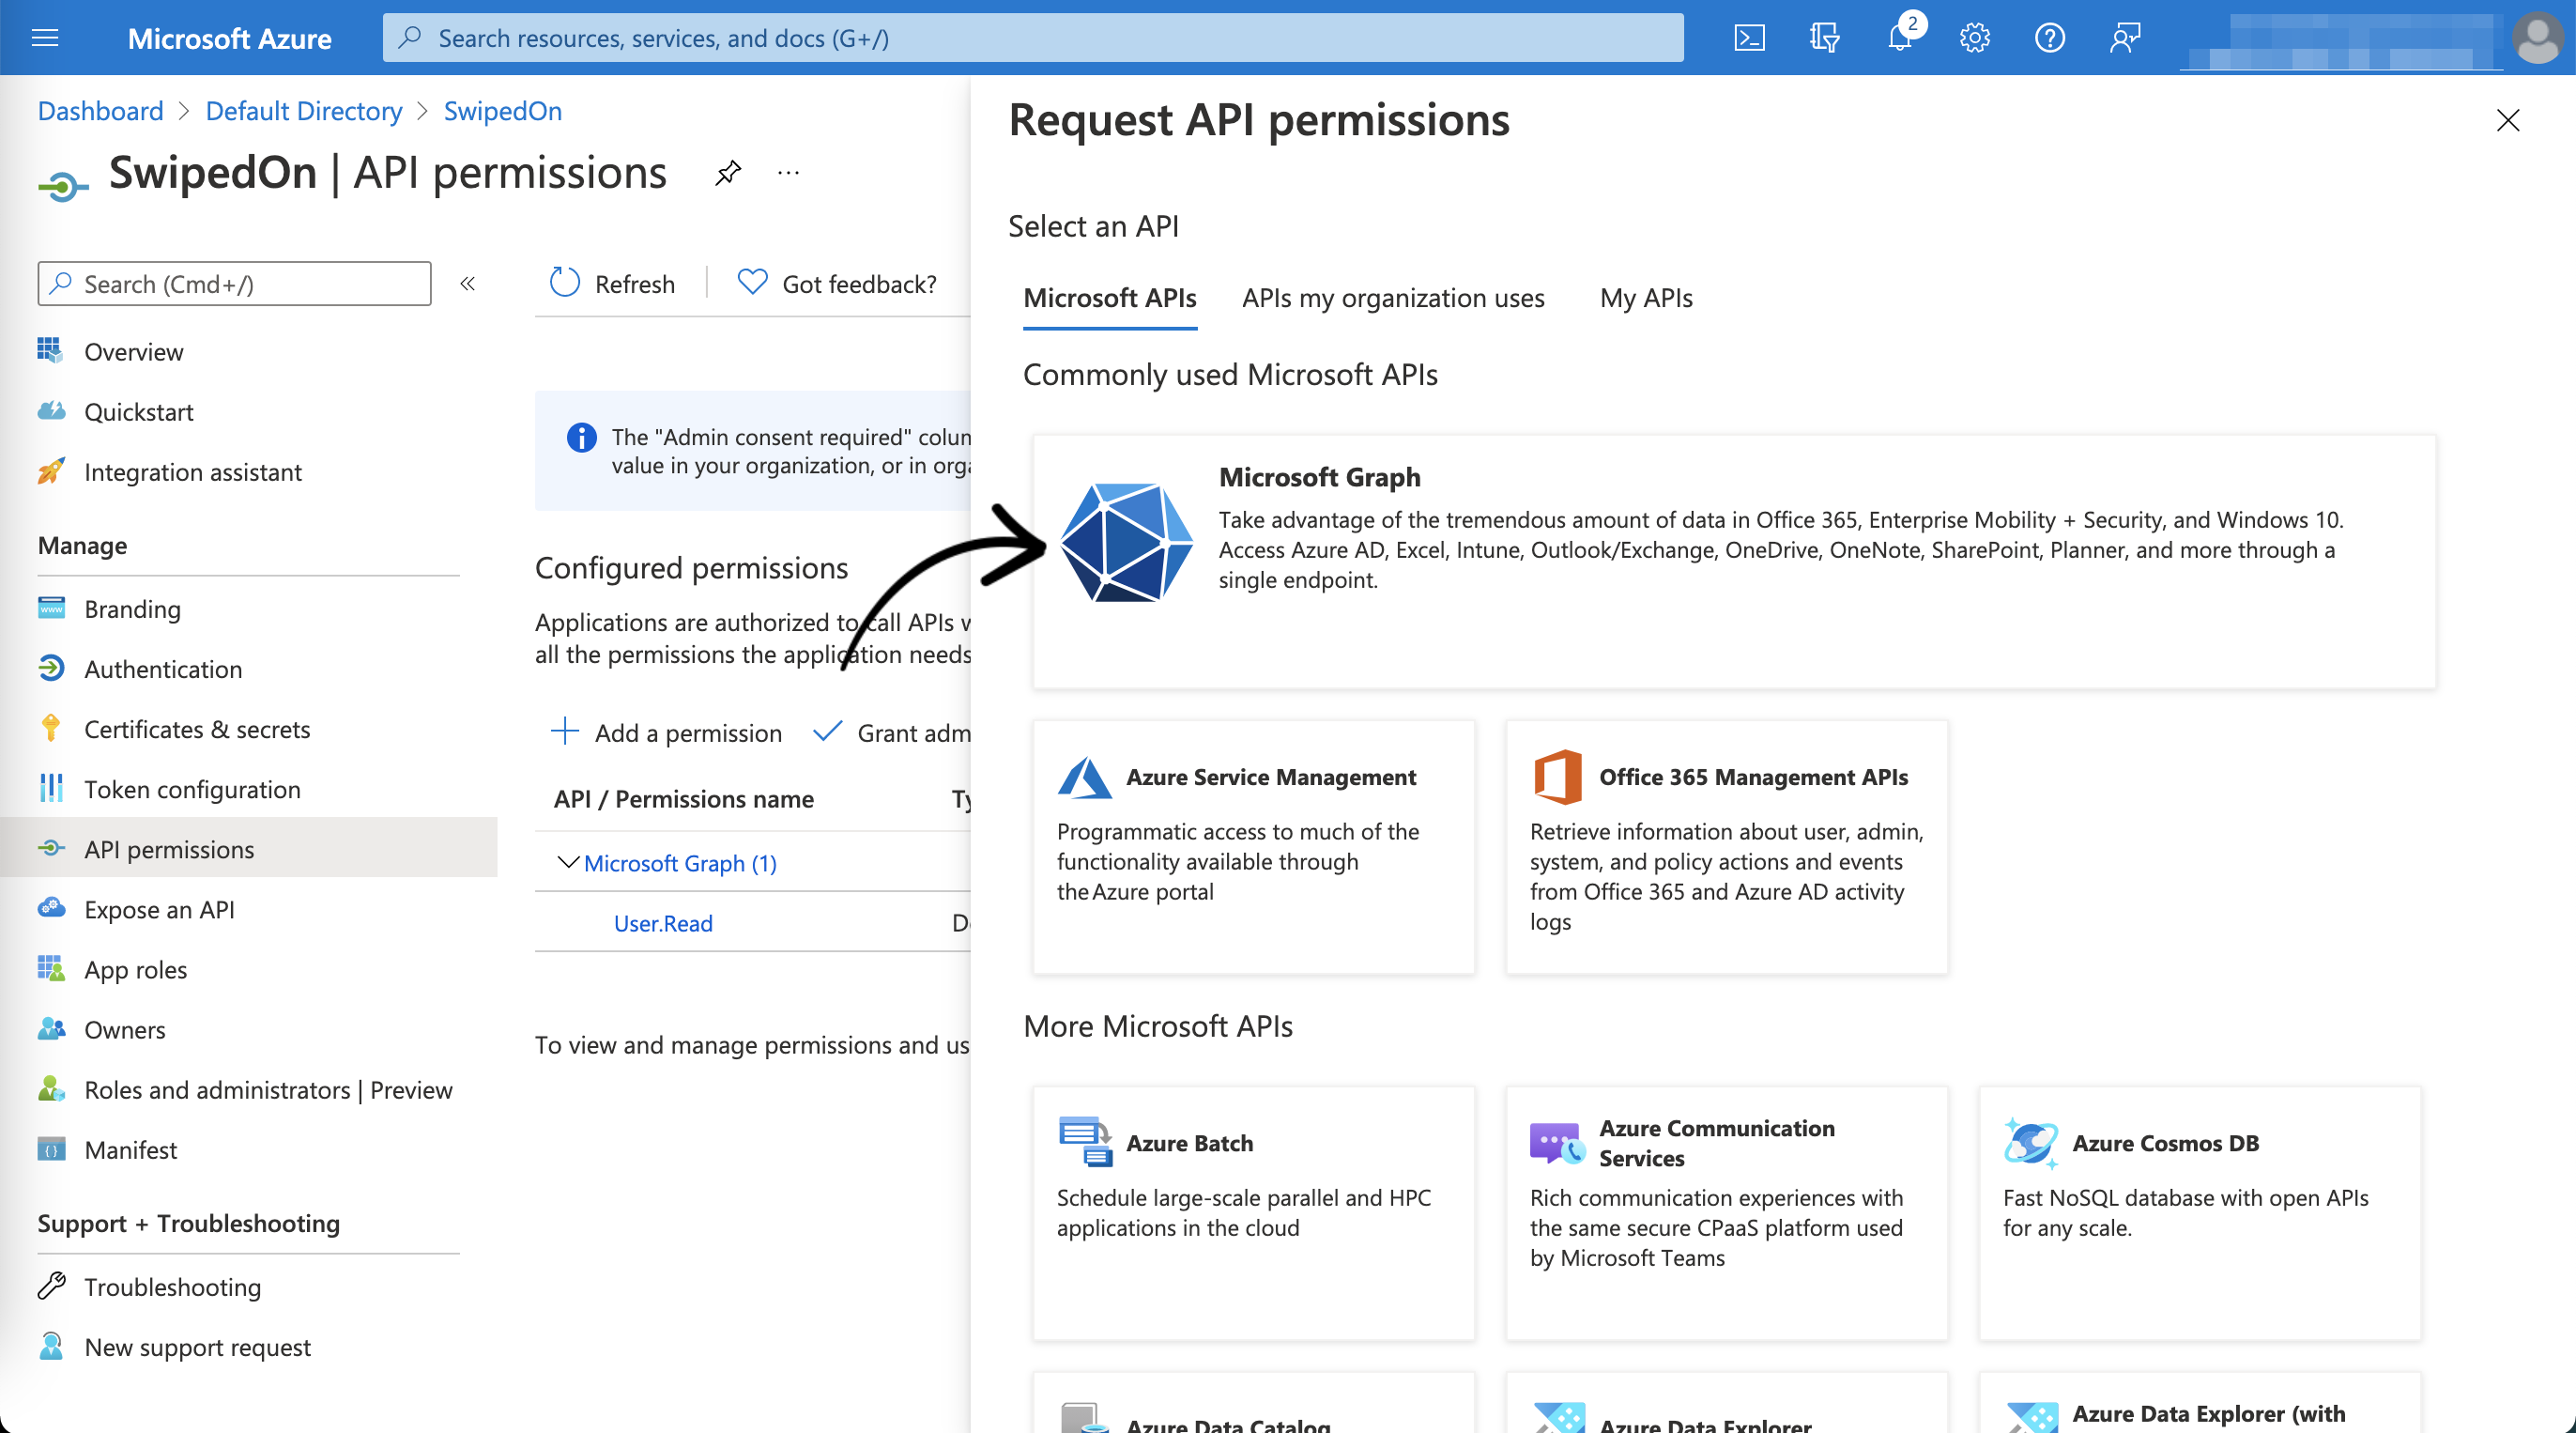
To allow SwipedOn to connect to your Azure Active Directory, you'll need to set API permissions. Click on API permissions on the sidebar and select the Add a permission button.
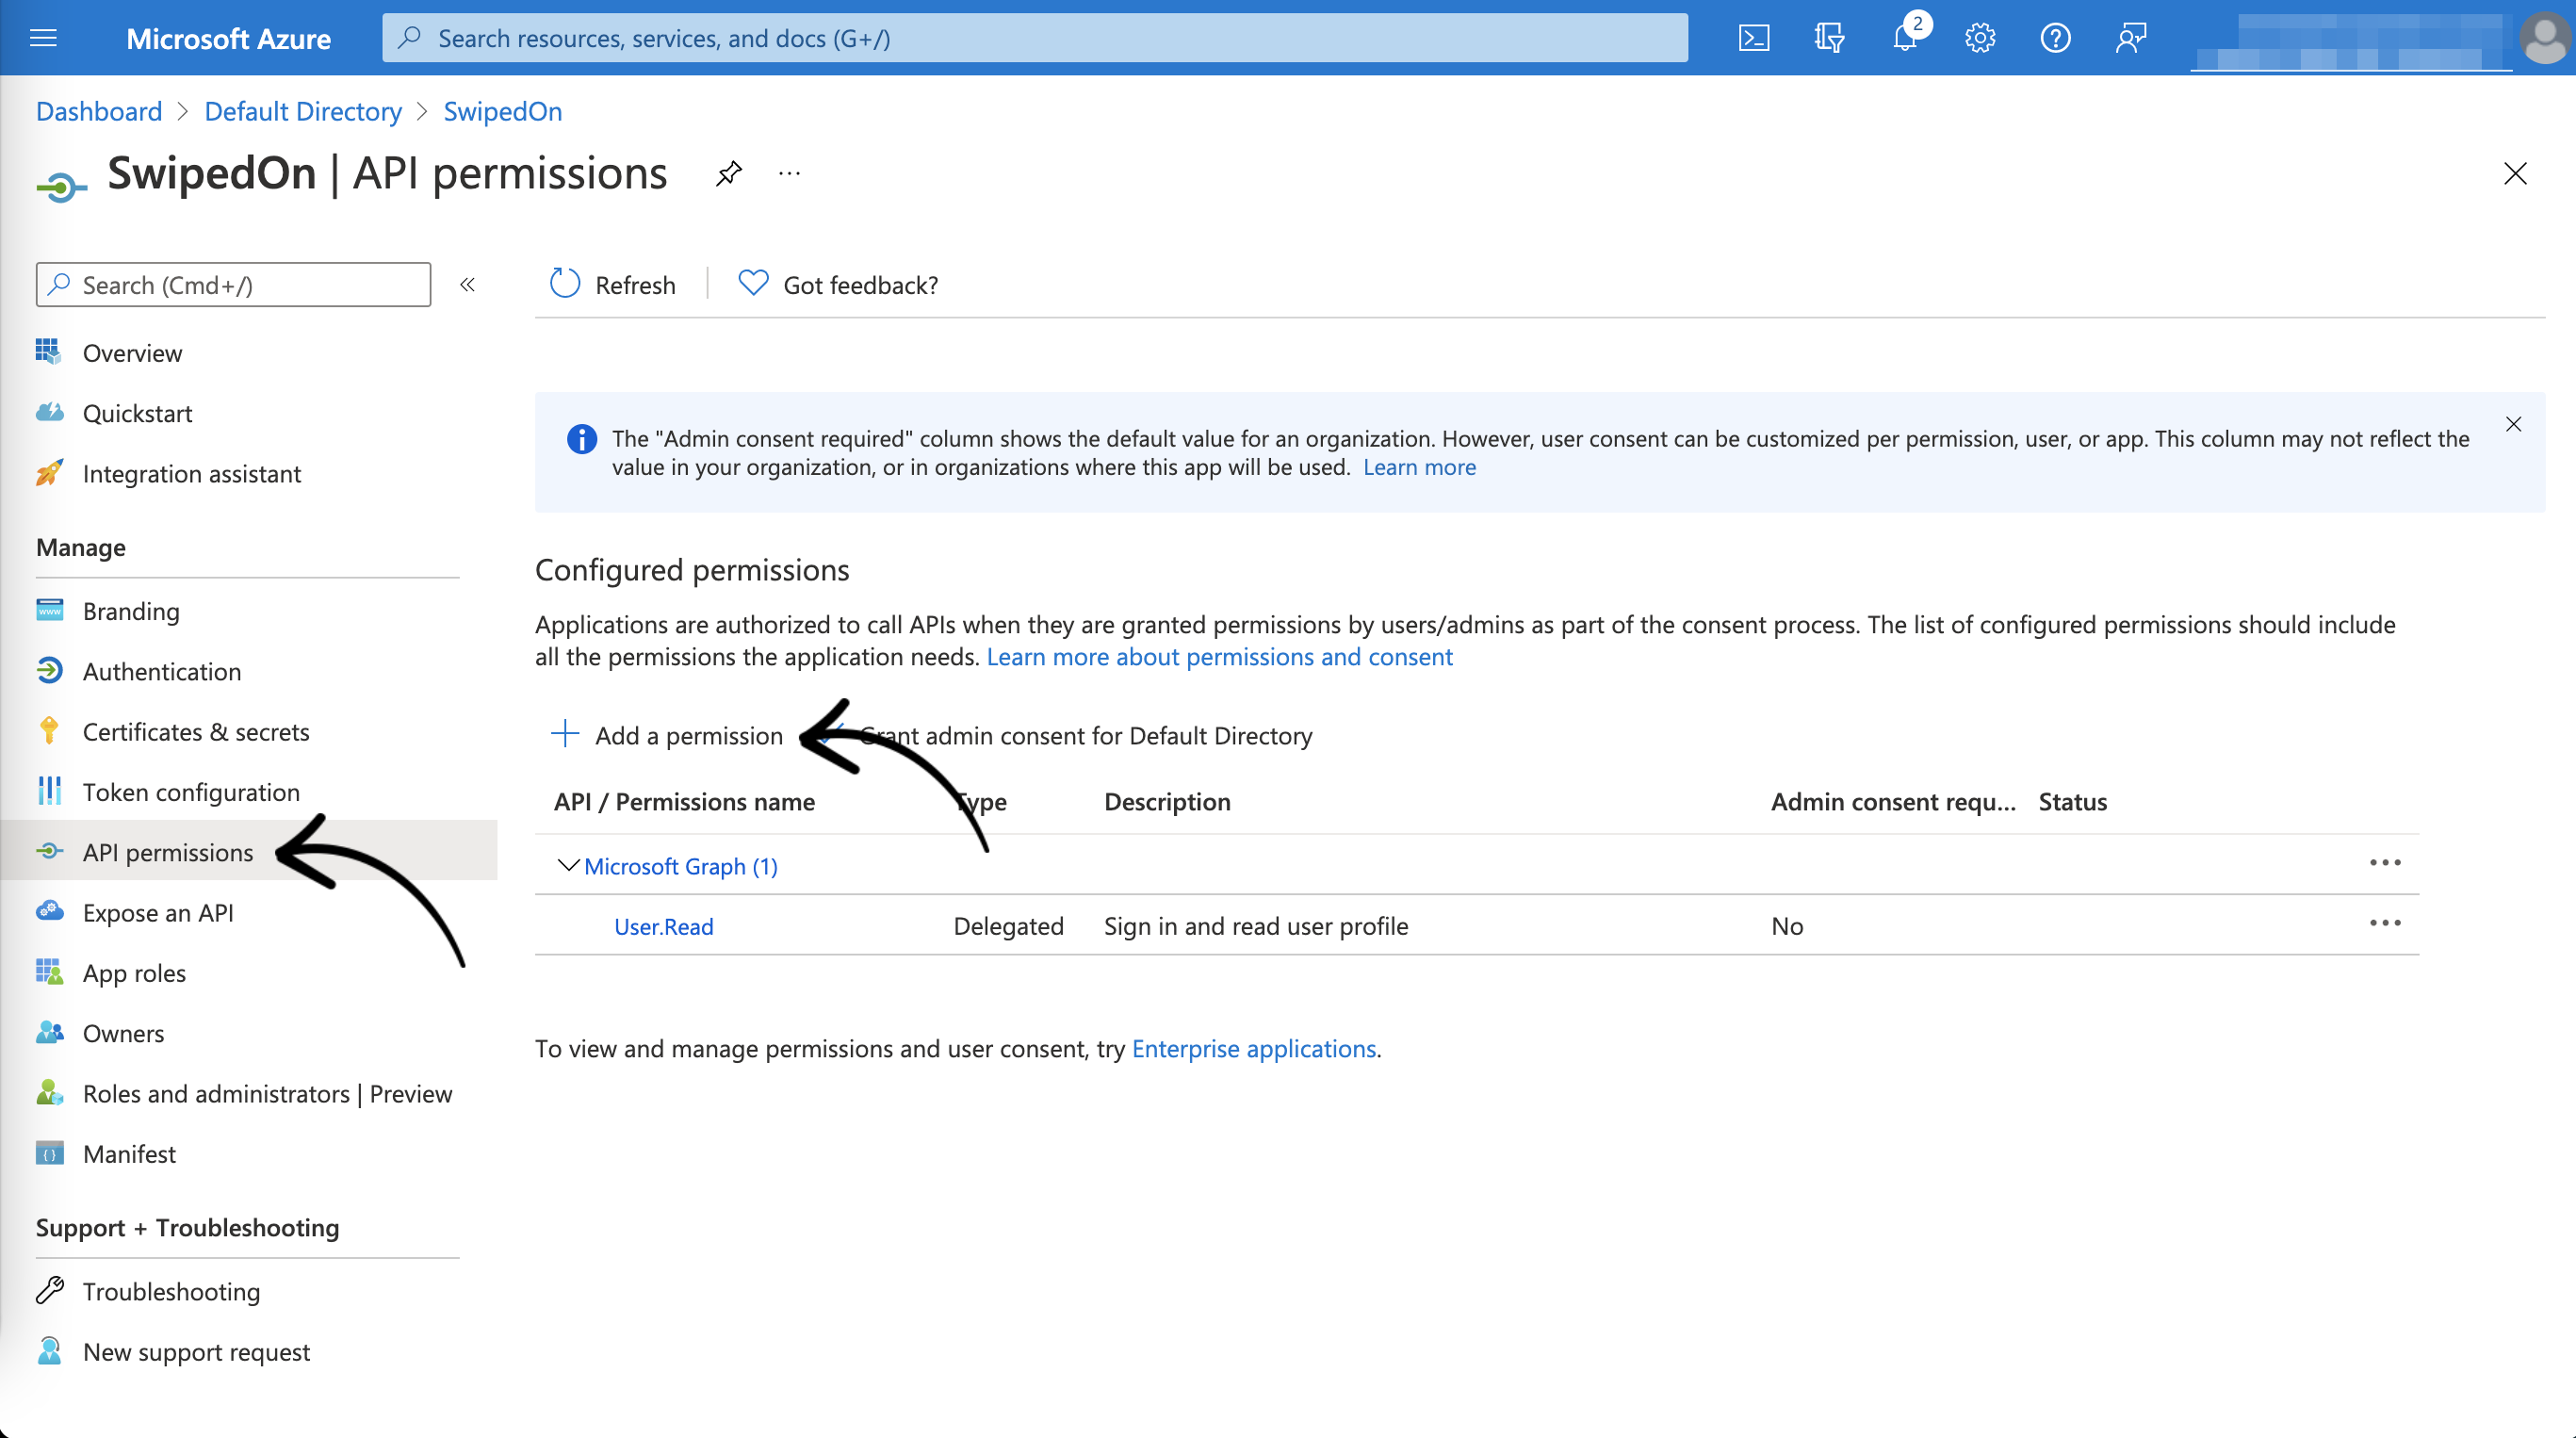
Within the Microsoft APIs, select the Microsoft Graph.
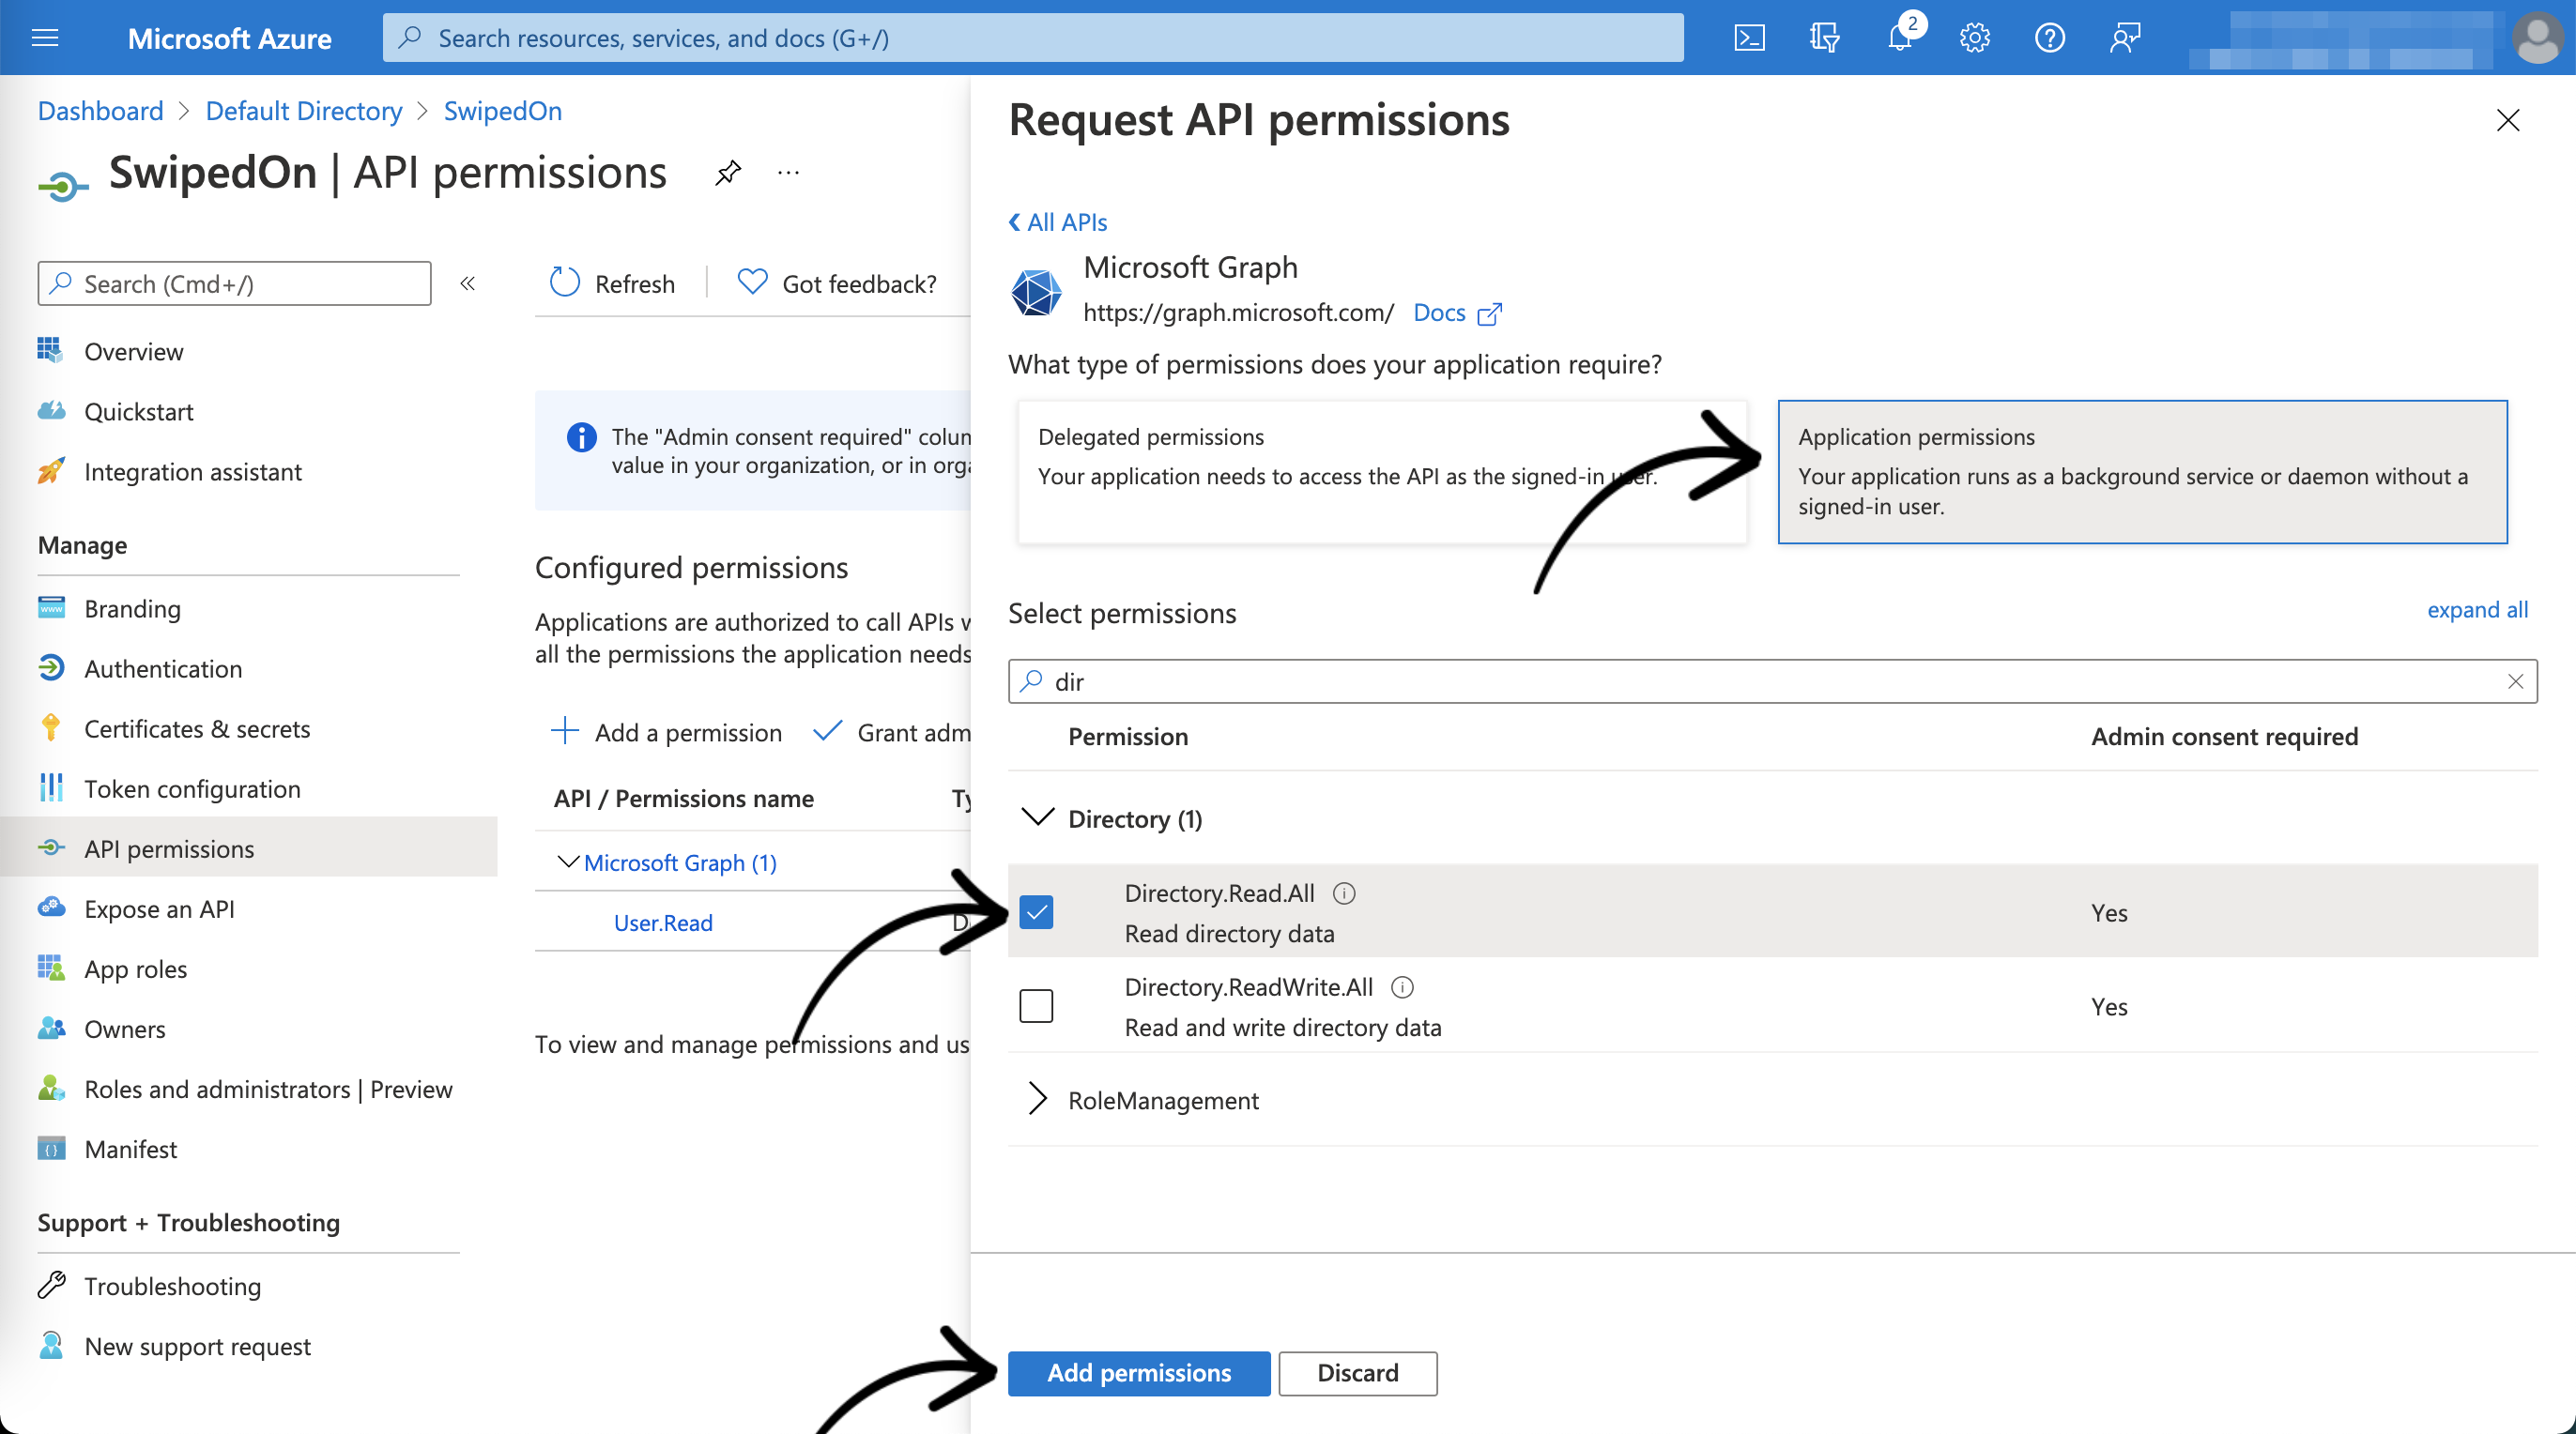
Select Application permissions, search or scroll to find Directory, then Select Directory.ReadAll, and click Add permissions.
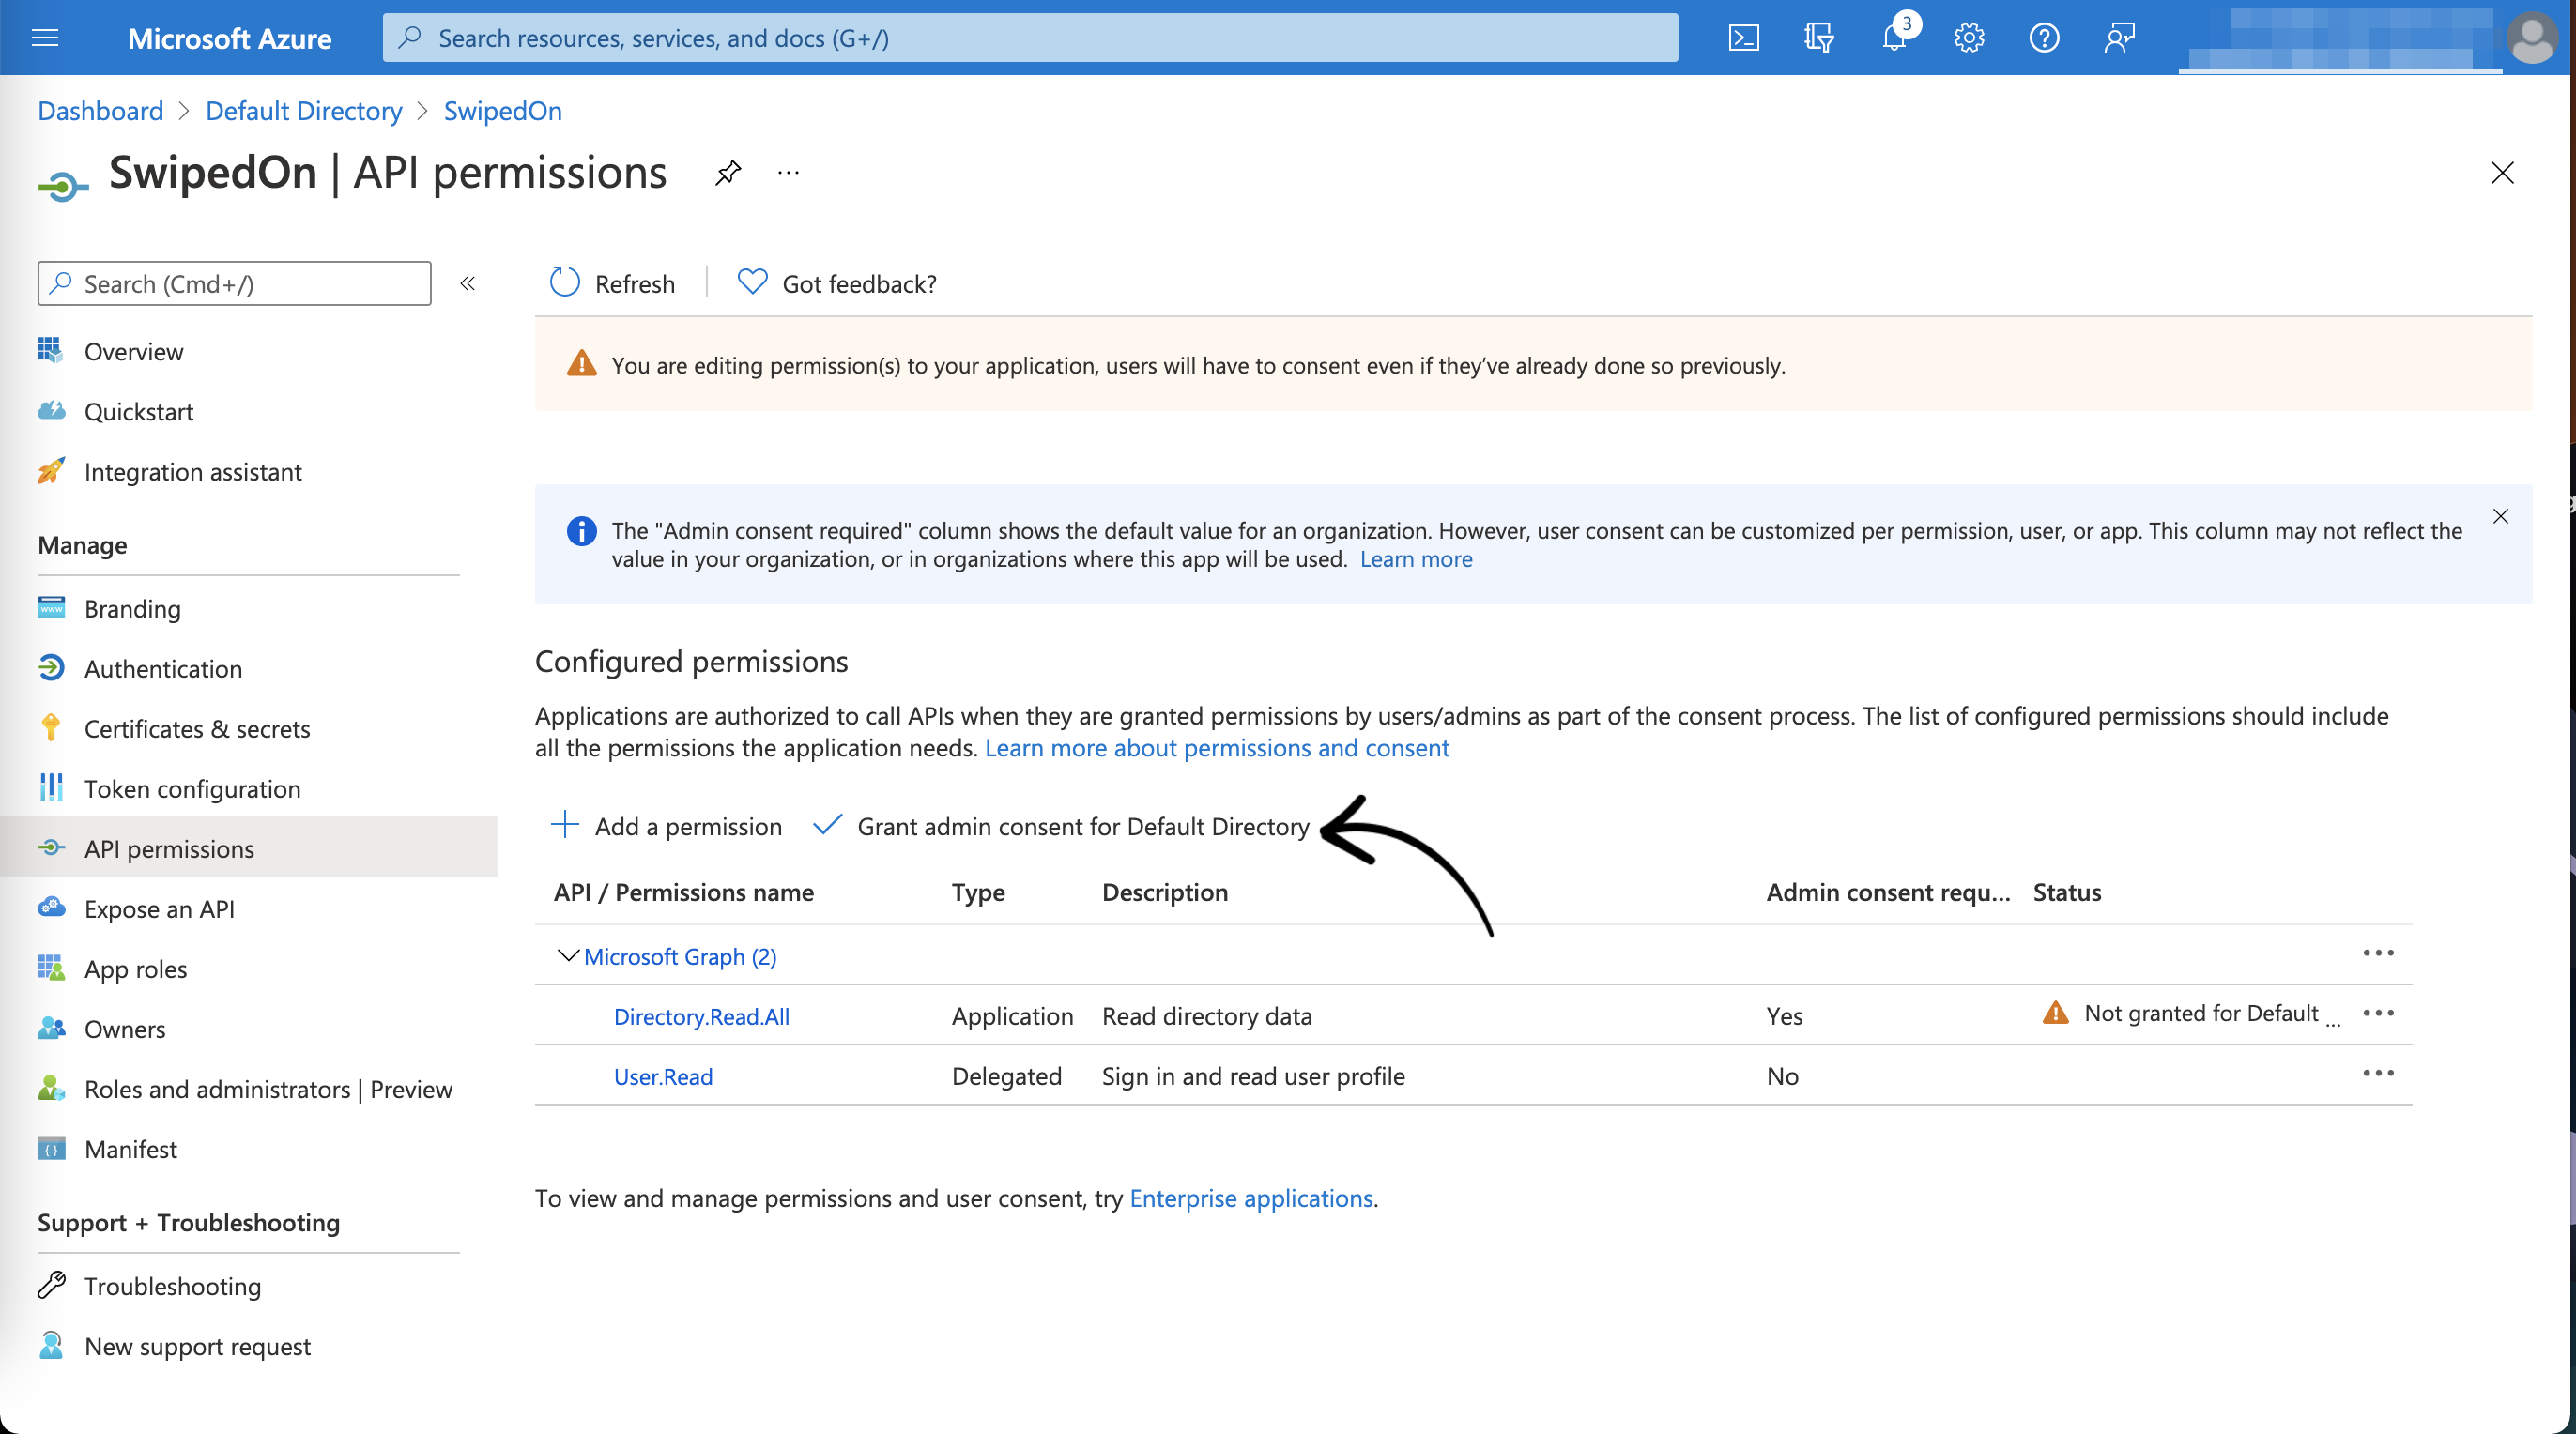
Your new permission will be shown, with a status of 'Not granted'. If you are an Azure Administrator, wait a few minutes for the Preparing to consent button to change. If you don't have permission to grant this consent, please ask an administrator to do this for you.
Once the button has been updated, click Grant admin consent for <your_directory>.
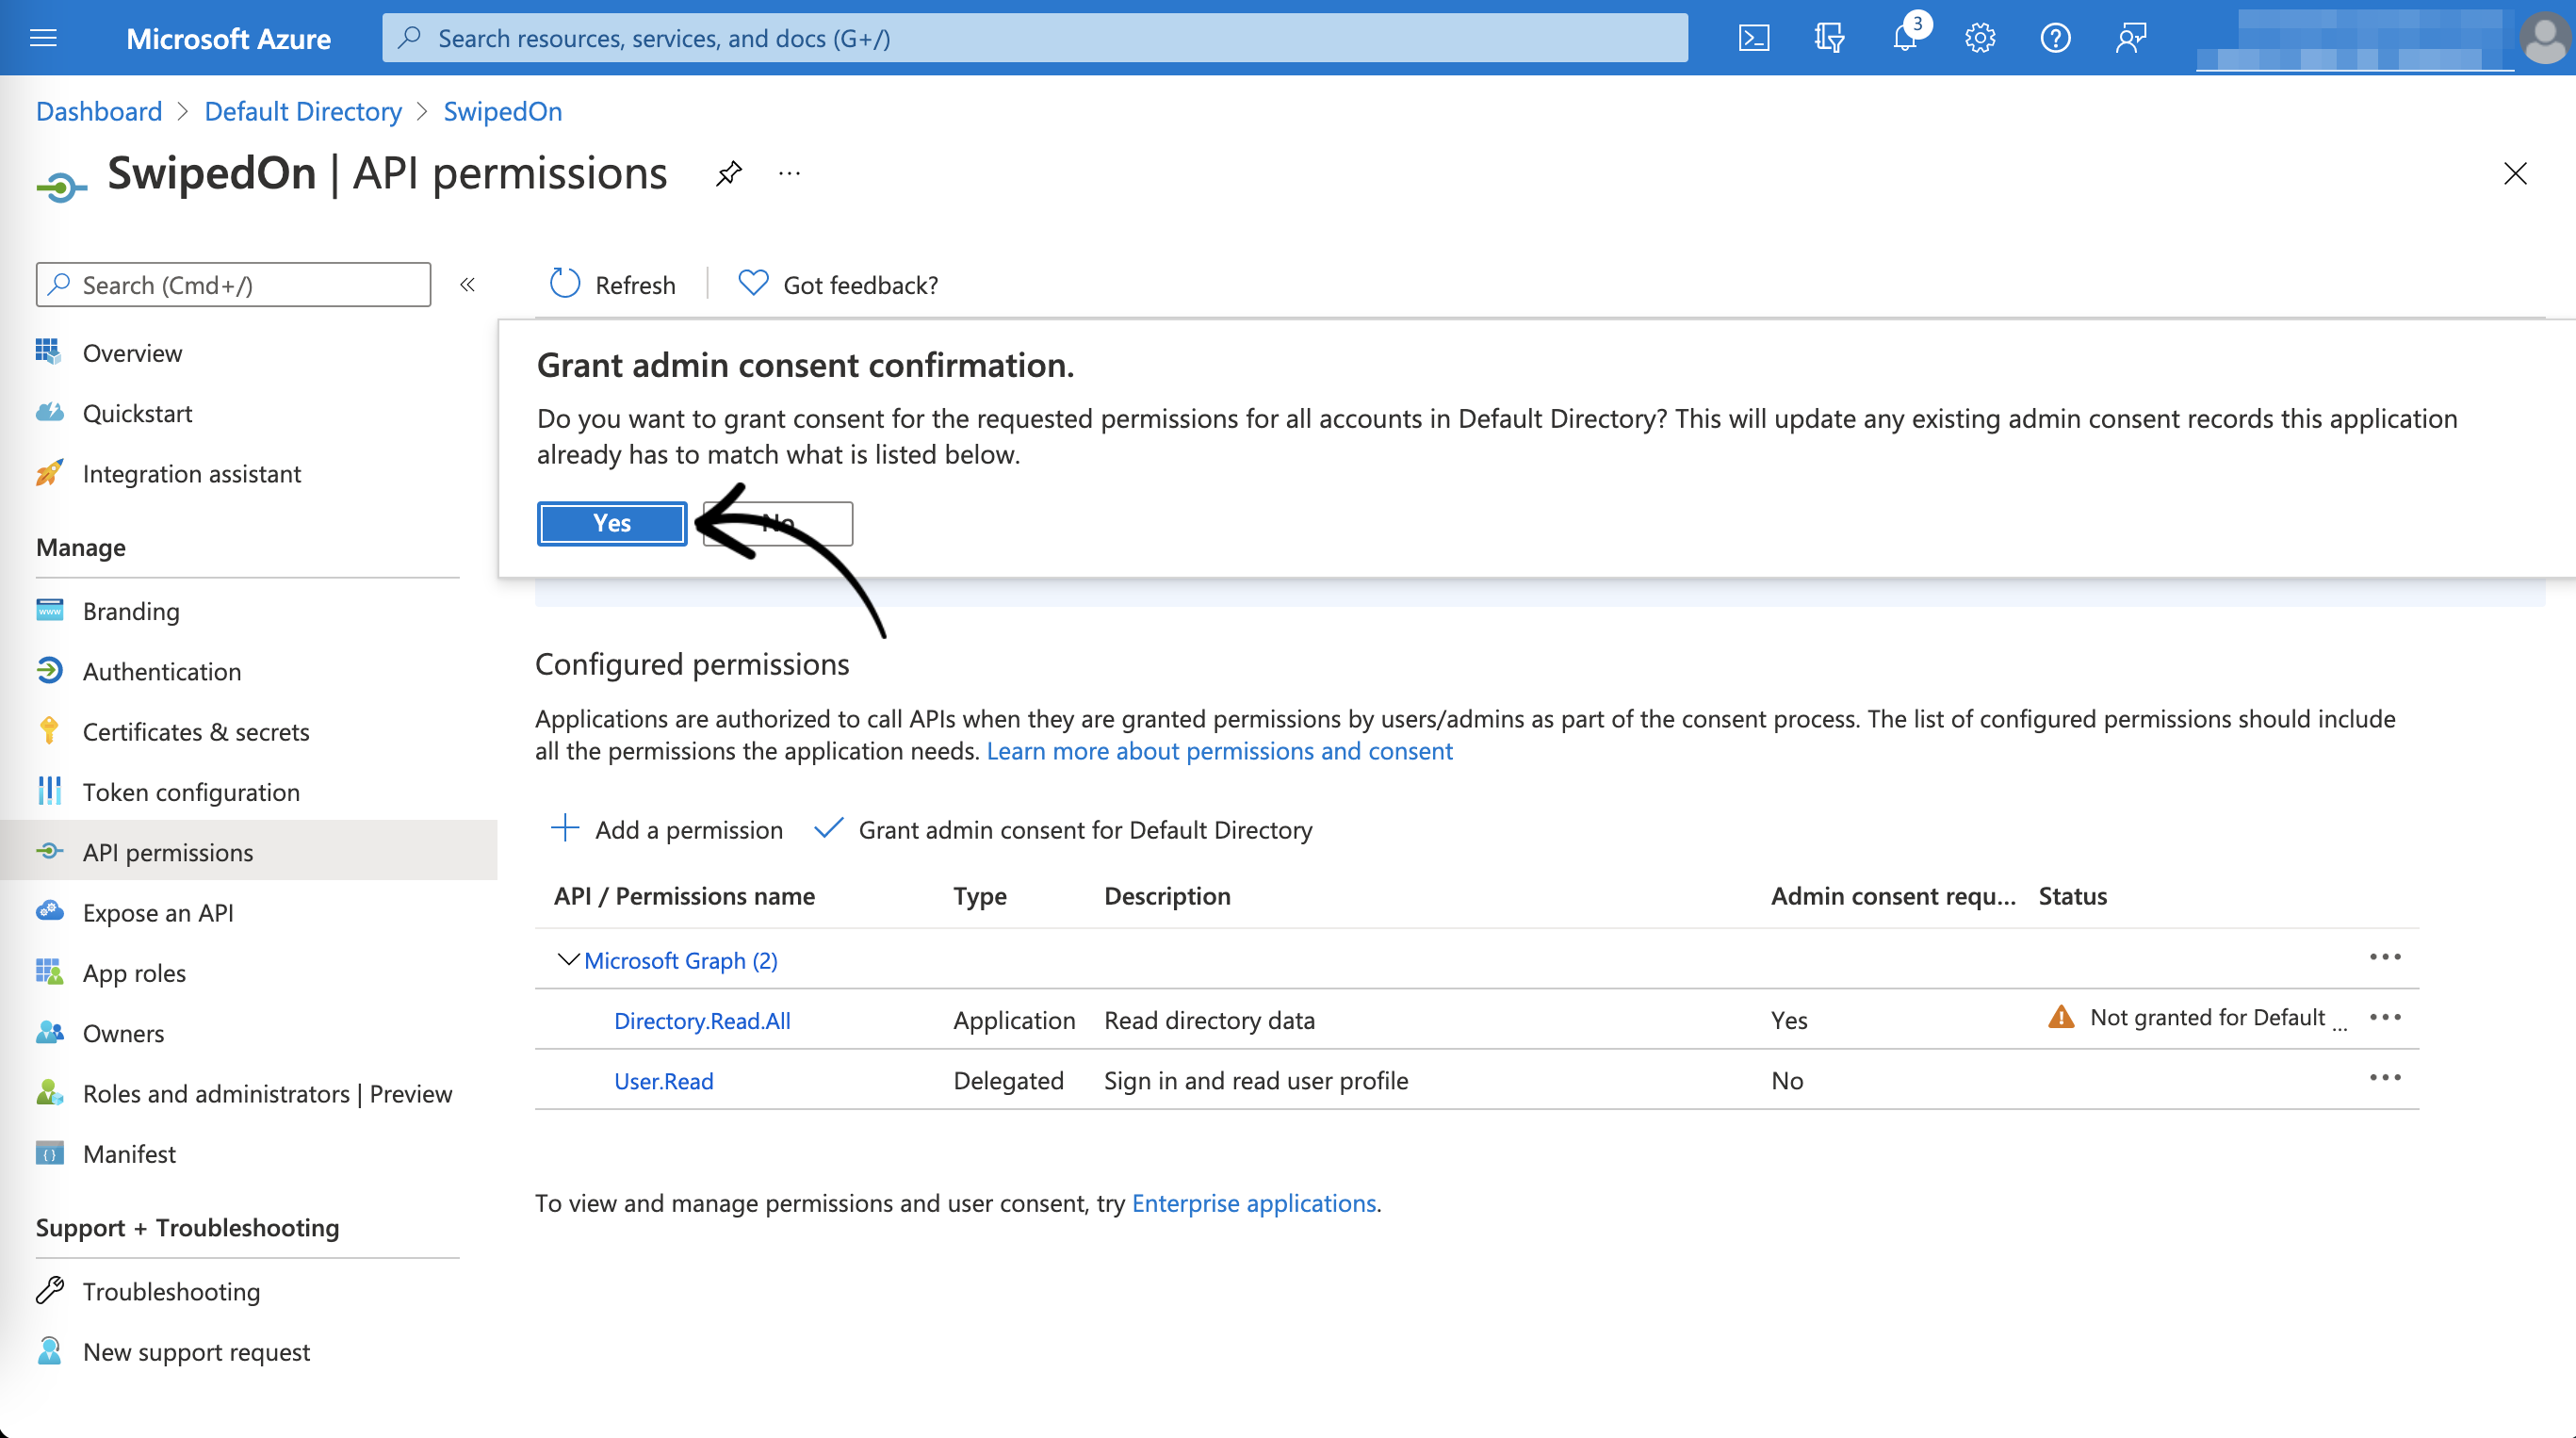
In the new window that opens, click Accept to grant these permissions.
Your permissions page will now update to display that permissions have been granted.
You're all set! Now it's time to set up the integration.