🏳 Available on our Standard, Premium & Enterprise.
How to set up the SwipedOn integration for Slack
Navigate to the 'Integrations' view of the SwipedOn web dashboard and click on 'Set Up' below the Slack heading.
Next, select the Slack workspace that SwipedOn will be integrating with from the drop-down in the top right corner of the screen, and click on the green 'Allow' button at the bottom of the page. 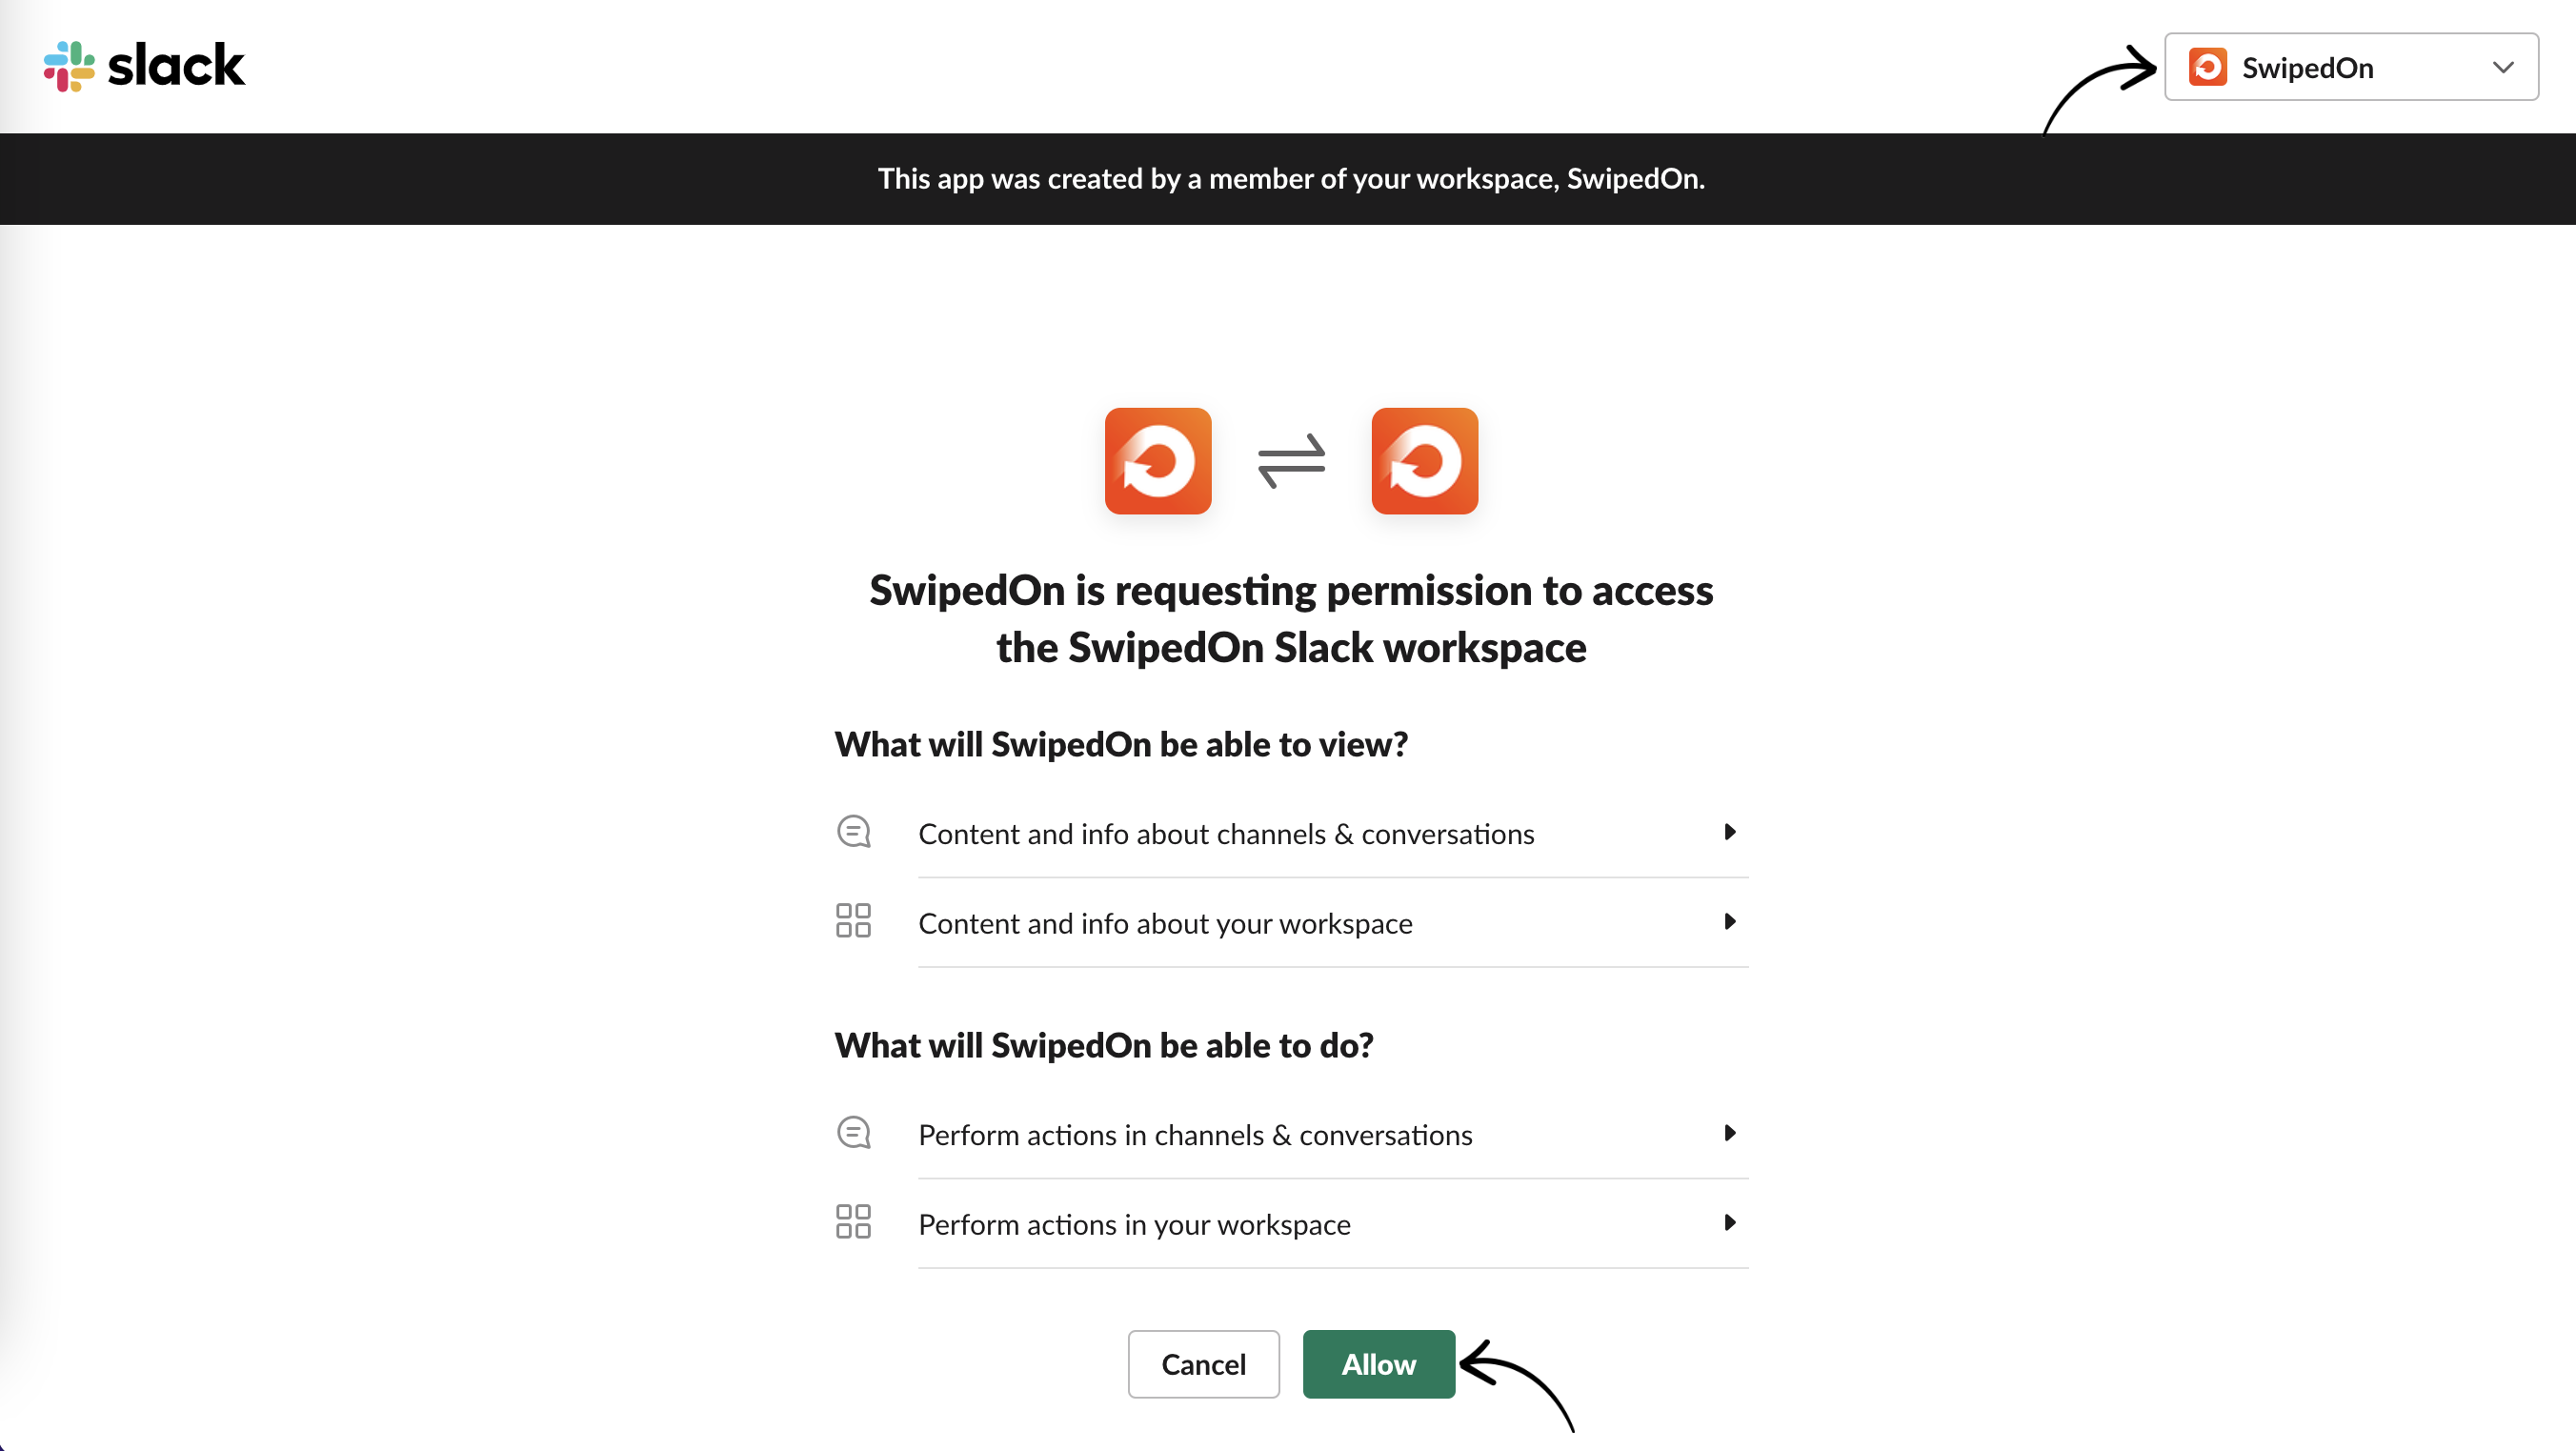
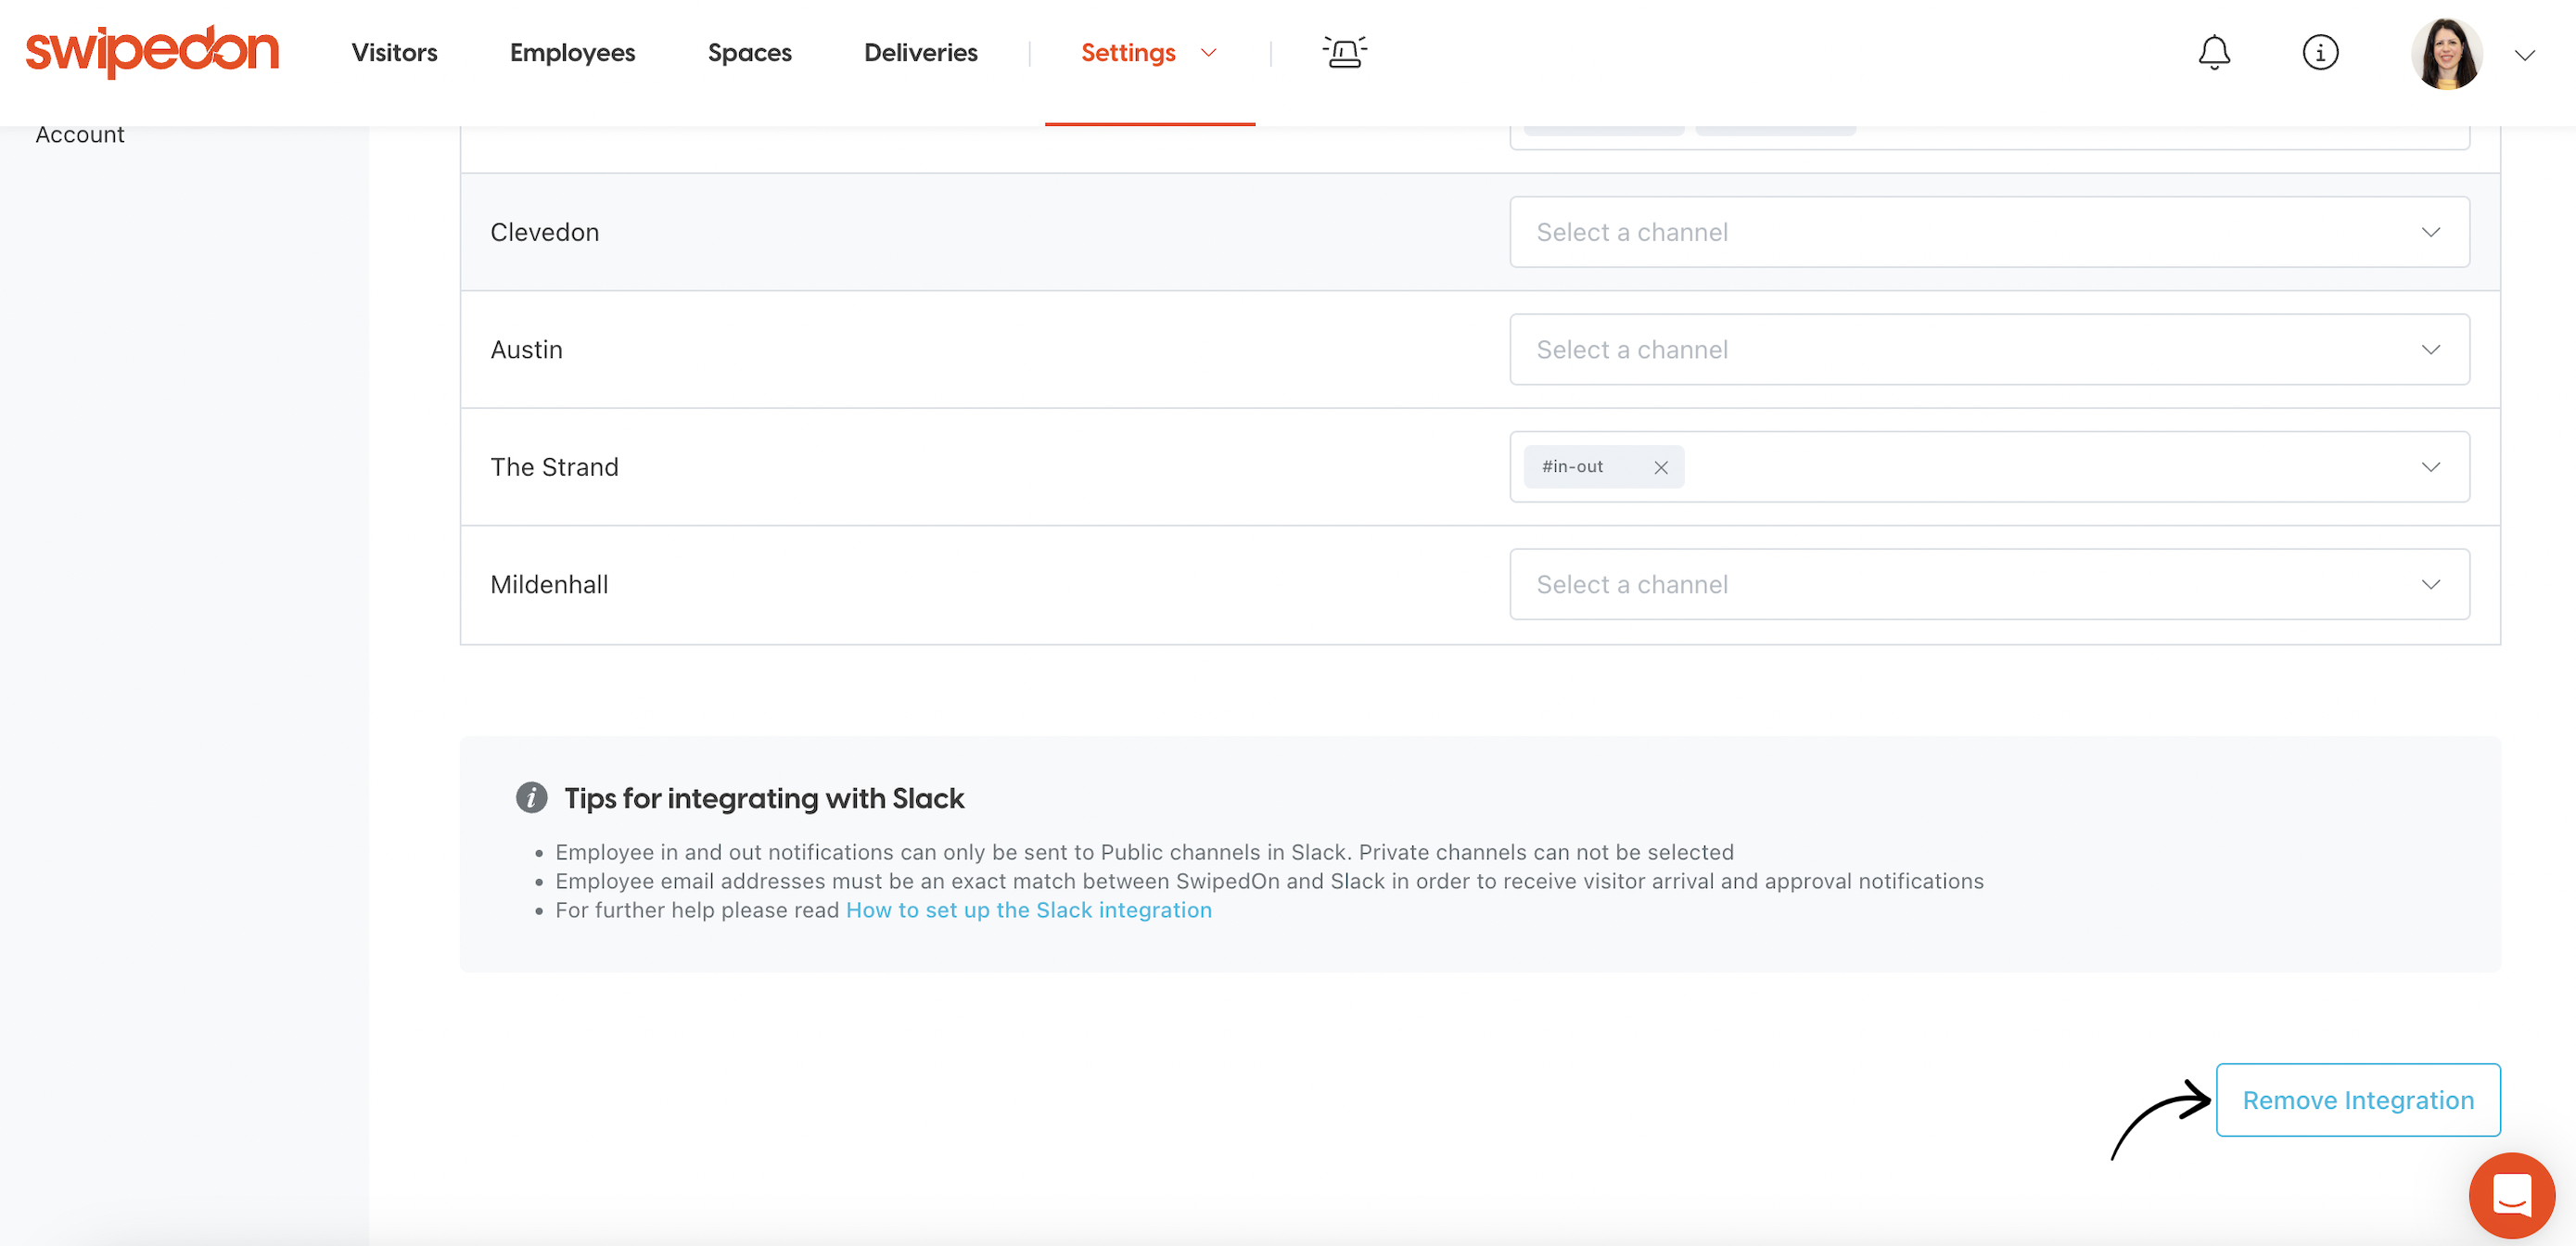
Once connected, all of the locations associated with your SwipedOn account will display to the left of the page. To the right a drop-down with the Slack channels is available to set against each location.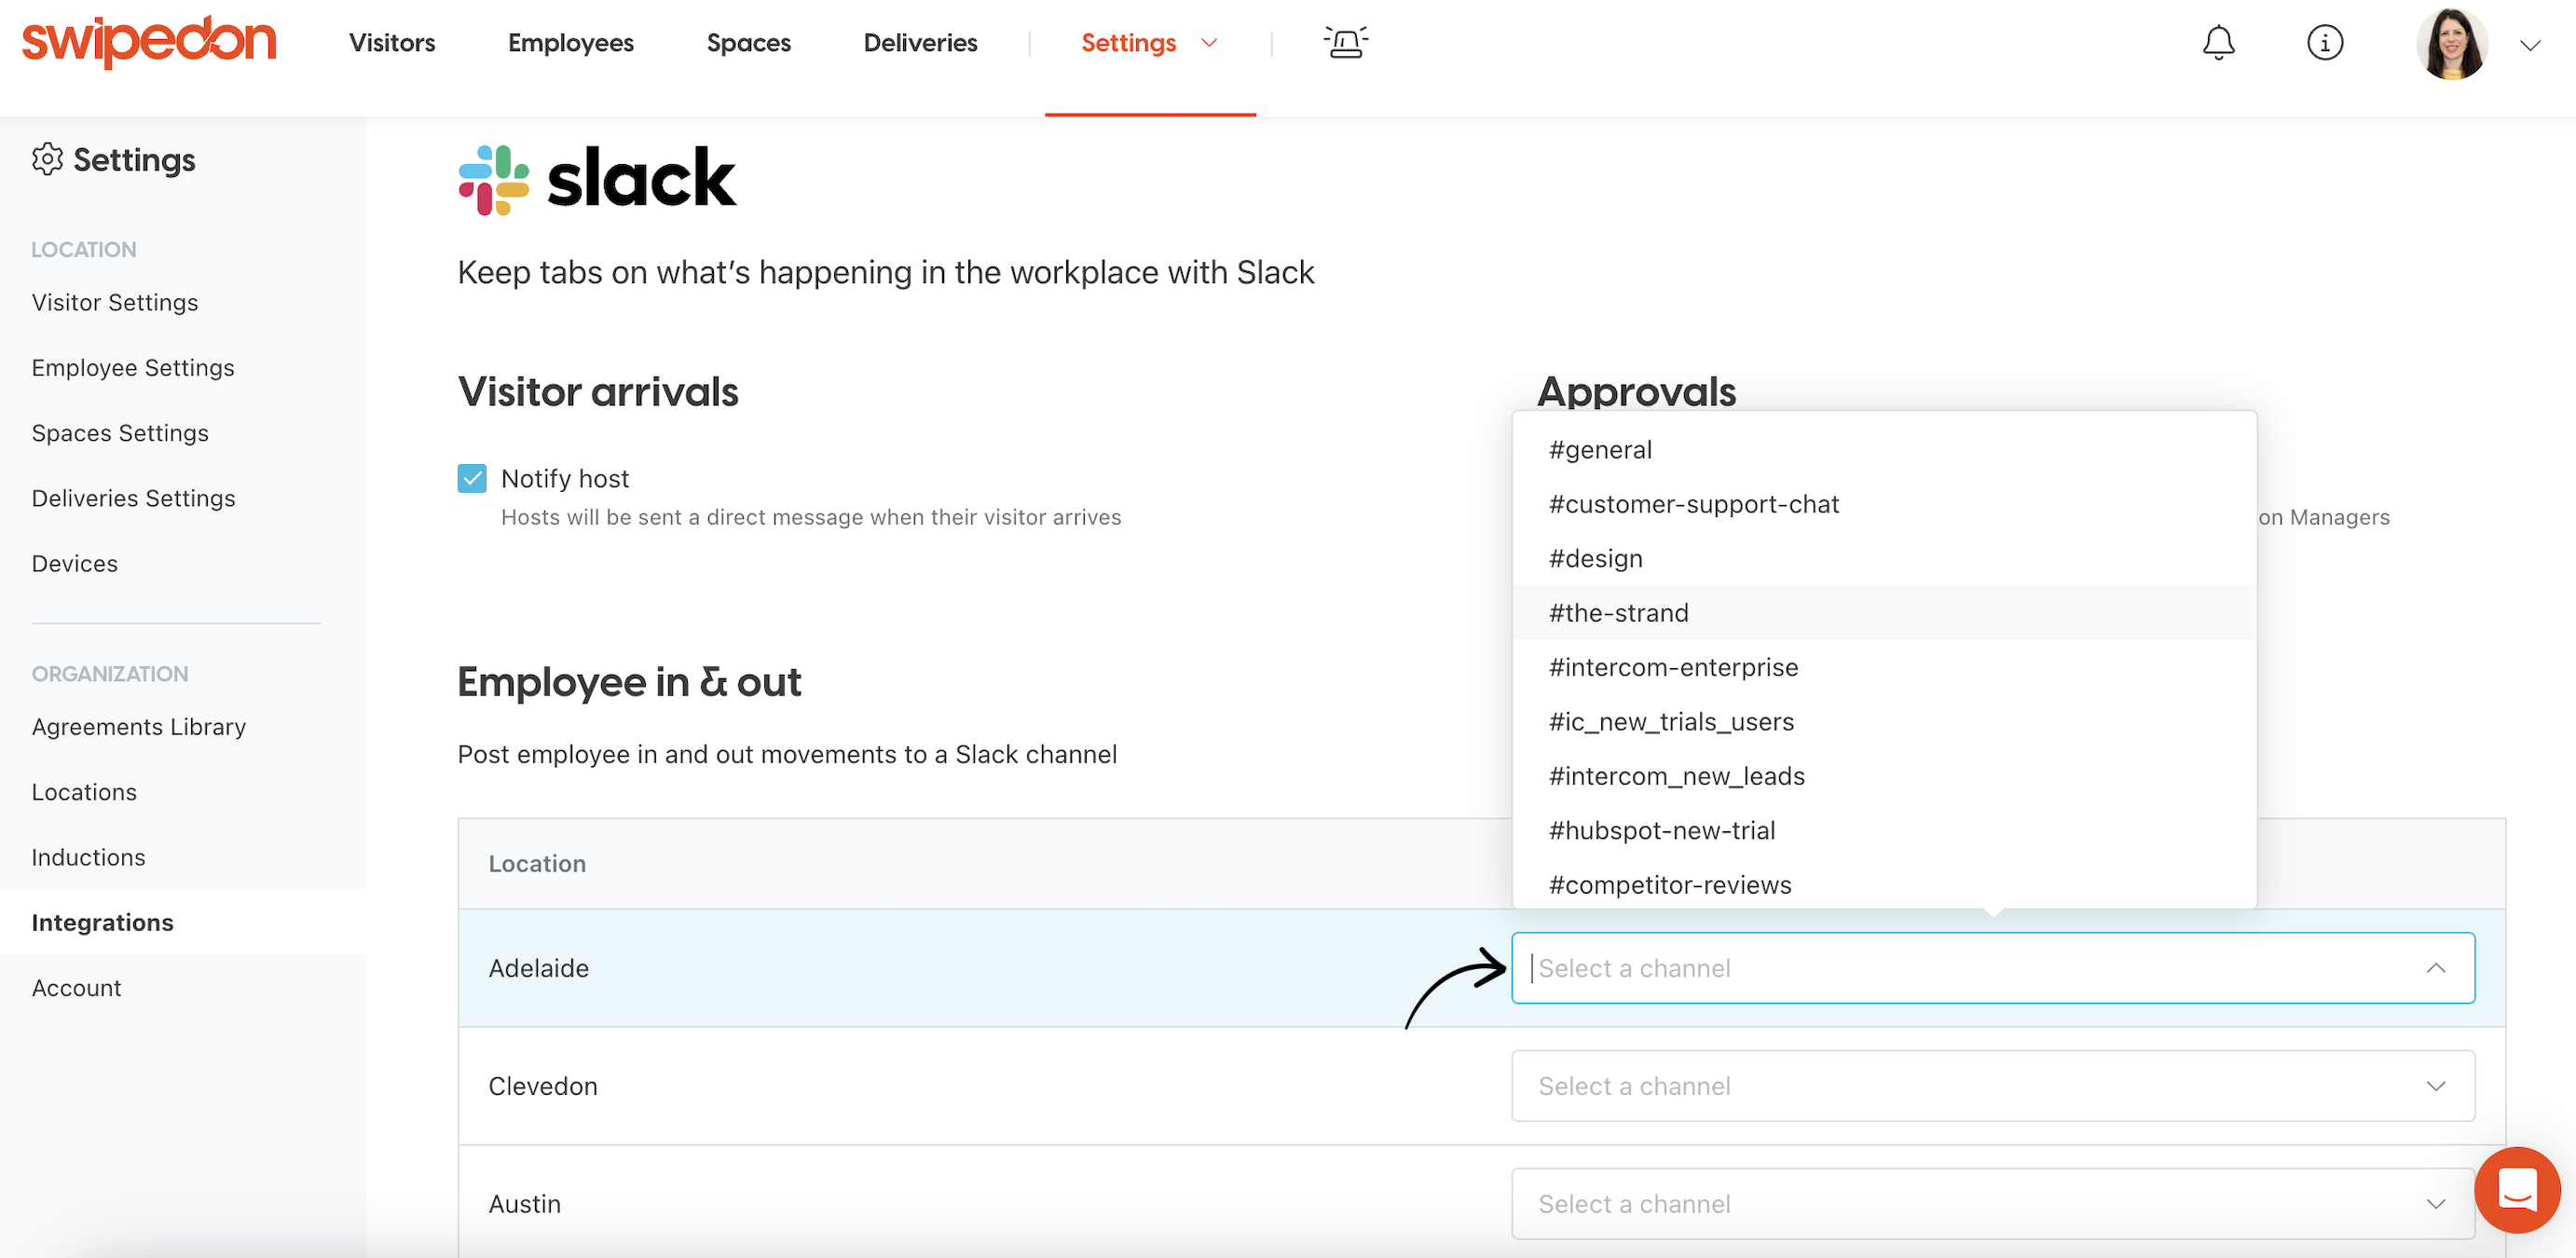
Please note: only public Slack channels can be connected. Private channels will not appear in this list.
How to manage the SwipedOn integration for Slack
If changes need to be made, company admins can do so by navigating to the 'Integrations' tab of the SwipedOn web dashboard and can click on the 'Manage' button.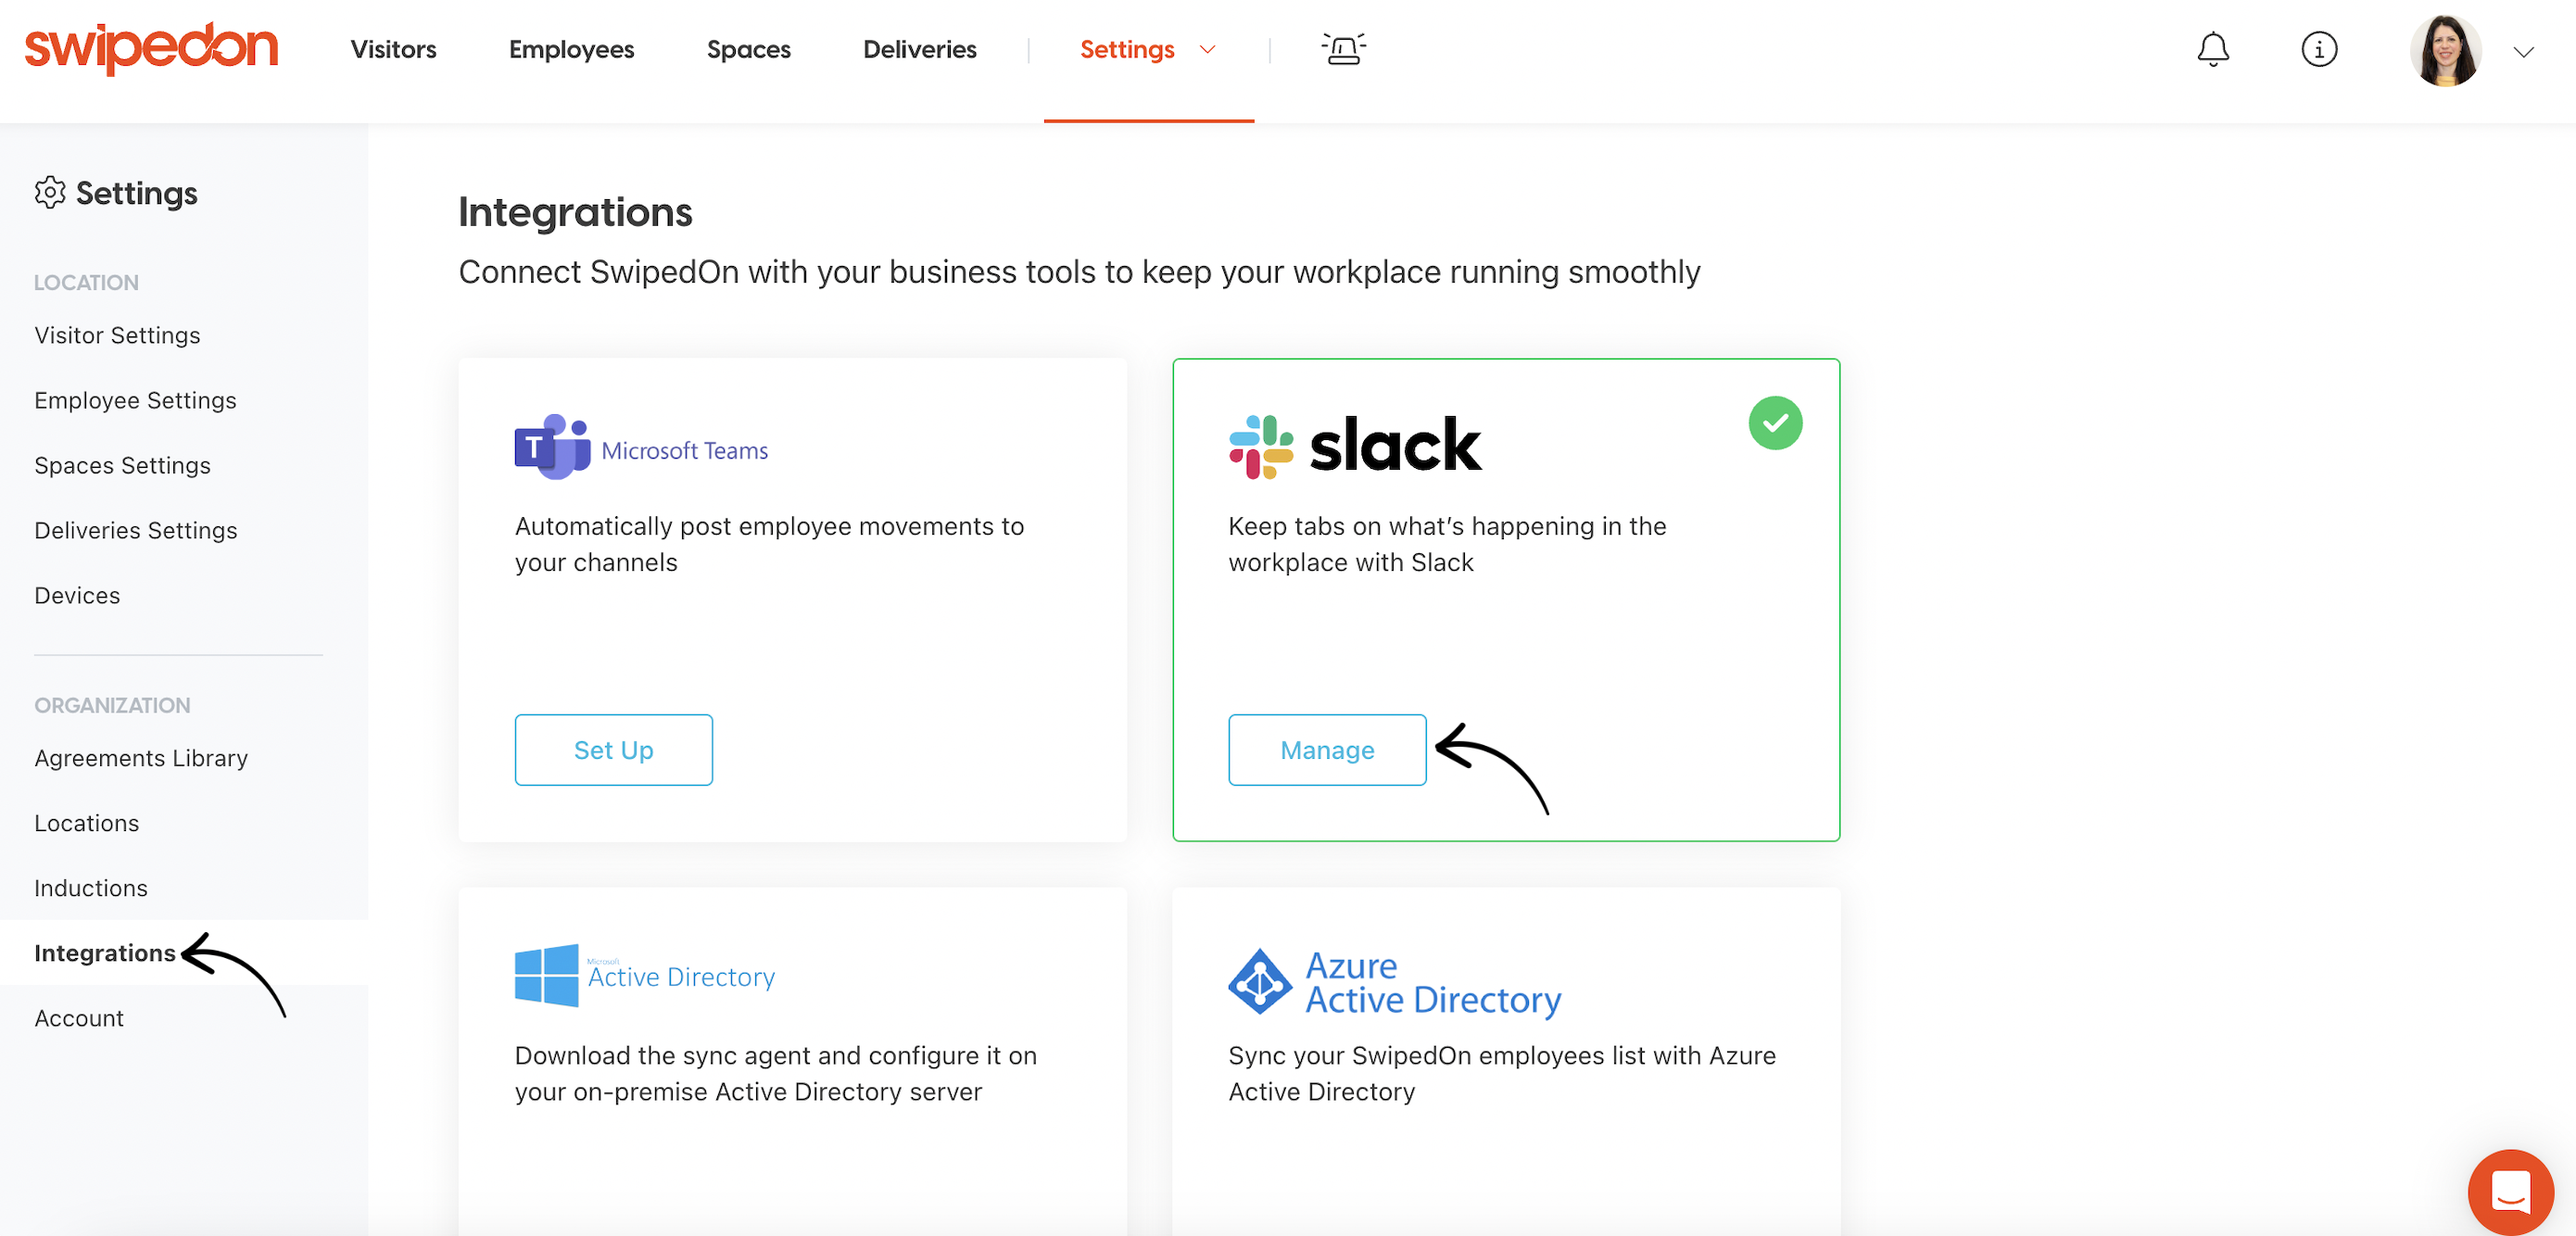
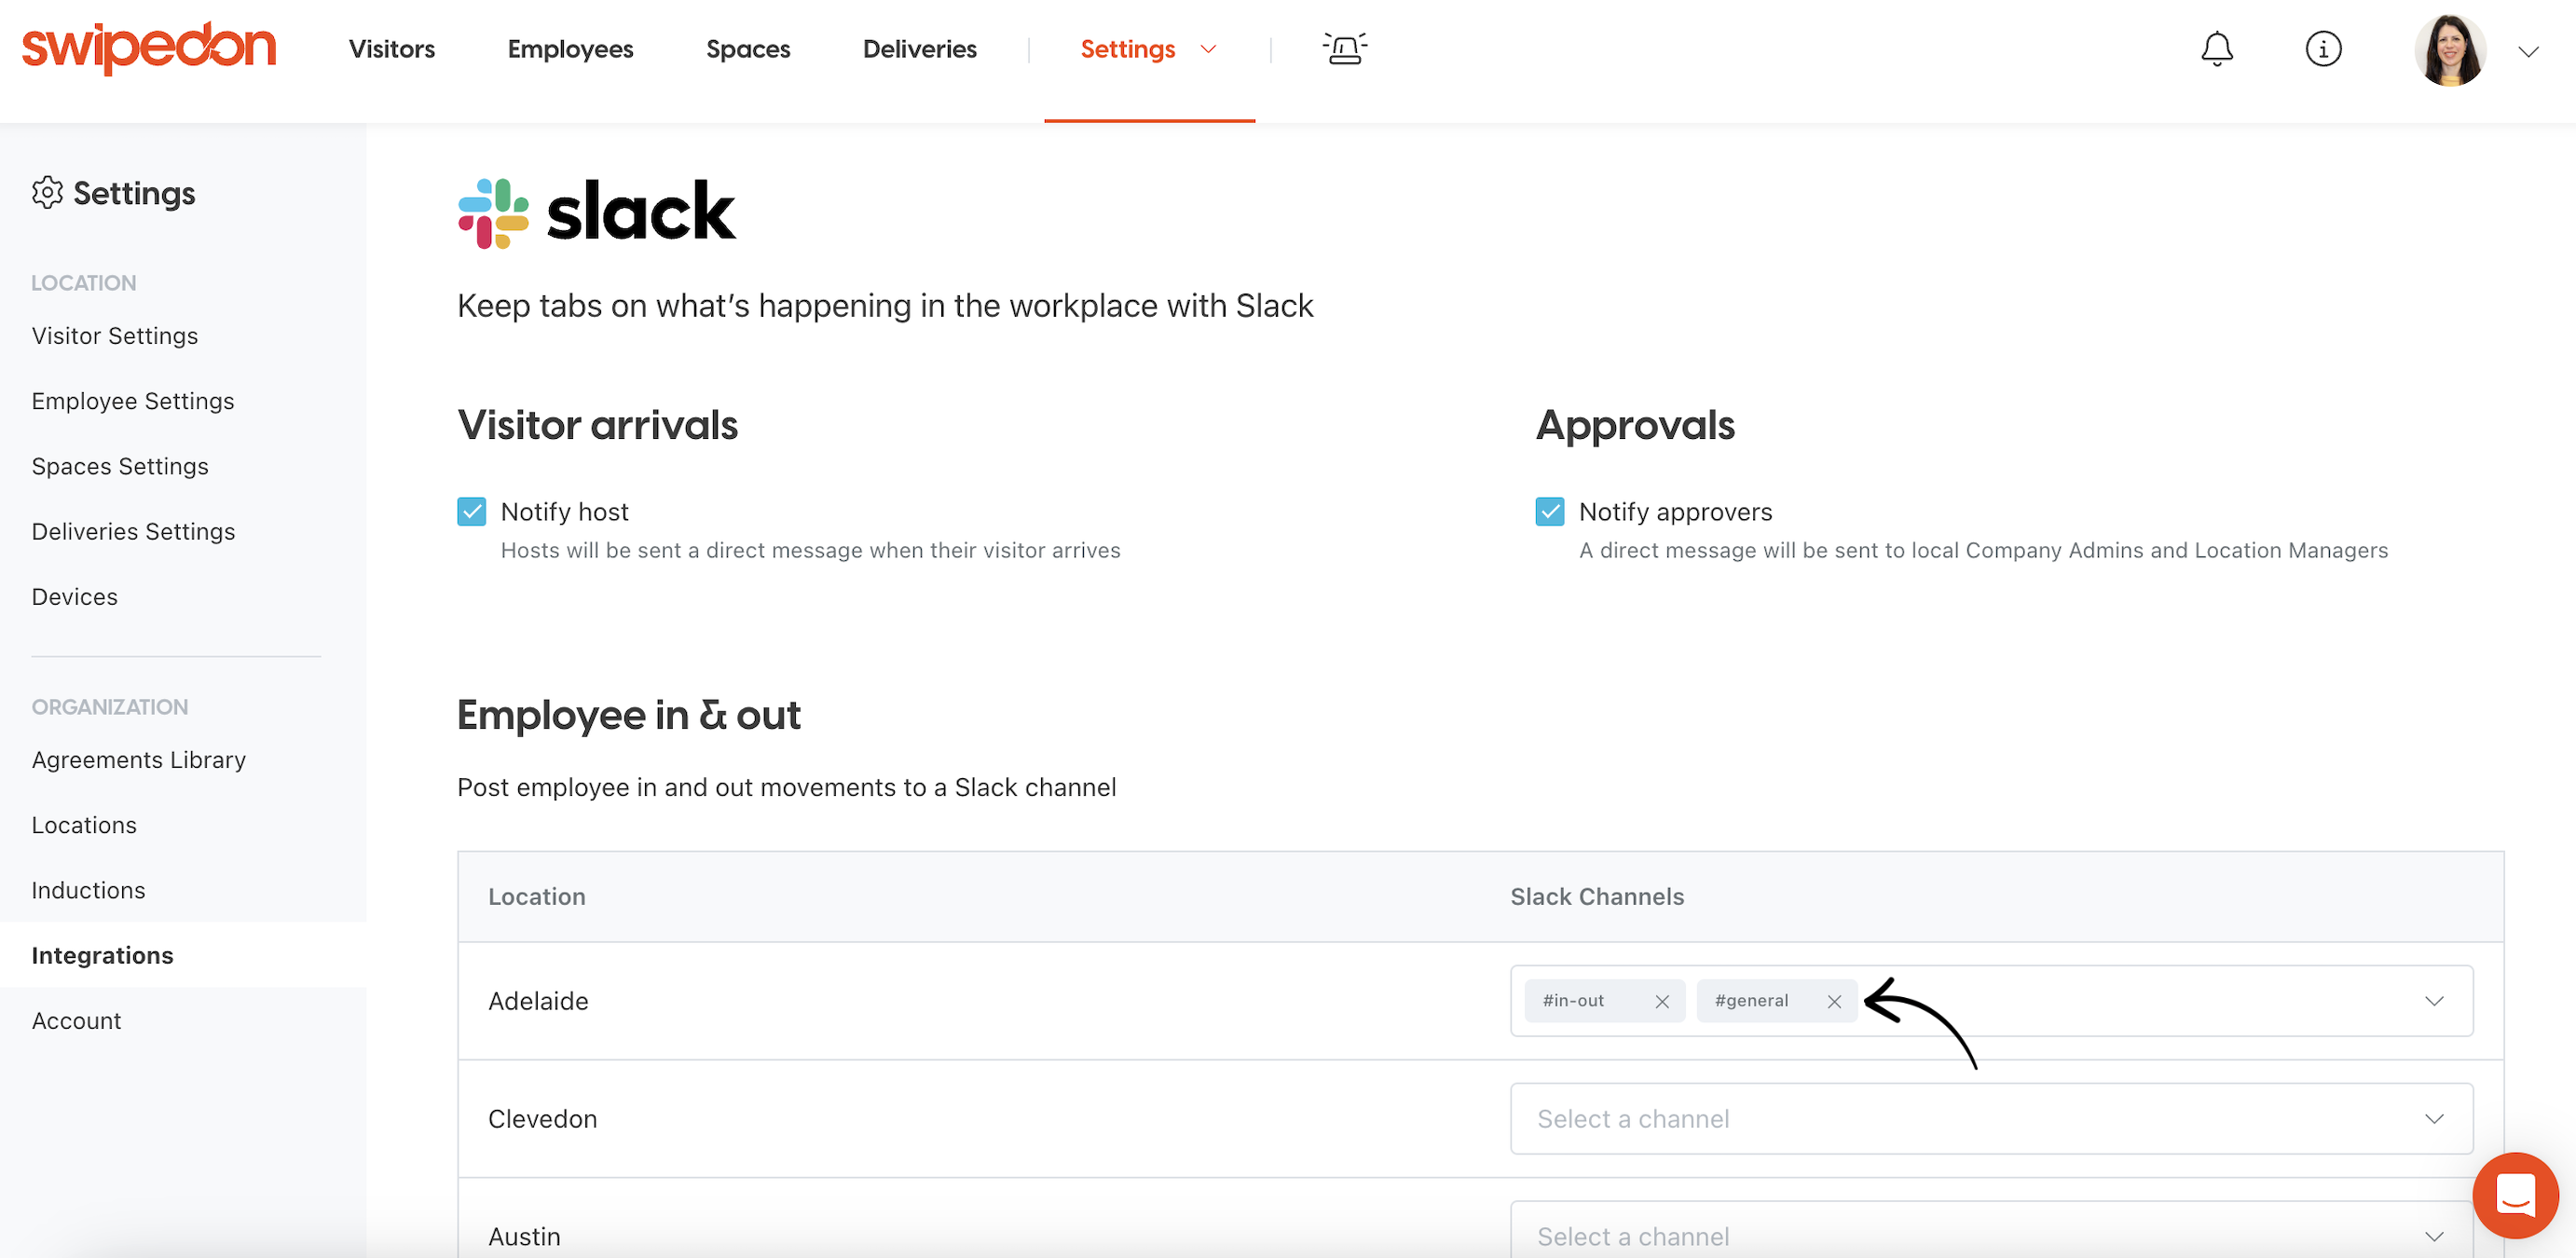
To remove a mapped Slack channel, click on the 'x' icon to the right of the channel name mapped against the location to disconnect the employee in/out movements from showing here.
If you click on the 'Remove Integration' button it will result in all mapped locations and Slack channels being deactivated and deleted. This will also remove the SwipedOn app from the Slack workspace. The integration will then need to be set up again as shown at the top of this article.
Additional considerations
If a location is connected to a Slack channel that is then archived, deleted or made private, the SwipedOn connections will also be removed. To continue receiving updates in that channel, a new location would have to be connected.
The SwipedOn app can be removed from your Slack workspace by following the steps here.