🏳️ Available for Standard, Premium and Enterprise
To make managing locations and location settings easier for admins, SwipedOn offers location groups for those accounts subscribed to a multi-location Standard, Premium or Enterprise plan. Location groups all share the same settings and configurations e.g branding, visitor and employee settings etc. whereas single locations can all have different settings and configurations.
How to create a location group
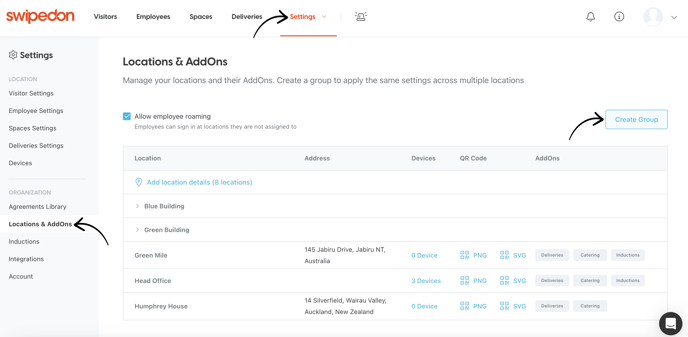
- Navigate to the 'Settings' > 'Locations & AddOns' view of the SwipedOn web dashboard and add a new location group by clicking on the 'Create Group' button.
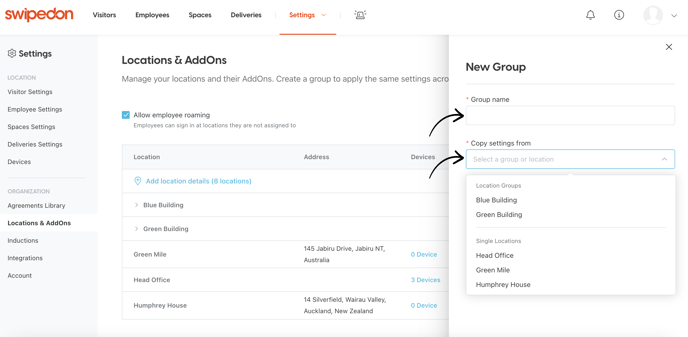
- This will open up a drawer on the right hand side of the page - input a name for this group and select an existing location to copy any current settings from and then click 'Create Group'.
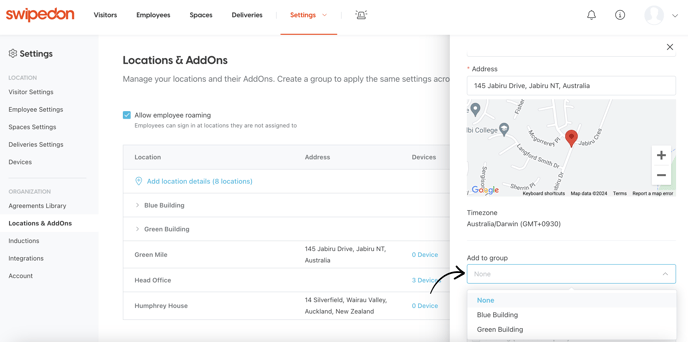
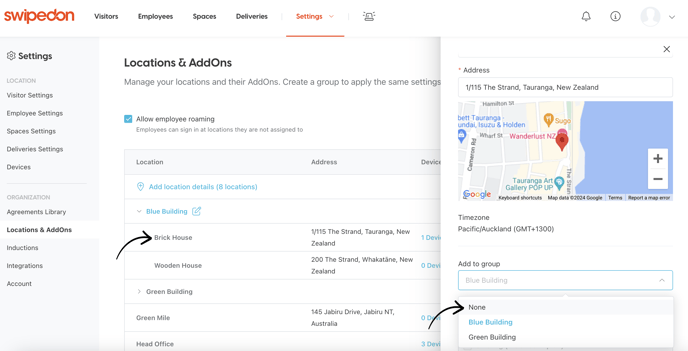
- Once a group has been created, you can add any locations that are already set up into this group by clicking on that particular location, which will open up the drawer on the right hand side. You can then click on the "Add to Group" dropdown and select which group you'd like to move this location into.
- New locations can be added directly to a group if the plan has additional locations available by clicking on the 'Add location details' on the available locations.
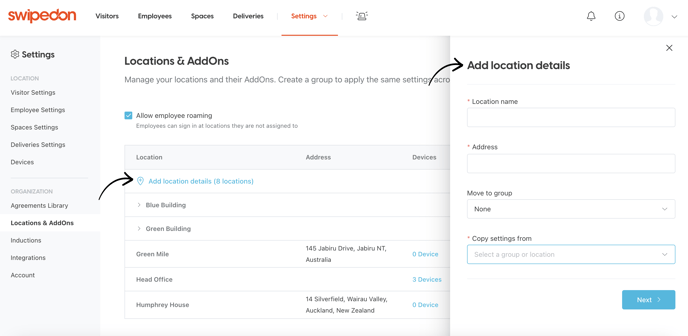
- Once the location's name and address have been entered against the designated fields, select the group then click 'Save'
Any locations created in or moved into a group will automatically assume all of the settings currently set for that location group. There is no limit to the number of groups that can be created or locations that can sit within a group.
How to remove a location from a group
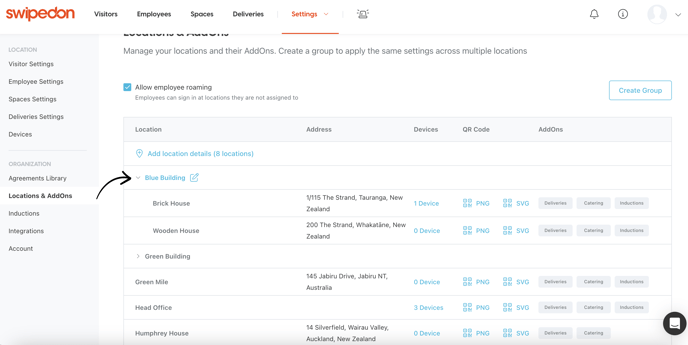
To move a location within a group to be an independent single location, navigate to the Settings > 'Locations & AddOns' view where you can see all locations and groups listed in a table. Click on the drop-down arrow next to the group to display the grouped locations - these will be indented from the main list to show the separation between locations within the group, and those that are independent, as shown below.
- From here, simply click on the location that will be removed from this group and when the drawer opens on the right hand side, change the drop down under 'Add to Group' to be 'None' and then click 'Save'. You will then be able to see that location has moved below to be listed with all of the independent locations.
- Locations moved this way will retain all of the settings of the group it was removed from, but from that point on will be independent. Settings updated for that location will now apply only to that location.