Visitor fields are customizable fields designed to capture specific pieces of information, allowing you to tailor the sign-in experience for different types of visitors. We offer seven different customizable types of visitor fields which can be set up by those with company admin roles.
Click here to learn more about the different visitor field types
Below we will cover how to manage the visitor fields, such as how to hide, reorder and remove these fields.
Pre-set Visitor Fields
The 'Full Name' field is a mandatory field. This field cannot be edited, hidden or set to not required as, at a minimum, we need a full name for record-keeping purposes.
The second visitor field that is set by default to 'Company Name' can be edited by clicking on this text. To hide this field from showing, click on the slider to toggle it off, or if you'd rather this not be a required field, just uncheck the required checkbox.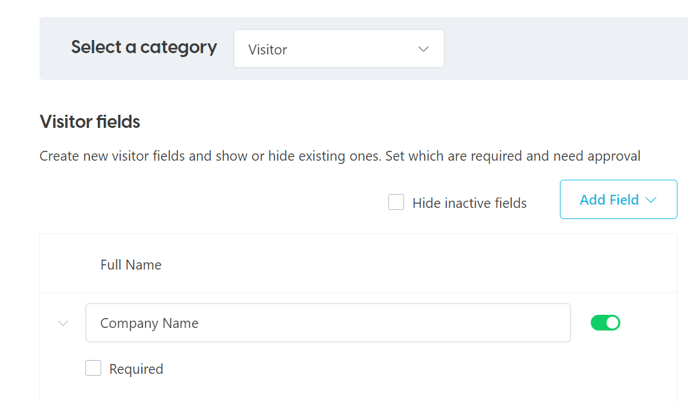
Setting a field to 'required'
You may want all visitors to fill out a custom visitor field when signing in. If so, the 'Required' checkbox can be enabled by clicking on the visitor field you would like to apply this to and checking this option. 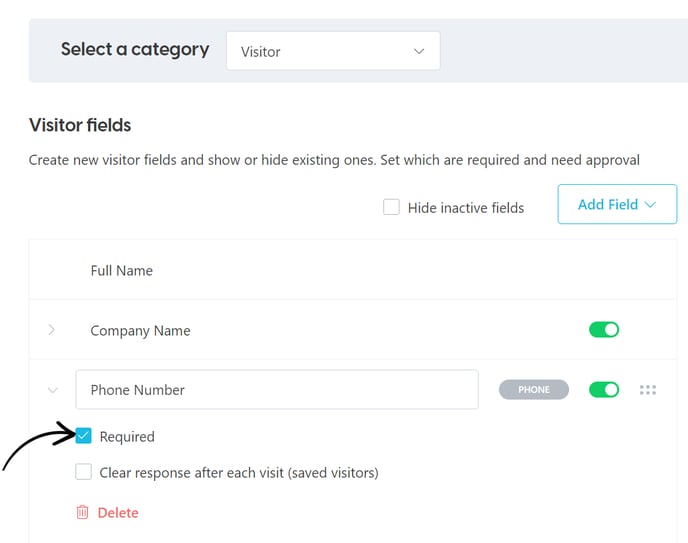
Enabling 'Clear response for every visit'
If the 'Allow visitors to save their details for their next visit' feature has been enabled within the 'Settings' > 'Visitor Settings' > 'Advanced Settings' view of the web dashboard, the 'Clear response after each visit' can be enabled against custom visitor fields.
If there is a specific field that a visitor should fill out again each time they sign-in, and they use the 'Remember me' feature, the company admin can enable the 'Clear response after each visit' option against this field to ensure information does not populate the remembered information upon their next sign in.
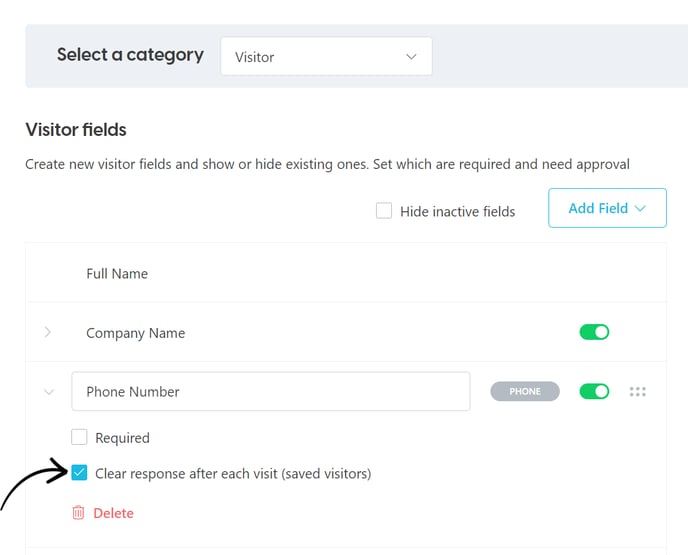
Simply click on the visitor field you would like to enable this setting against, and check the box as shown above. Now, when your remembered visitors sign in next time, this field will be clear and they must re-enter this information.
Reordering and hiding fields
To reorder custom visitor fields, click and drag from the right of the field and drop in the preferred order.
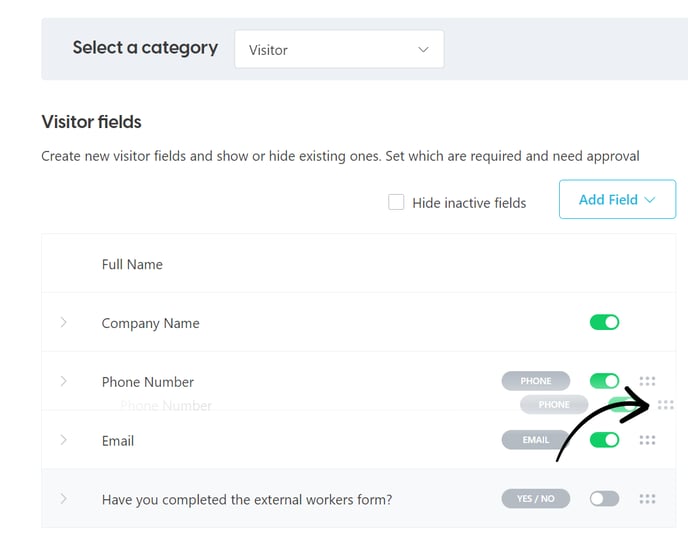
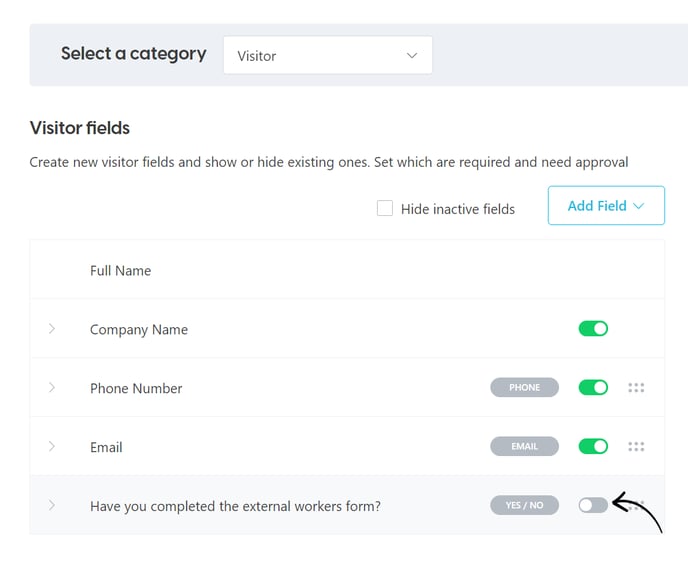
To hide a field as opposed to removing it, click on the slider to toggle it off, and this will no longer display on the iPad and Android tablets.
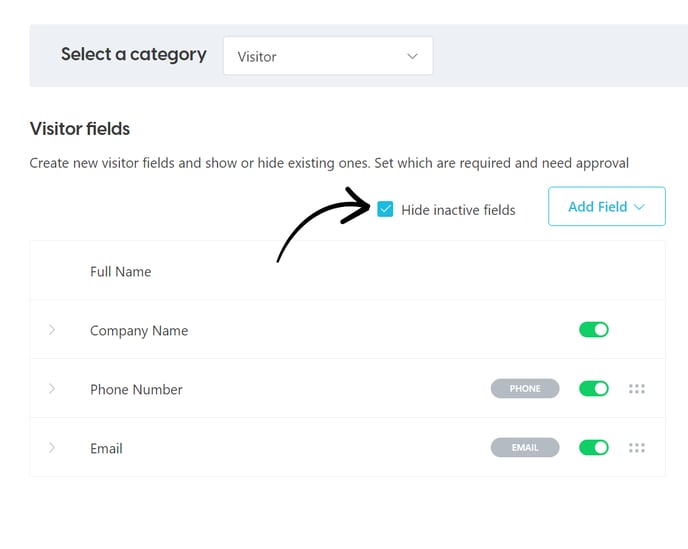
Hiding inactive fields
When the 'Hide inactive fields' checkbox is enabled, any hidden visitor fields will no longer show against the visitor fields view. This allows the admin to see only active fields and is most useful for companies that use a mix of hidden and unhidden visitor fields or are subscribed to a multi-location plan.
Deleting fields
If you no longer require a particular visitor field and do not wish to hide this to ensure all past visitor data associated with this field is not deleted, you will instead need to delete it.
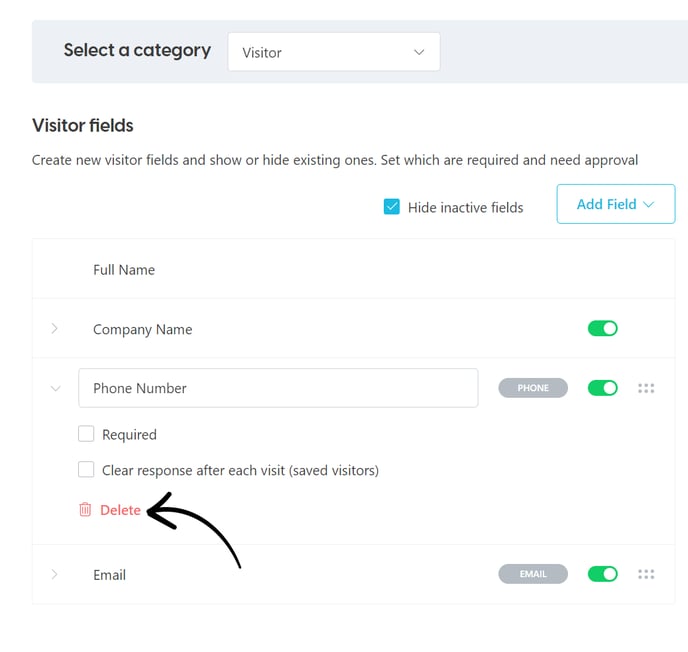
To delete a visitor field, click on the field you would like to delete to expand the options available. You will see the word 'Delete' at the bottom of this field. Click on the 'Delete' button and a pop-up box will appear asking for you to confirm you wish to delete this and warning that any past visitor data associated with this field will be deleted from the system.
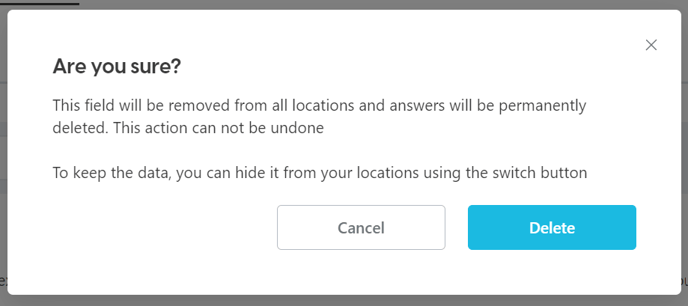
If you would like to continue with the removal of this field, click on the 'Delete' button and this will no longer appear against your visitor fields view of your web dashboard across all locations, as well as permanently deleting any visitor answers from your historic records.