Learn more about the set-up process to enable visitor approvals, giving admins the ability to approve or reject a visit.
🏳 Available on our Premium & Enterprise plans
The SwipedOn visitor management system has a screening feature that can help during a medical crisis, from avoiding unnecessary contact with staff and allowing self-serve sign-in for visitors to providing the option of asking visitors about their recent travel or current state of health.
This means you and your staff can be alerted if a high-risk person might be entering your workplace and plan for that accordingly.
Install the SwipedOn app
To enable this feature, please ensure you have installed or updated your SwipedOn app version to 2.17.0 or later.
How to set up the approval fields
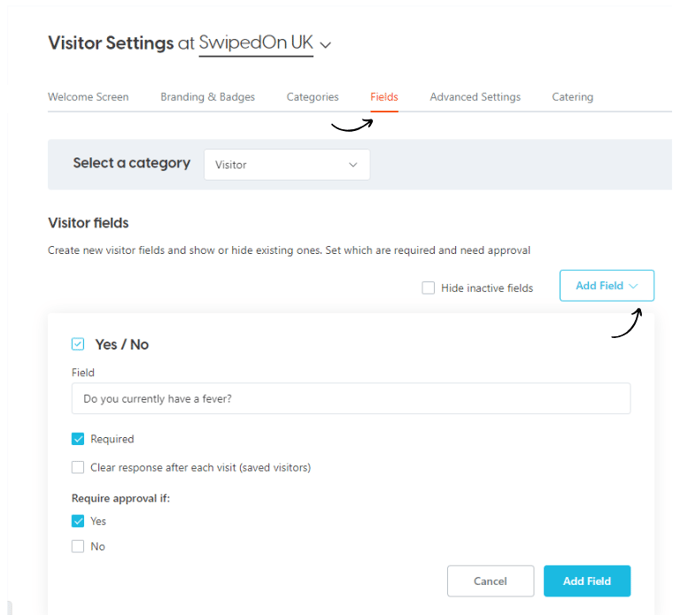
- Visitor approval fields are set up within the 'Settings' > 'Visitor Settings' > 'Fields' view of the SwipedOn web dashboard.
- Click on the 'Add Field' button and select the approval field e.g. multi-choice, checkboxes, yes/no or document.
- Input the question or statement that will be displayed to the visitor, and check 'Yes' or 'No' below the 'Require approval if' section for this field to trigger an approval and/or alert notification when this answer is selected by the visitor.
For example, if using a yes/no visitor field, when 'Require approval if:' has 'Yes' or 'No' enabled, the admins, and if enabled, the selected host at the visitor's location, will receive an email notification allowing for approval or rejection of the visit.
Visitors view
Once the fields have been set up, the device will now display the questions, as shown below with the yes/no field as an example.

If the visitor selects a response that then requires approval, they will see the below screen.

Email Notification
The admins at this location will then receive the email (and, if enabled, SMS, push, Slack or Teams) notification asking them to approve or reject the visitor.
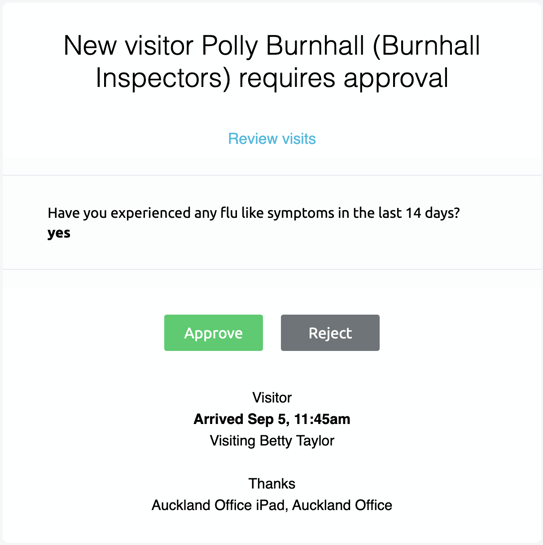
The admin or host can then approve or reject the visit by selecting one of the above options. Once approve or reject has been selected, this will redirect the admin or host to a web page showing the approval or rejection has been applied with a timestamp alongside the visitor's name.
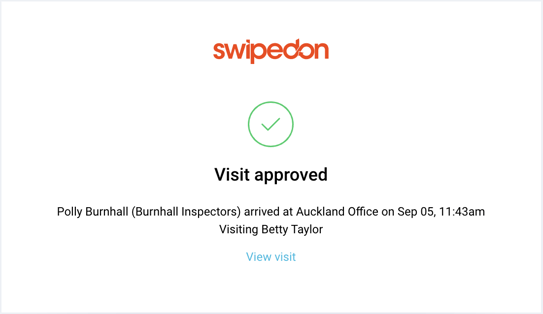
If approved, the host (if selected) will then receive the usual email notification of their visitors' arrival, and if enabled, an ID label will then print. If rejected, an admin will need to notify the visitor that they have not been approved for entry. This is also applicable when the 'allow hosts to approve visitors' setting is enabled.
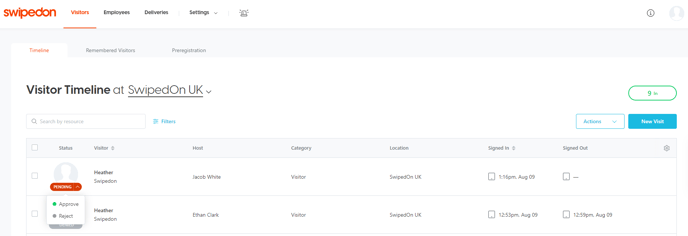
If 'Review visits' is selected before the visit has been 'Approved' or 'Rejected', this will navigate the admin to sign into the SwipedOn web dashboard and display any Pending visits where the admin can then approve or reject this visitor.
Notification recipients
Admins:
Company admins and location managers will receive approval notifications by default when this field type requires approval. If subscribed to a multi-location account, the location manager and company admin associated with the location will receive the approval notification. If no admin is associated with the location, this will send to all company admins across all locations. Learn more about admin roles.
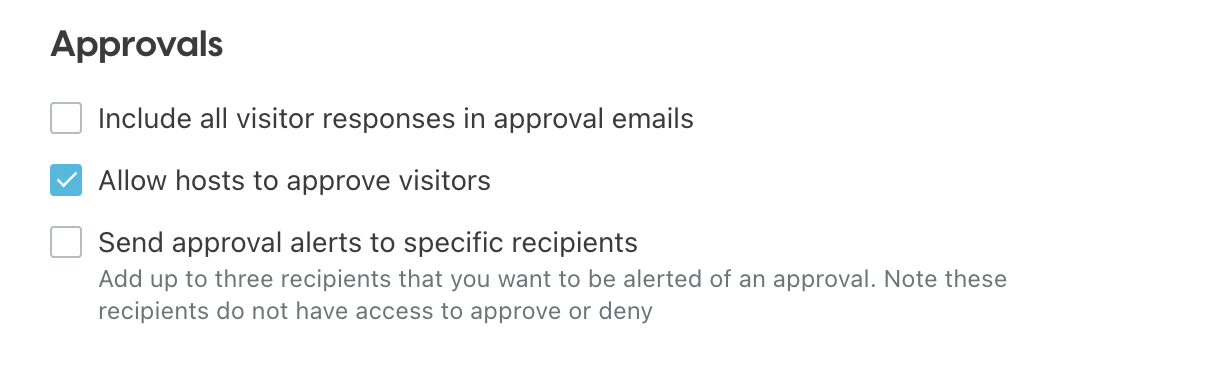
Hosts:
The host selected by the visitor can also receive an approval notification from which they can approve or reject the visit. This can be enabled within the 'Settings' > 'Visitor Settings'> 'Advanced Settings' view. See our support article for more information on how to allow hosts to approve visitors.
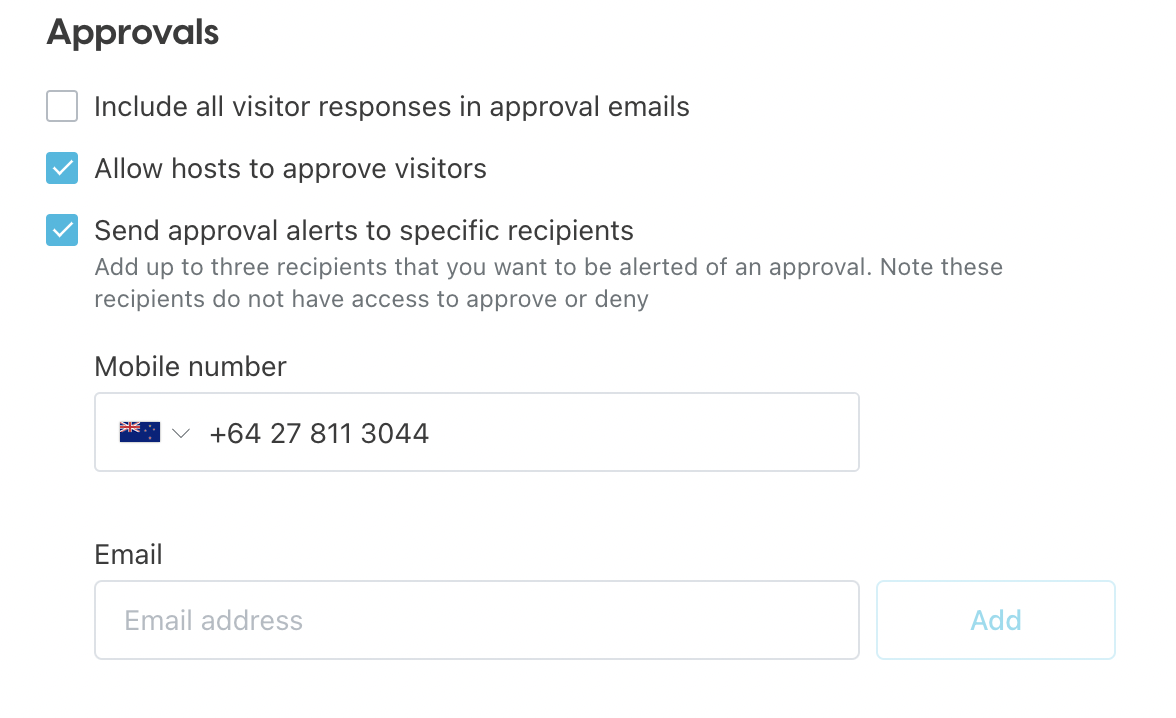
Approval alert recipients:
The 'Send approval alerts to specific recipients' visitor setting allows for up to 3 email recipients (and 1 SMS recipient) to receive a notification that a visitor requires approval. However, these recipients do not have the ability to approve or reject the visit via this notification, they are simply informed. For more information read our support article on email notifications.