🏳️ Available on our Standard, Premium & Enterprise plans
How to enable Host Notifications via Microsoft Teams
Firstly, ensure the 'Require visitors to select who they're meeting with' visitor setting has been enabled by navigating to the 'Settings' > 'Visitor Settings' > 'Advanced Settings' view of the SwipedOn web dashboard.
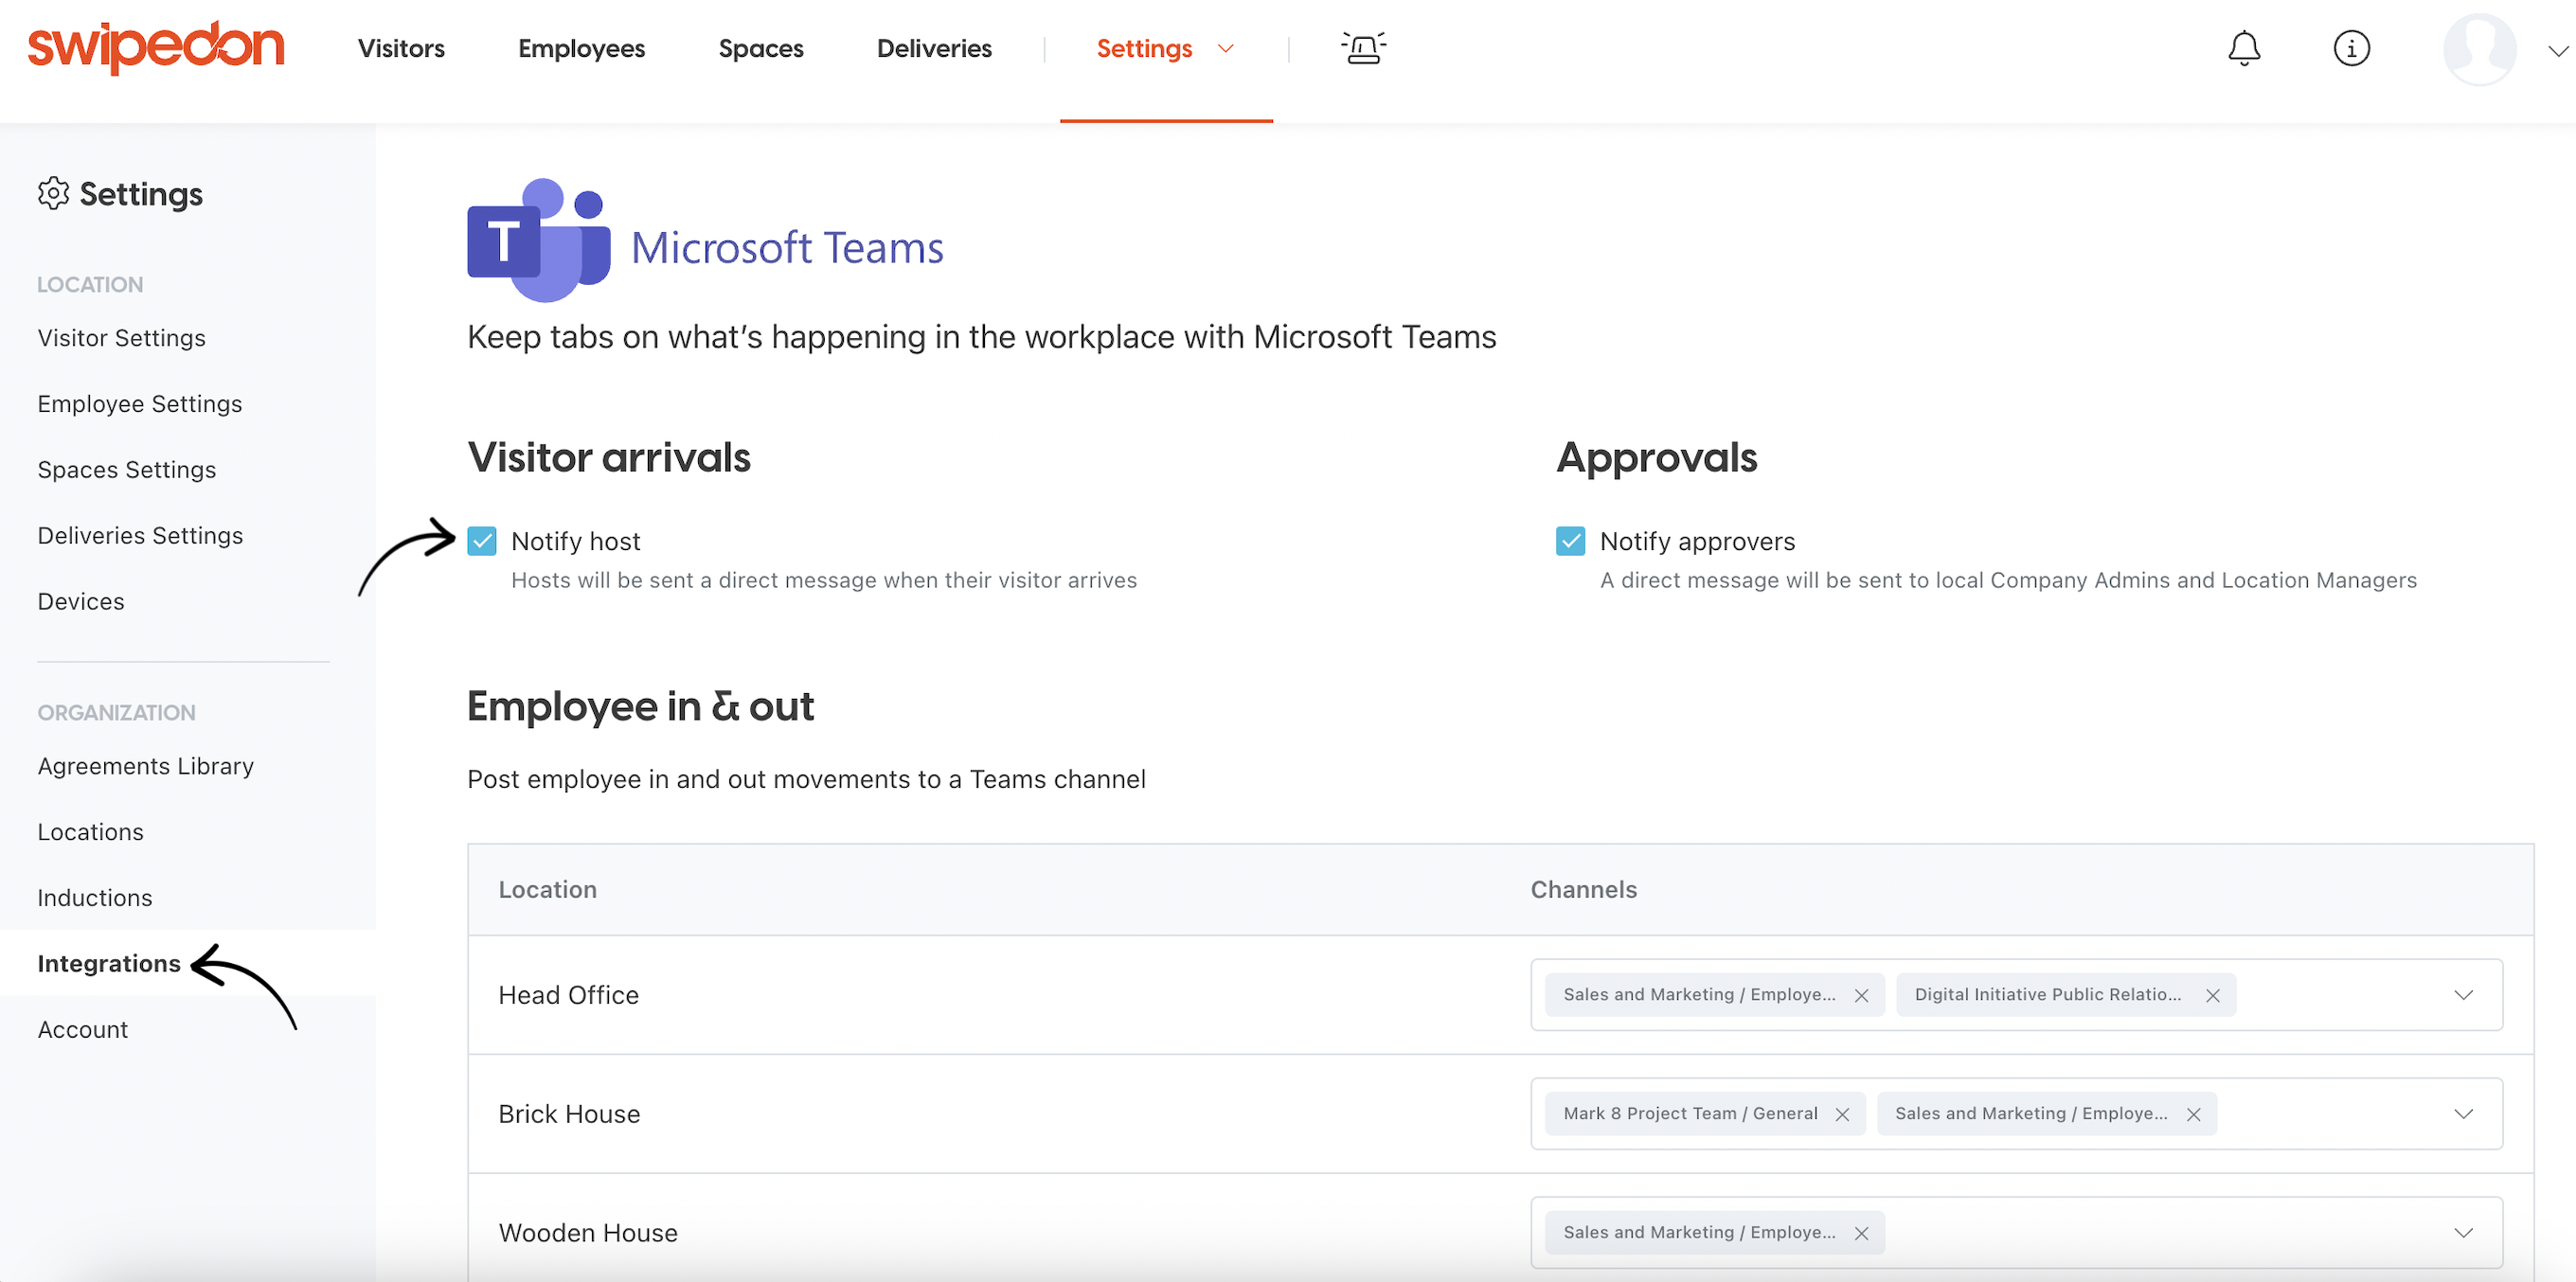
Once enabled, navigate to 'Settings' > 'Integrations' . If the Microsoft Teams integration is already set up, click the 'Manage' button. If not, click 'Set up' and follow the steps provided in our support article here.
Below the 'Visitor arrivals' section, select the 'Notify host' checkbox. Once selected, the host will receive a direct message via Microsoft Teams when their visitor arrives (along with any email, SMS, or push notifications).
How to enable Approval Notifications via Microsoft Teams
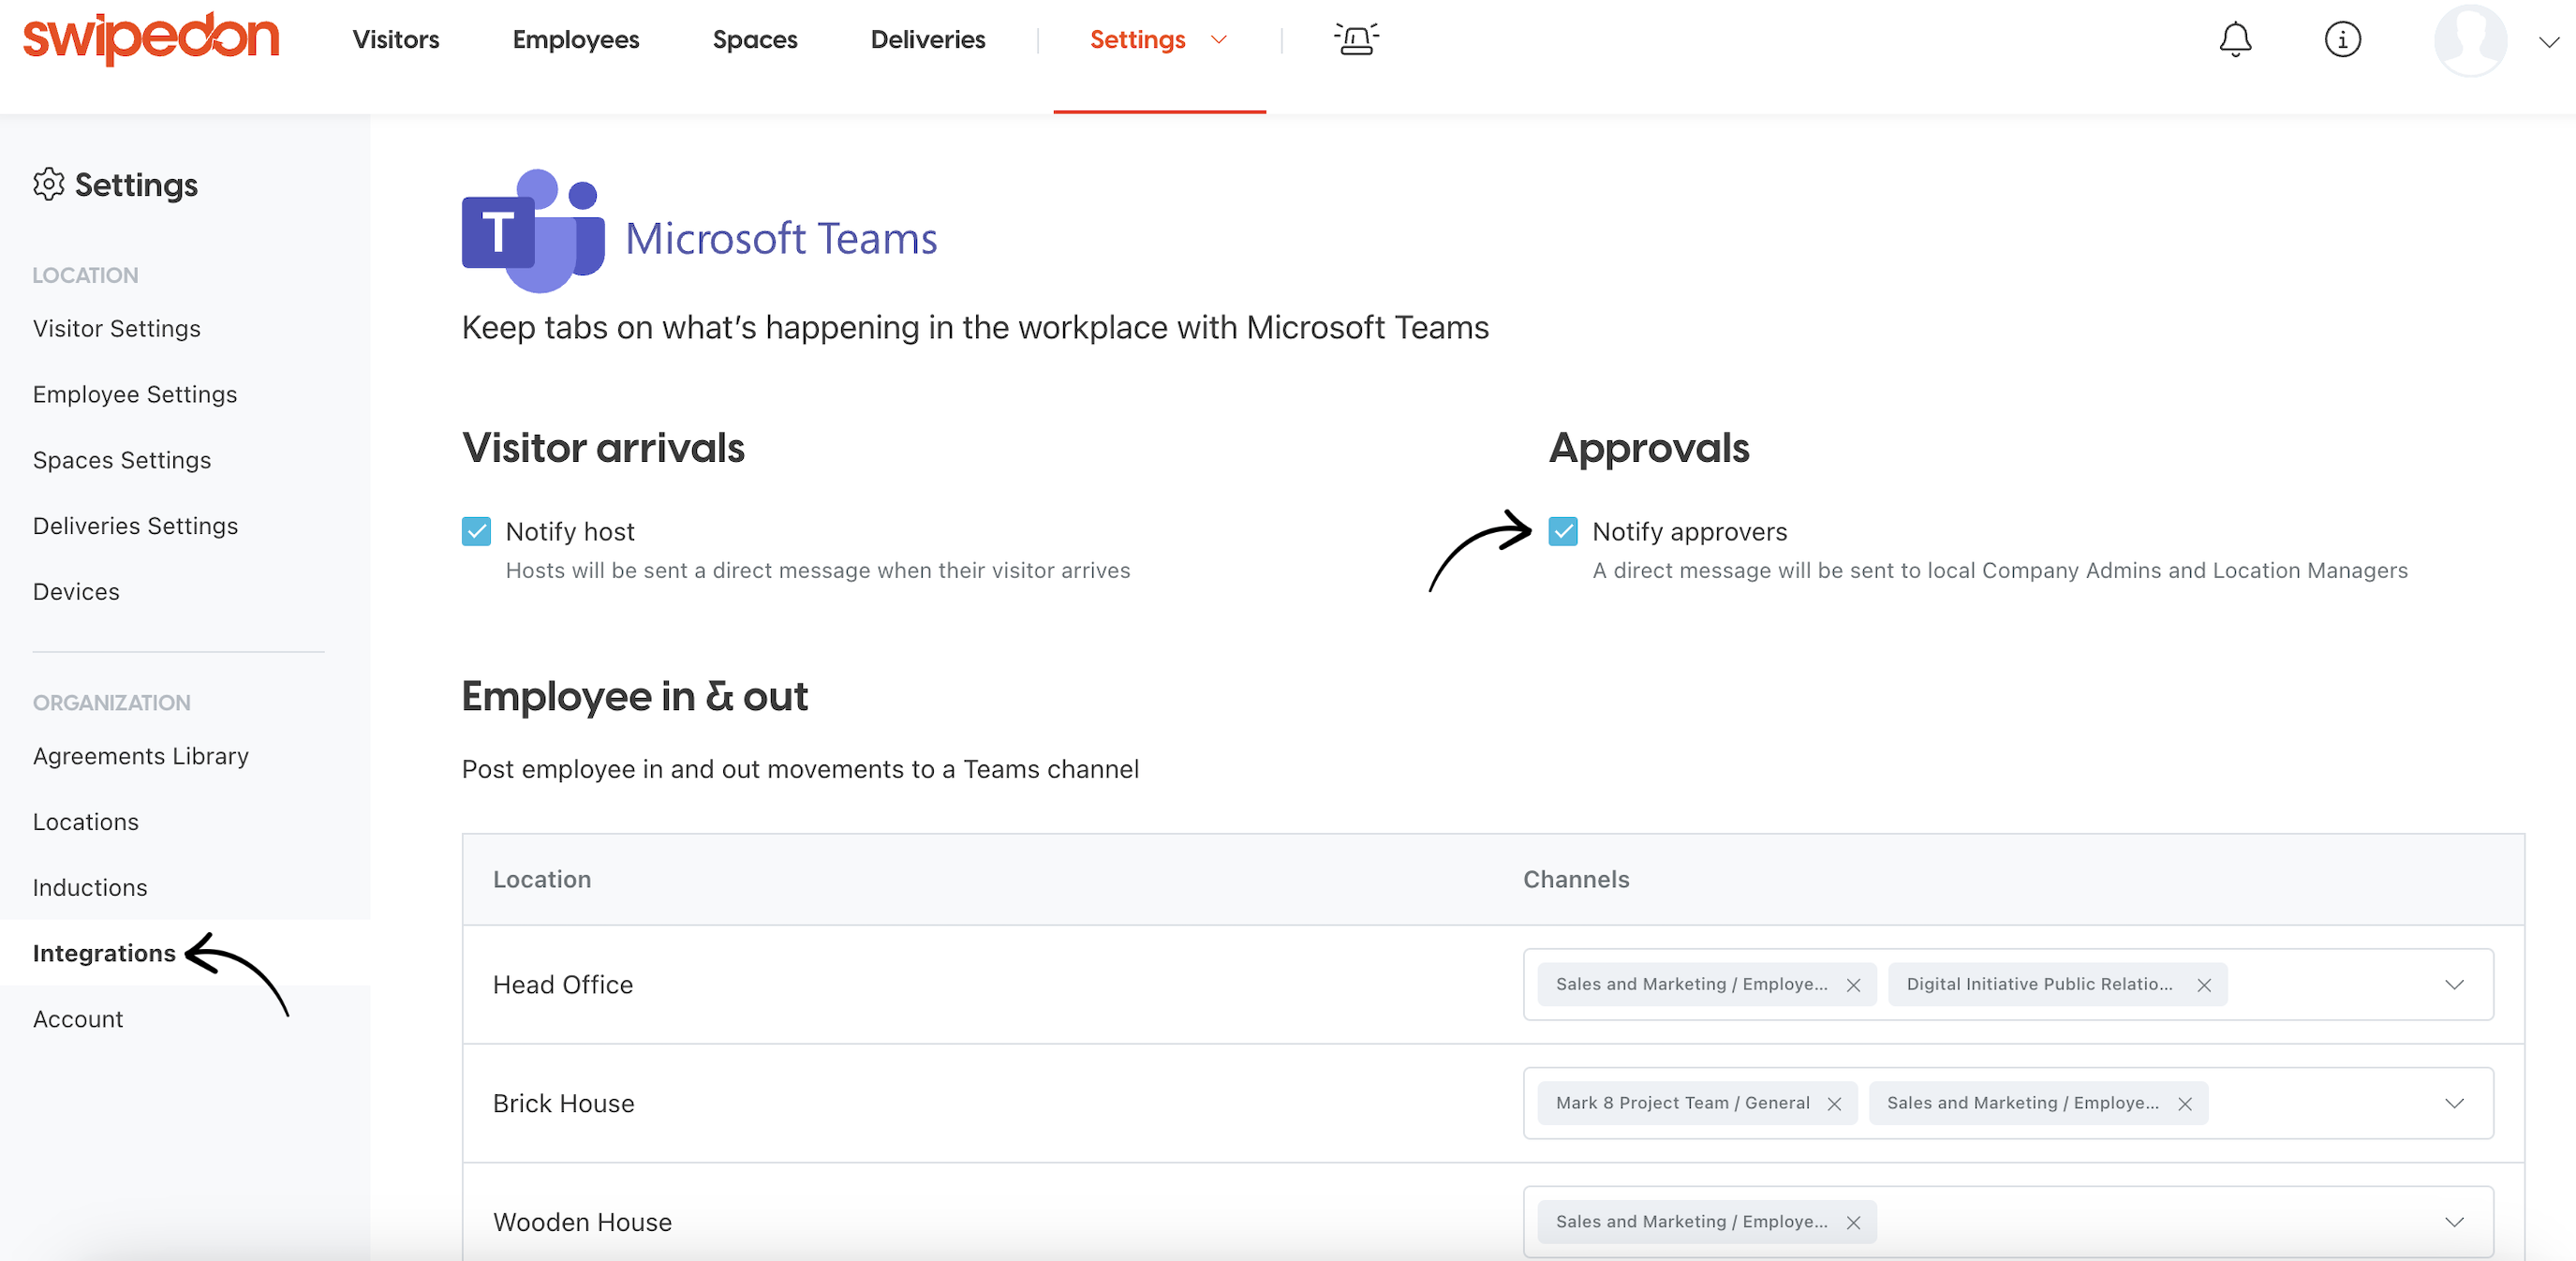
Navigate to the 'Settings' > 'Integrations' view. If the Teams Integration is already set up, click the 'Manage' button. If not, click 'Set up' and follow the steps provided in our support article.
Below the 'Approvals' section, enable the 'Notify approvers' checkbox. Once enabled, the approvers will receive an approval notification via Microsoft Teams (along with any Email, SMS, or push notifications).
To ensure the host can also approve their visitor, navigate to the 'Settings' > 'Visitor Settings' > 'Advanced Settings' tab and enable the 'Allow host to approve visitors' checkbox. The host selected by the visitor will then receive an approval notification via Teams (along with any Email, SMS, or push notifications).
Notification settings are applicable to all locations when enabled.