🏳 Available on our Standard, Premium & Enterprise plans
Visitor preregistration
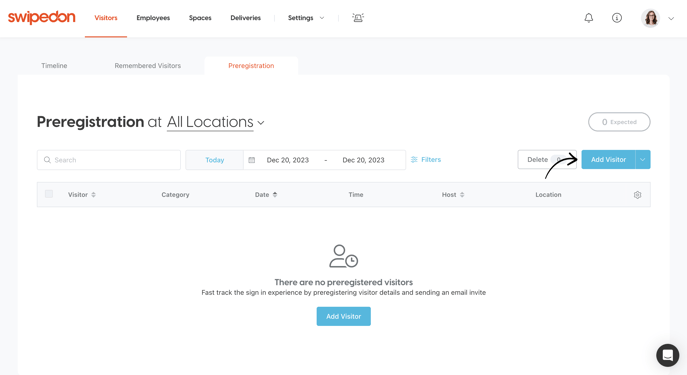
From the Visitors > Preregistration view in the SwipedOn web dashboard admins can send guests an email invitation, pre-fill any required questions on their behalf, and edit or delete the invitation after it’s been sent.
How to preregister a visitor
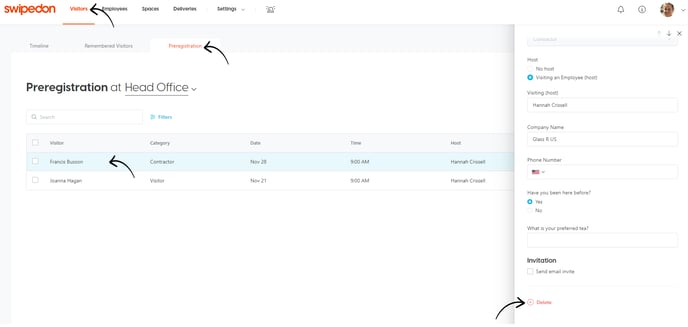
- Navigate to the Visitors > Preregistration view of your SwipedOn web dashboard.
- Click the 'Add Visitor' button, and a drawer will open on the right-hand side of the screen.
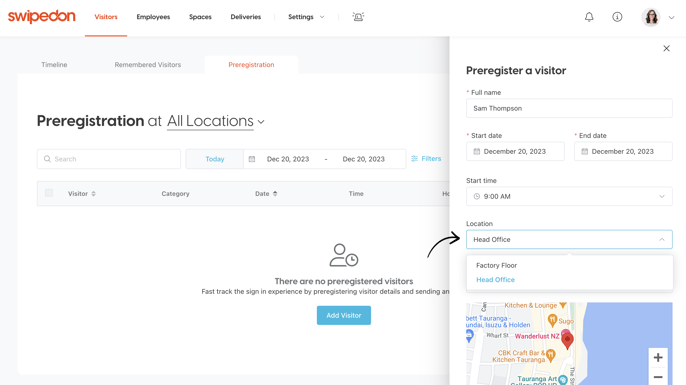
- If subscribed to a multi-location account, click on the location drop-down and select the location this visitor will be preregistered against. If filtered to a single location view or subscribed to a single location account, this location will automatically be selected.
- Select from the categories if the account has more than one set-up; the fields will change depending on the selected categories for those enterprise accounts with fields by category enabled.

- If enabled for this location & category, the option to select a host on behalf of the preregistered visitor is available.
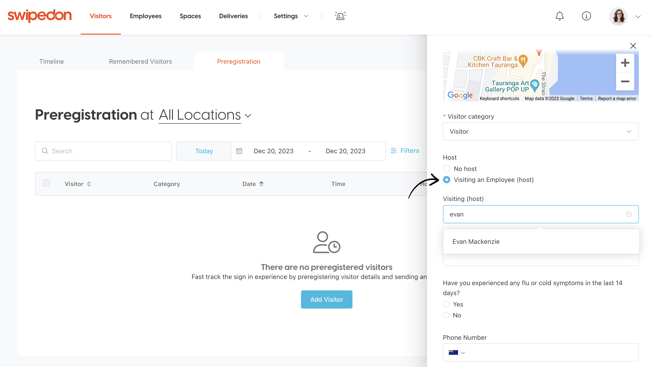
*Please note: an employee will only appear as a host against the location their employee profile is associated with. - Fill out any fields that should pre-populate on the iPad, Android tablet or contactless during sign-in, and leave any blank that the visitor should enter on the day of sign-in.
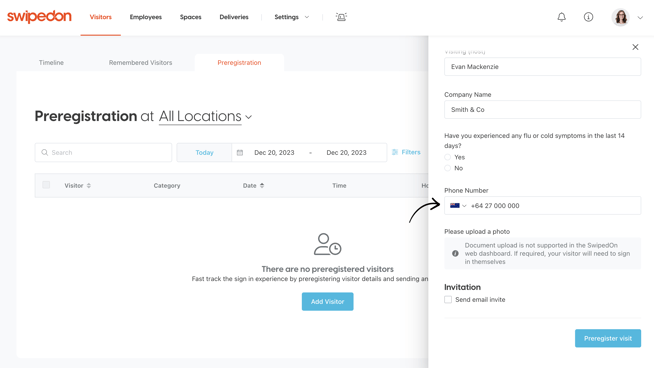
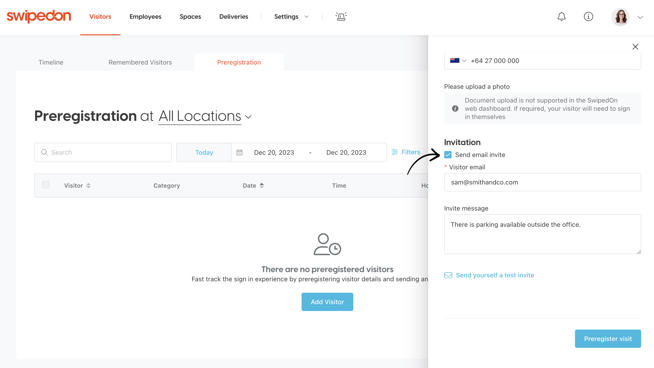
- To send an invite to the visitor as well, select the 'Send email invite' checkbox and enter the recipient's email address; below this is also the option to include a message on the invite. To preview this invite prior to sending it to the recipient, click on the 'Send yourself a test invite' button for this invite to send to the email address associated with the admin profile logged in.
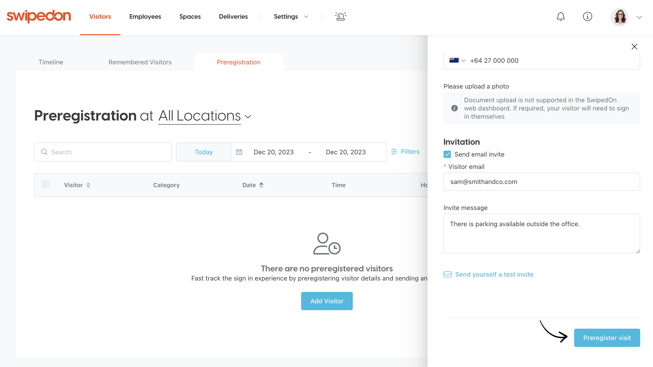
- Click on the 'Preregister Visit' button to complete the preregistration, and if the check box has been selected to send an email invite to the visitor, they will be sent an invite with all the details of their visit and the option to add it to their calendar via .ics file.
Once the visitor has been preregistered, they will appear in a list view. Preregistrations will appear in ascending order of the preregistration date and can be reordered alphabetically using the visitor's name, category, date or host.

How to sign in as a preregistered visitor
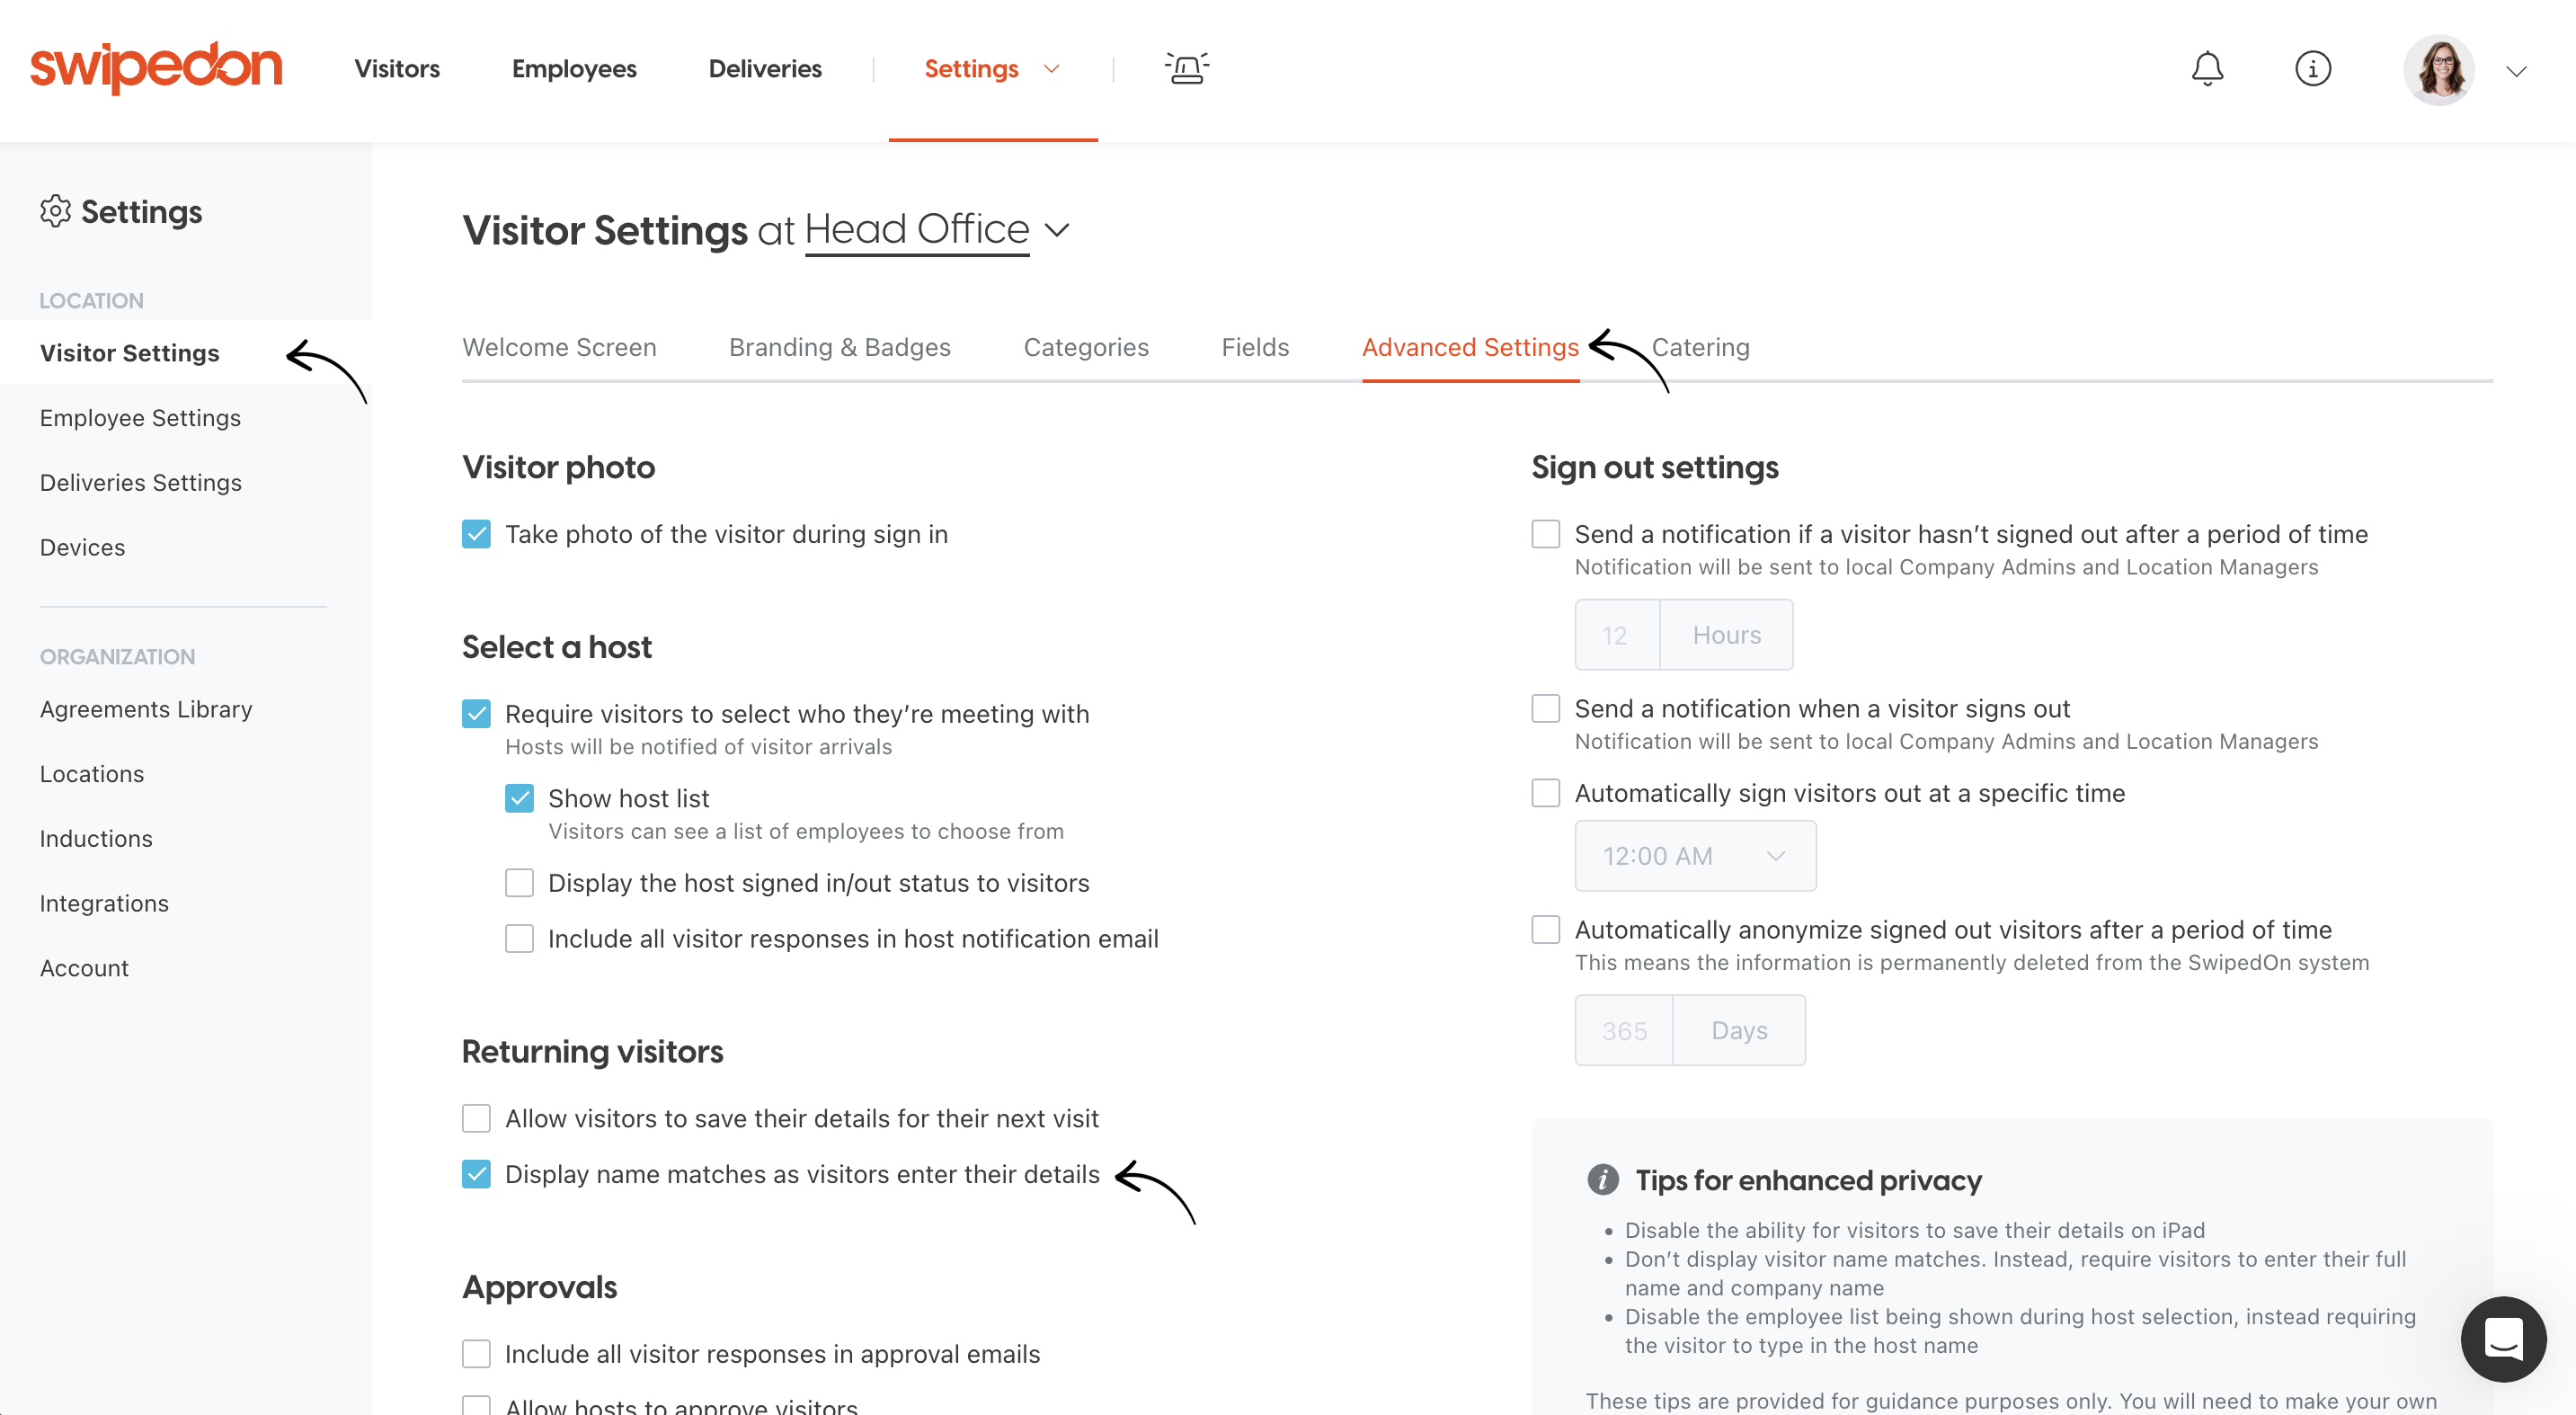
Preregistered visitors can sign in using an iPad, Android tablet or using the contactless QR code. If the 'Display name matches while visitors enter their details' visitor setting is enabled, the visitor will just need to input the first three characters of their name for their full name to appear from a drop-down option.
Once the visitor has input and tapped on their name, any additional fields filled out during preregistration will be automatically populated as well as show the preregistered visitors' host which can be changed, if required. The visitor then taps 'Next' and continues through the remainder of the sign-in process to complete their registration.
If using the Preboarding AddOn, a preregistered visitor who signs in and has already completed the preboarding flow beforehand will go straight through to a successful sign in page once entering their name and company name exactly as it was entered in their original preregistration email invite
How to Delete a Preregistered Visitor
To delete a preregistered visitor navigate to the Visitors > 'Preregistration' view of your SwipedOn web dashboard.
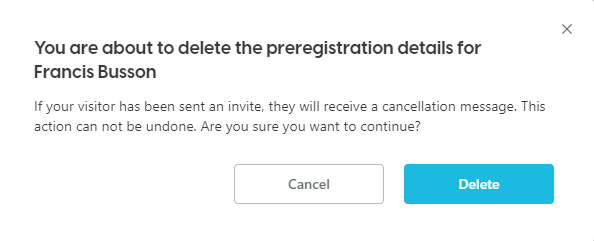
Click on the preregistered visitor you would like to delete to open the drawer, scroll down to the bottom and click 'Remove'.
A warning will appear to confirm this action. If your visitor has been sent an invite, they will receive a cancellation message. This deletion cannot be undone. Click 'Delete' to confirm the deletion or 'Cancel' to keep the preregistration.
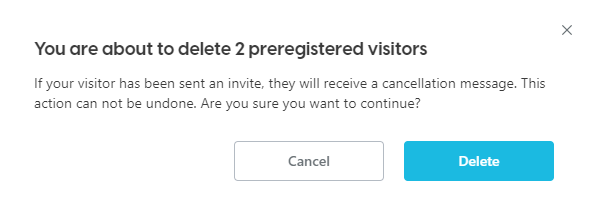
If you would like to delete multiple preregistered visitors at a time, select the checkboxes next to the names of the visitors you wish to delete. Once selected, click the 'Delete' button at the top right-hand corner.

You will then see a warning prior to deletion confirming the number of preregistered visitors you are about to delete, click 'Delete' to confirm the deletion. This cannot be undone.
How to see if a visitor was preregistered once they are signed in
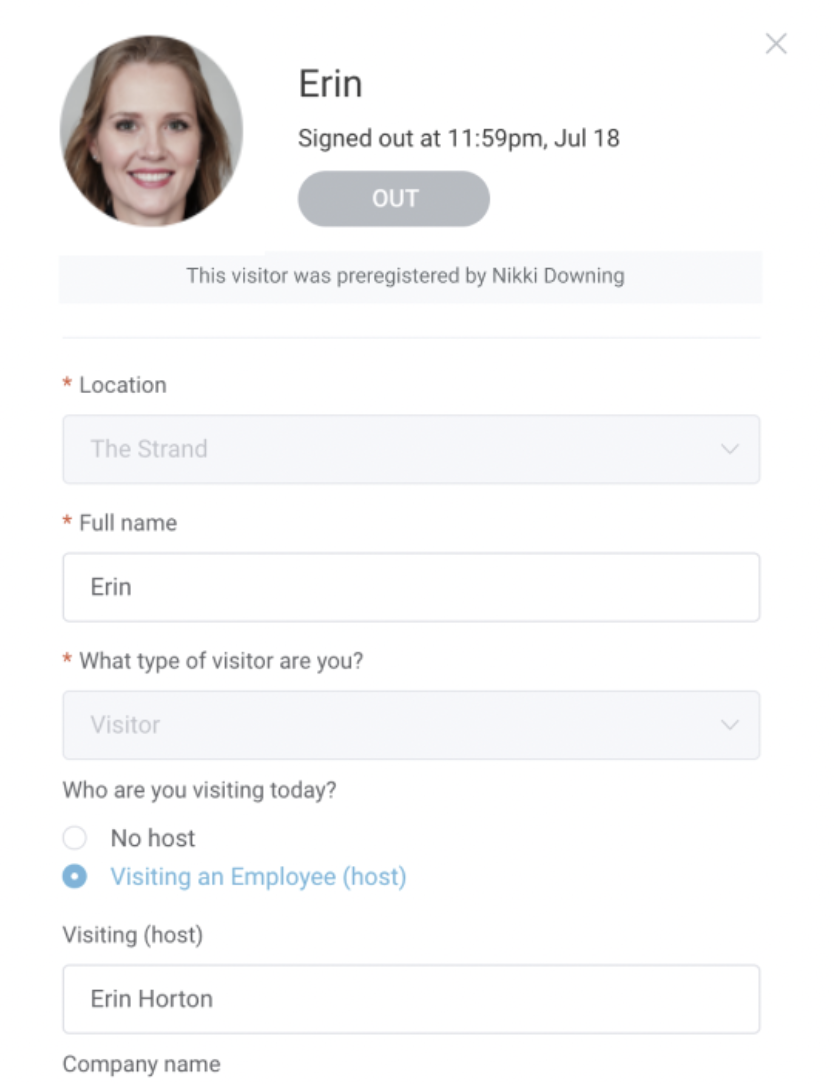
If you head to the Visitor Timeline and click on the drawer of a particular visitor listed there you will be able to view the details of who originally preregistered them underneath their visitor photo.
Additional Considerations
Visitor fields
If 'Clear response after each visitor (saved visitors)' is enabled against visitor fields, no preregistered data will populate against these fields for those preregistered visitor during the sign in flow.
 Any visitor fields and categories that have been customised within the 'Settings' > 'Visitor Settings' > 'Fields' view of the SwipedOn web dashboard will also appear within the Preregistration view.
Visitor settings
Suppose the visitor setting 'Display name matches while visitors enter their details' is disabled. In that case, the visitor will need to enter their full name and, if applicable, the company name field as well when signing in, as opposed to only needing to input the first three letters of their name when this setting is enabled.